Add a little green and orange to your home to help celebrate St. Patrick’s Day with this cute, DIY Garland. I’m sharing the easy tutorial and cut files with you today as part of a sponsored campaign with Cricut.
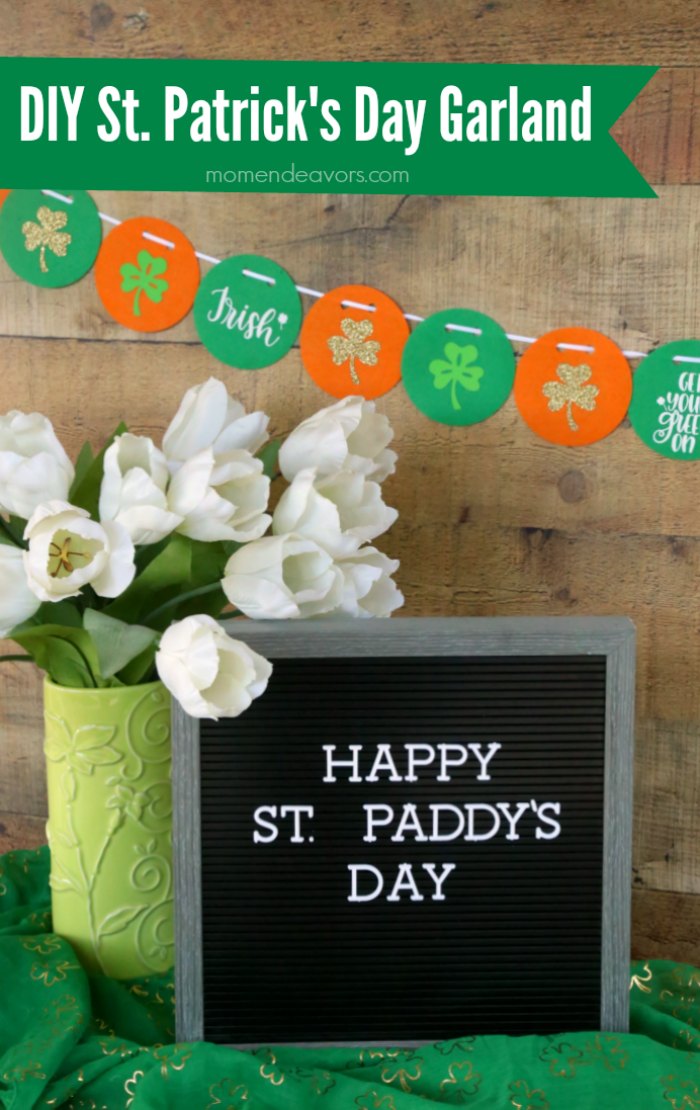 Are you Irish? Do you celebrate St. Patrick’s Day or just love decorating for the holidays? I love adding little touches for the different holidays and seasons. So, something simple like this easy DIY St. Patrick’s Day decor is always a great option in my book. Whether you call it a “bunting”, “banner”, or “garland”, this simple Cricut project would also be a great piece of holiday decor for your St. Patrick’s Day party!
 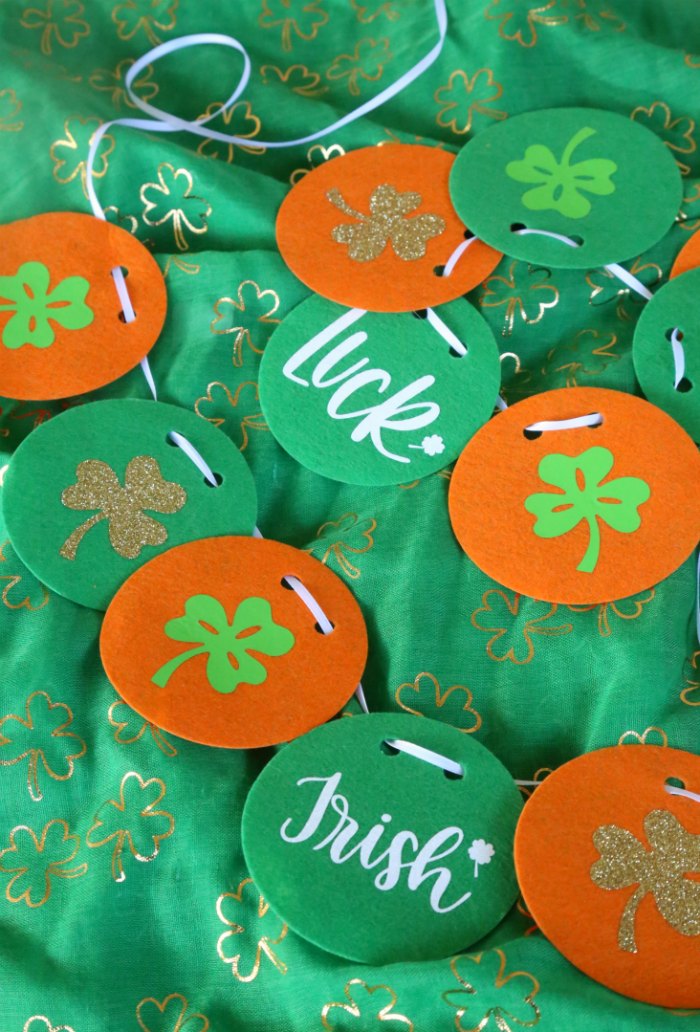 I have a special place in my heart for Ireland and St. Patrick’s Day (after performing in Dublin on St. Patrick’s Day). So I love adding a few little touches here and there for St. Paddy’s Day. And after being IN Ireland on the holiday, I also know that you’ll often see A LOT of orange on St. Patrick’s Day too. So, I like to incorporate that into some of our St. Patrick’s Day decor like in this garland.
DIY St. Patrick’s Garland Supplies
(Note: Affiliate links are included below to make shopping easy for you (if you make a purchase, I may earn a small commission. Thanks for helping to support Mom Endeavors!!).
- Cricut Maker
- Cricut Tools Set
- Cricut EasyPress 2 and Cricut EasyPress Mat (*Note – if you don’t have an EasyPress, a regular iron will work!)
- Cricut Iron-On (I used Gold Glitter, Green, and White)
- Green & Orange Felt (You can get 12×12 sheets in the Cricut Felt Sampler)
- Cricut BrightPad (*Optional – but super handy for weeding glitter iron-on)
 To start the project, you’ll need to cut circles out of the felt. And to make things really easy, I have a simple template you’re welcome to use! You can access “Simple Circle Banner” Cut File in Cricut Design Space! Yay! Don’t you love it when things are just EASY?! I do!
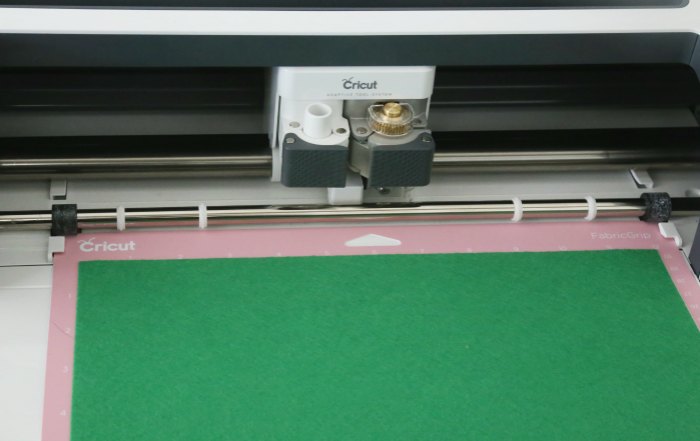
You’ll want to put the felt on a FabricGrip cutting mat and I highly recommend using the rotary cutting blade with your Cricut Maker to cut the felt. The blades are really easy to swap out and the rotary blade cuts the felt soooooo nicely! If you sew or like doing projects with fabric (even simple ones like this), the rotary blade is a must! It’s one of the many perks about the Maker machine – love it! 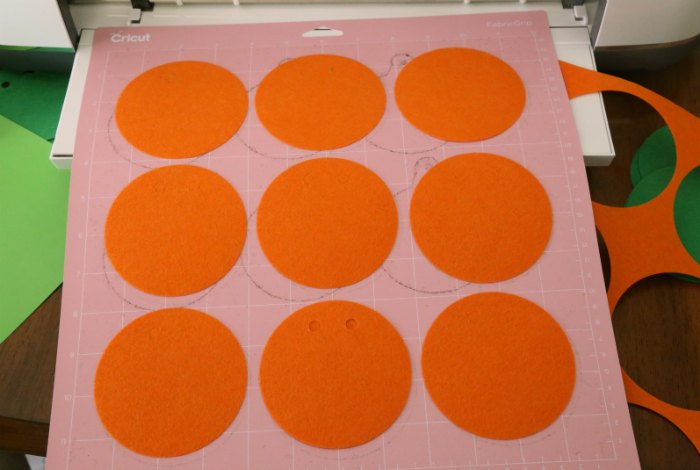 While plain colored circles can indeed make super cute garlands, I decided we needed to spruce them up with some shamrocks and St. Paddy’s Day things. So, I got out my Cricut EasyPress 2 and Cricut EasyPress Mat to add some cute words & sayings to the circles.
St. Patrick’s Iron-on
Within Cricut Design Space, I searched for “Irish” and “St. Patrick’s Day” to find some fun image files of shamrocks and other sayings. I imported the ones I liked into my canvas and sized appropriately for the cut circles (the words were a max width of 2.5″ and the shamrocks were a max height of about 2″). I used a mix of gold glitter, green, and white iron-on to cut out the files. 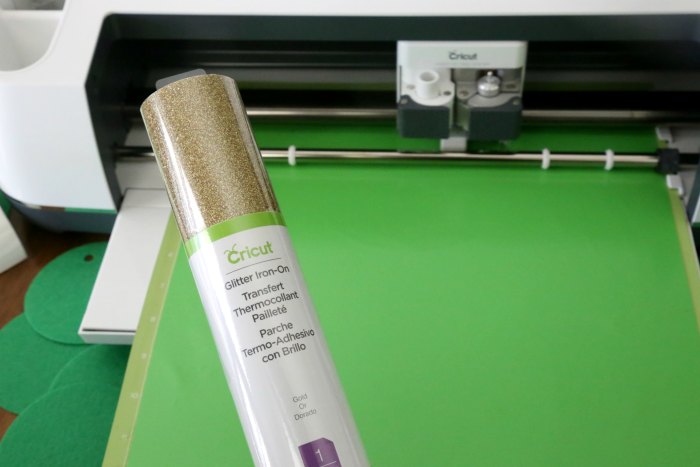 I cut out all my shapes and words first, then I got to placing them on the felt circles and adhering them using my EasyPress. Super quick and easy! If you’re not sure about the EasyPress, be sure to check out our information guide post here –> Cricut EasyPress 2 Guide.
 And that’s really it! Once you’re done adhering your cute St. Patrick’s Day designs, all you’ll need to do is lace some ribbon or string through the circles and hang up your new St. Patrick’s Day garland!
 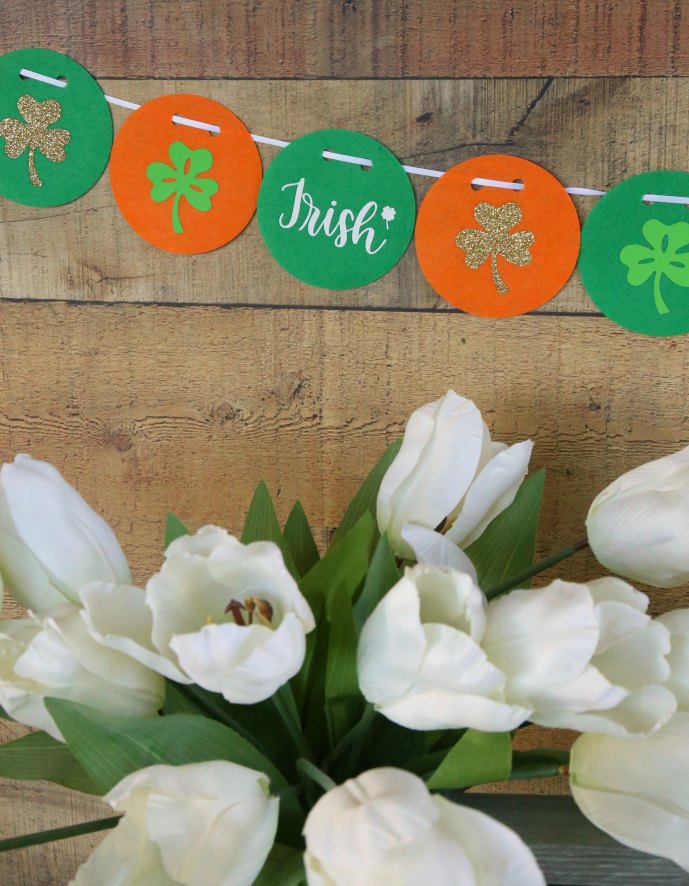 Gotta love a simple project to add a little fun for holidays! This definitely qualifies as some easy-to-make and inexpensive DIY St. Patrick’s Day decor – and I love it!
Happy Creating…and Happy St. Patrick’s Day! Erin Go Bragh!
This is a sponsored conversation written by me on behalf of Cricut. The opinions and text are all mine.