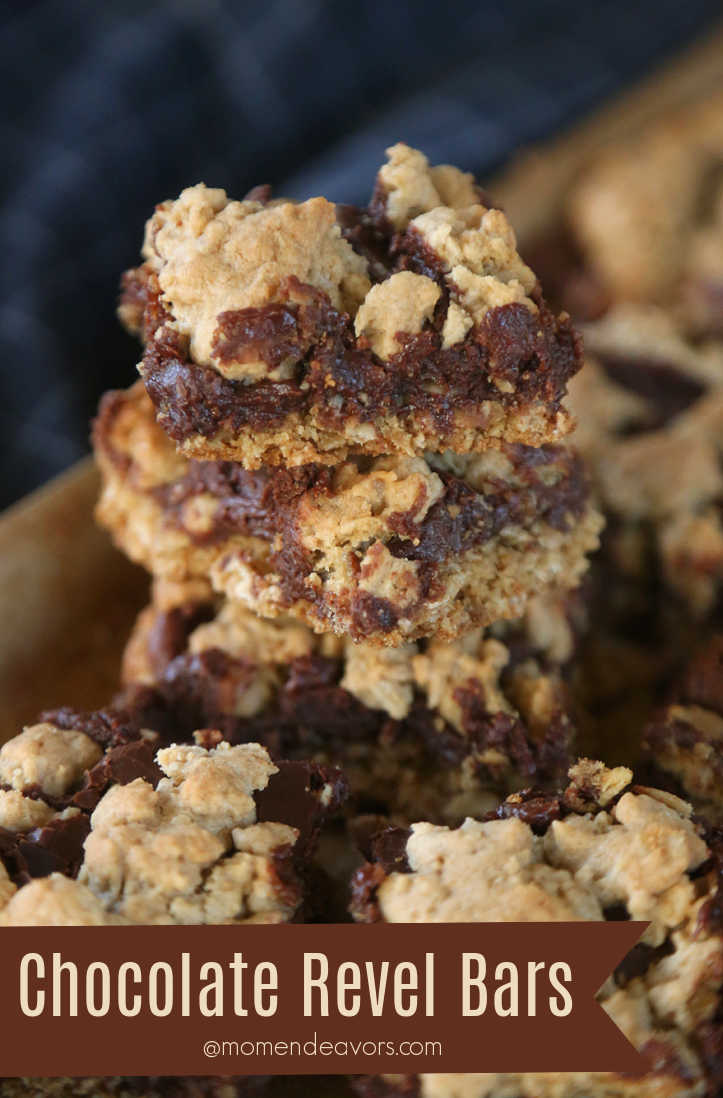
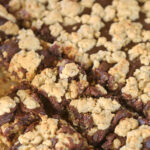
What is a Revel Bar?
A revel bar is a thick dessert bar made with what is essentially oatmeal cookie bar layers and a gooey, fudgy layer in the middle. They are most commonly made with a chocolate fudge layer (hence the chocolate revel bars) name. But the gooey layer really could be anything – caramel, dulce de leche, peanut butter, butterscotch, etc.
There doesn’t seem to be any clear answer on where the name “revel bar” came from, but it is clear that this is a recipe that has been around a long time! And if we think about the word “revel” as meaning to delight in or to enjoy, then it’s a fitting name for these bars because they are indeed quite enjoyable to eat (even if they don’t look the fanciest). 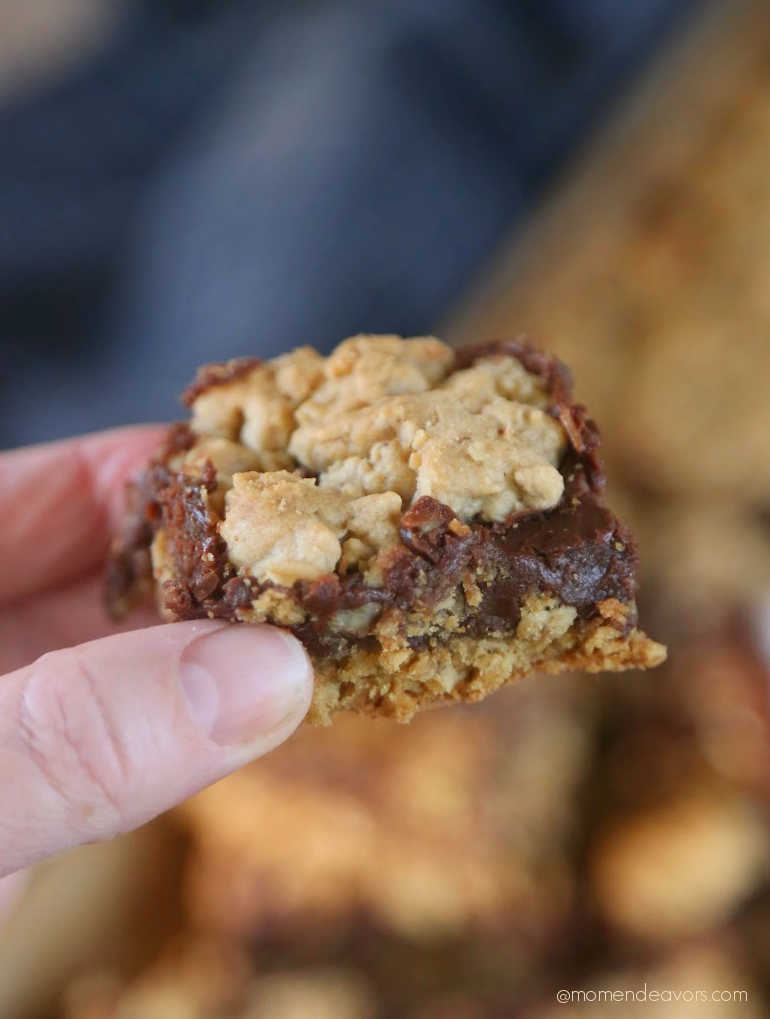
Revel Bars Ingredients
Making the bars is SO easy and they’re made only with baking staples, so it’s very likely you already have everything you need on hand!
- Oats: I have always used old-fashioned rolled oats in this recipe and we think they turn out deliciously. Some recipes swear by only using the quick cooking oats though, will likely results in a chewier, less crumbly bar. So, you can use whichever you’d prefer or whichever you have on hand. However, steel cut oats will NOT work in this recipe. So just make sure you don’t try to substitute with those.
- Sweetened Condensed Milk: Make sure you have the right milk! You’ll need a can of sweetened condensed (not evaporated) to get that delicious fudgy chocolate layer.
- Chocolate Chips: You can really use any chocolate chips that you prefer for this recipe. My go to for this recipe is semi-sweet or dark chocolate chips in this because milk chocolate just isn’t our favorite.
- Pan Size: I tend to use a “bar pan” for this recipe. The inside dimensions of mine are about 7.75 inches x 11.5 inches. You could certainly use a 9 x 13 dish though – your bars will just be slightly thinner than what you see in pictures here.
How to Make Revel Bars
Once you’ve gathered all the ingredients, making the bars is so easy! You can whip these up in just a few minutes! 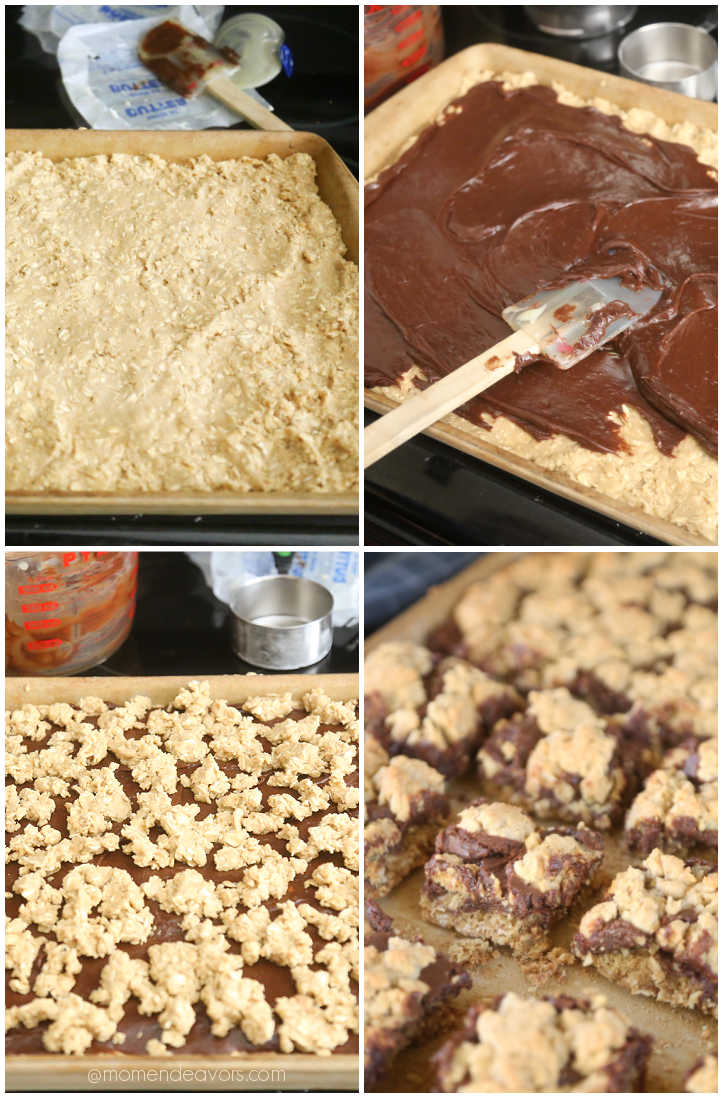 Once you mix up the oatmeal cookie batter, you spread part of the mixture into your pan to make the base layer. Then, you’ll make the fudge layer with the sweetened condensed milk, chocolate chips, and a little butter. The most standard way to do this is in a saucepan on the stove. But if you’d like to save time, you can absolutely do this step in the microwave. Yes, really! It is so easy (usually takes less than 2 minutes that way too) to pop it in and melt the chocolate while you’re making the base layer! Either way though, it’s not difficult. And once you have the base layer and then the chocolate, all that’s left to do is dot the top with the remaining oat mixture and bake!
Freezing Revel Bars
One of the best parts of this recipe (besides the gooey, rich, deliciousness) is that they can be frozen for at least 3 months to serve later. You can cut and freeze into squares. But to help avoid any dryness at the edges, I think it’s best to freeze them in large sections wrapped in foil, then placed in freezer-safe containers or plastic bags. Then, when you need them, take the section out, thaw, and cut into bites then. 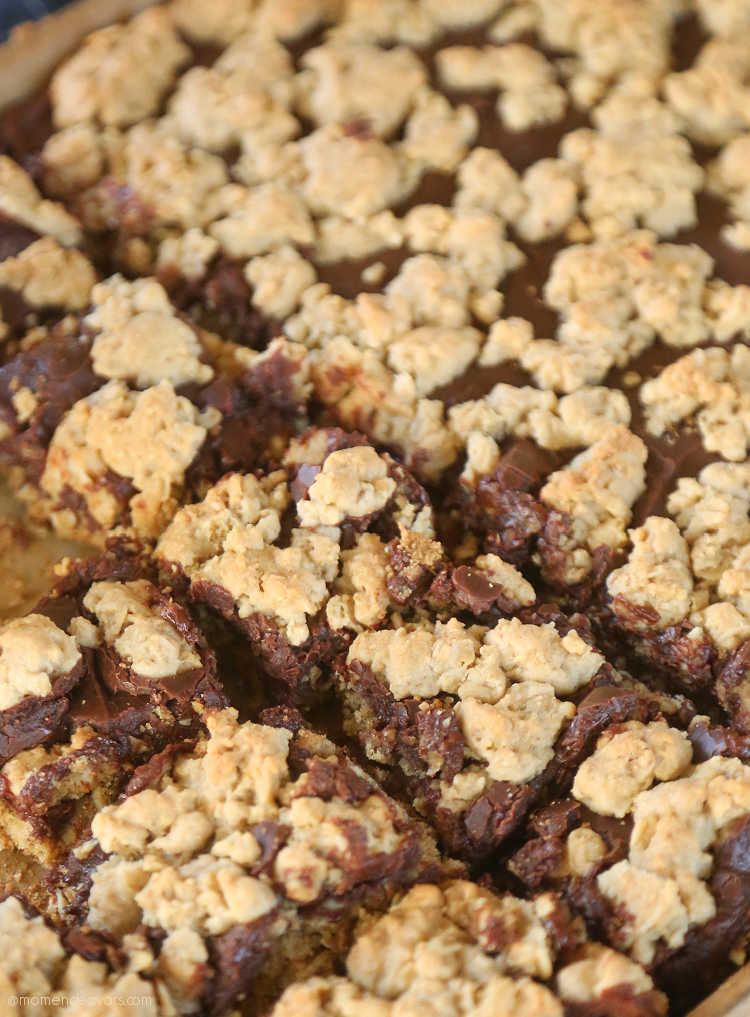
Other Delicious Dessert Bar Recipes
- Apricot Oatmeal Crumble Bars
- Eastern European Jam Bars
- Chocolate Peanut Butter Oatmeal Bars
- Pecan Pie Bars
Revel Bars Printable Recipe:
Chocolate Revel Bars
Ingredients
Oat Bars
- 1 cup butter less 2T
- 2 cups brown sugar
- 2 eggs
- 1 teaspoon vanilla
- 1 teaspoon baking soda
- 1 teaspoon salt
- 2 cups AP flour
- 3 cups old-fashioned oats
Chocolate
- 12 oz. bag semi-sweet chocolate chips (about 2 cups)
- 14 oz. can sweetened condensed milk
- 2 Tablespoons butter (saved from the 1 Cup used for the batter)
Instructions
- Preheat oven to 350°F. Grease the pan or line pan with parchment.
- In a large bowl, combine oats, flour, baking soda, and salt. Stir to combine.
- In a separate large bowl, use a mixer to cream together butter & brown sugar. Add eggs and vanilla, mixing until smooth and well combined.
- Continue mixing, Adding 1 cup of the oat mixture at a time until everything is combined.
- Spread about 2/3 of the mixture into the prepared bar pan/baking dish. Set aside.
- Make the fudge layer by combing chips, condensed milk, and butter together. You can do this in a medium saucepan over medium heat on the stove...or you can use a microwave safe dish and melt in the microwave (should be less than 2 minutes). With either option, stir frequently to avoid burning.
- Spread chocolate fudge over the batter in pan.
- Dot the chocolate layer with the remaining oatmeal mixture.
- Bake for 25 - 30 minutes until lightly golden brown on top. Don't overbake or these become a little dry & crumbly. Let cool completely prior to cutting.


14 Responses
Oh goodness! I forgot about these delicious treats! I love them, and am for sure going to keep this recipe of yours handy! 🙂
I have heard of these but have never tried them. Now that I know they can be frozen, I will have to give them a try. 🙂 Thanks for linking them up!
Haha, cool! I just made these recently too. They're so yummy!
OMG those sound good! Chocolate is my guilty pleasure! Thanks for sharing!
These chocolate revel bars look great! Thanks for sharing!
Oh my – love look absolutely delightful! Thank you for linking them to This Week's Cravings ~hope you'll join us next week too!
Wow! These look like heaven!
I always freeze my fresh cookie dough into ready to bake balls. I bake the frozen balls as if they were fresh. I like this because I only bake 3 or 4 cookies at a time and they are always fresh and if I am in a pickle and need to take something with me, I can always take cookies.
Oooh… these look SO GOOD! I really need to make these :)Thanks so much for sharing at What's Cooking Wednesday. Be sure to stop by and link up more great recipes!http://notsohomemade.blogspot.com/2010/12/chili-for-chilly-night-128-whats.html
Thanks so much for linking up to This Week's Cravings. I am also hosting a 12 Days of Christmas Goodies, so make sure you come back every day in December and link up a Christmas Goodie! http://momscrazycooking.blogspot.com/search/label/12%20DAYS%20OF%20CHRISTMAS%20GOODIES
Oh.My.Gosh. These make me want to jump into the pan with them. They look so yummy! I love that they can be frozen and saved for later. Thanks for linking up to Homemade Christmas!
OH MY goodness! These are one of our favorites! They are so yummy!
Thanks!!
I am going to try these. They look delish!
P.S. I had to google “AP Flour”. Duh 🙂