Oh the weather outside is frightful… so how about a cup of hot chocolate? I’m thrilled to share this cute snowflake hot cocoa bar idea with you today (along with links to the design files) as part of a sponsored partnership with Cricut.

Festive Hot Chocolate Bar
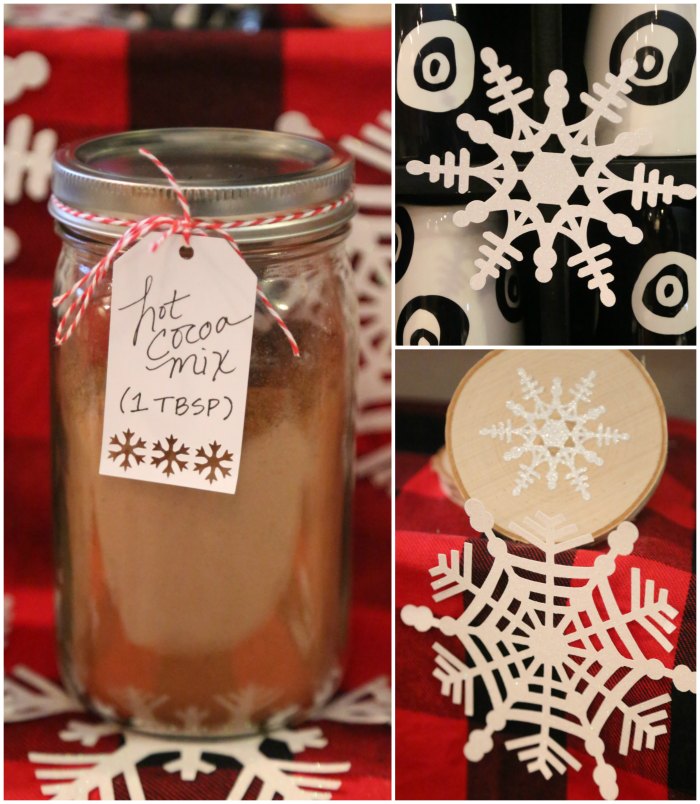
We’re gearing up for the holidays and the winter months. So, we’ve carved out a little section of the kitchen and set up a simple hot cocoa bar (you could add a coffee set up to the mix as well)! I love that this is something you could set up right after Thanksgiving and easily leave up through January and February. Snowflakes are such a great winter theme. I then used a lot of black & white (since I’ve got a lot of that in my kitchen), with buffalo check. But you can really do any color scheme that you’d like!  I love the way it turned out. It’s simple yet festive & fun! I would have NEVER been able to do those great snowflake designs without using my Cricut Maker though! You’ll find some great snowflake designs right Cricut Design Space and with a Cricut Access Membership, you’ll have unlimited use of over 30,000 cut-ready Cricut images! I love having it and with it, all these snowflake designs were included!
Simple Snowflake Decor
Here’s what I used:
- Cricut Maker
- Glitter Cardstock – Colorful White
- White Cardstock
- Glitter Vinyl – Silver
- Cricut BrightPad
- Cricut Tools Set
- Bakers twine
- Wood slices
- Tape
Once you’ve rounded up your supplies, you can start creating! If you like the snowflakes you see here, then I’ve made it SUPER easy on you! You can click on any of the links immediately below to get my Cricut designs and cut files! The snowflakes are the same in the first two links – the difference is just the quantity and size. I did small ones on vinyl to make the coaster and larger files on the glitter cardstock to make the paper snowflakes. 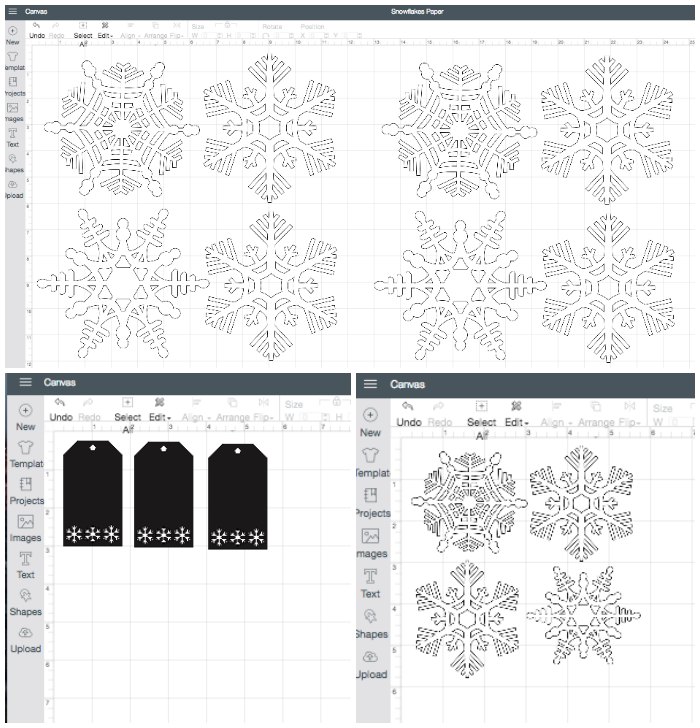
As I shared in my cute Christmas Owl shirts post, I LOVE using the Cricut Maker! It’s perfect for this where you want to use multiple materials (like various papers and vinyl) since it has built-in settings for A LOT of different materials. Each setting has its own unique calibration for the machine, so once you specify the material-type for your cuts, the machine will adjust the blade depth and pressure to those materials! No second-guessing on your part! So, once you’ve got the snowflake designs and materials set-up, you just need to hit “cut” and let the Maker do its thing! 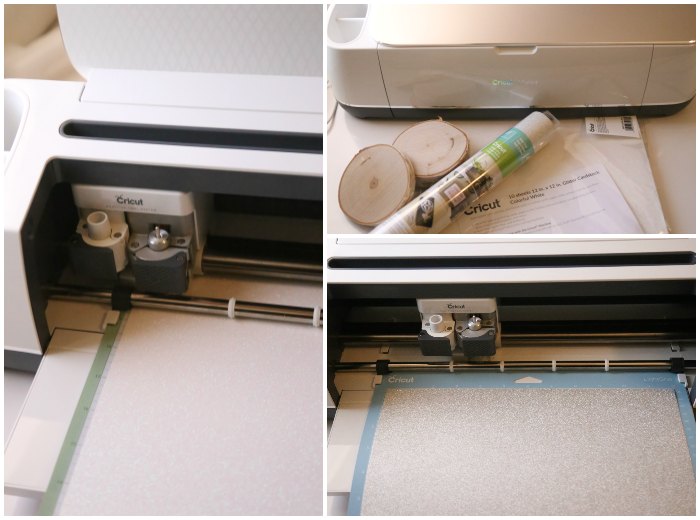 The paper snowflakes cut from the glittery cardstock look so pretty in our set-up, but I really love the other details – like the simple snowflake coasters! These were SO easy! Just cut the small snowflakes out of glitter vinyl and put them on wood slices.
 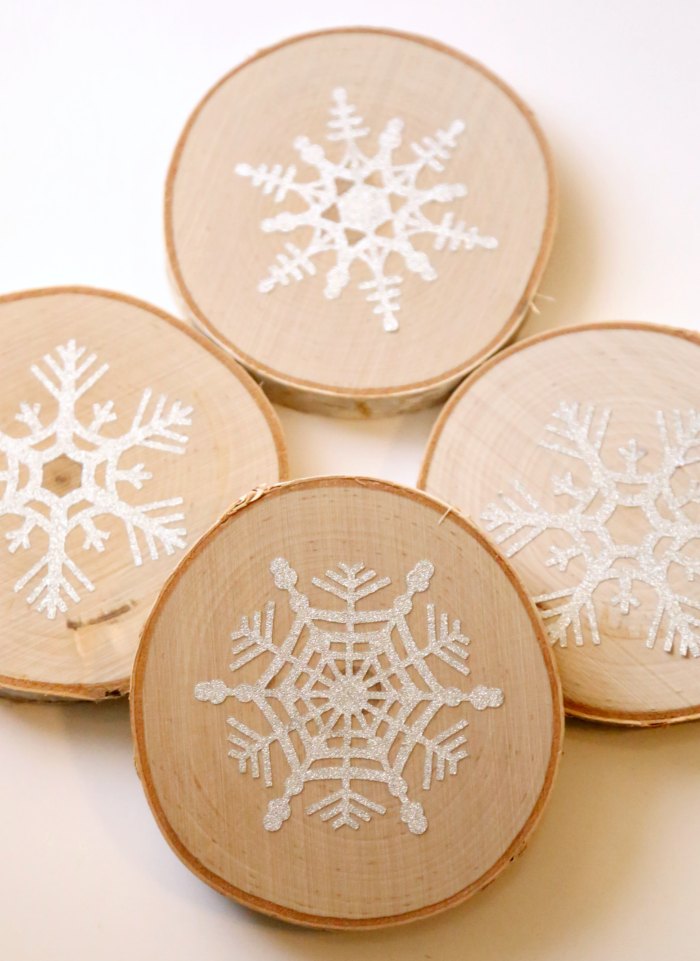 LOVE! To make this process easier, you can use a Cricut BrightPad. Talk about a handy tool, making it SO much easier to see (especially for weeding intricate vinyl details)!!! If you don’t already have this and you do a lot of crafting, add it to your wishlist!
  So super handy! In addition to the vinyl and large paper snowflakes, I decided that our jars of hot cocoa ingredients needed some cute labels! And the snowflake tags add just the right, simple touch. These were so easy to cut and add to our jars, really completing the theme!
 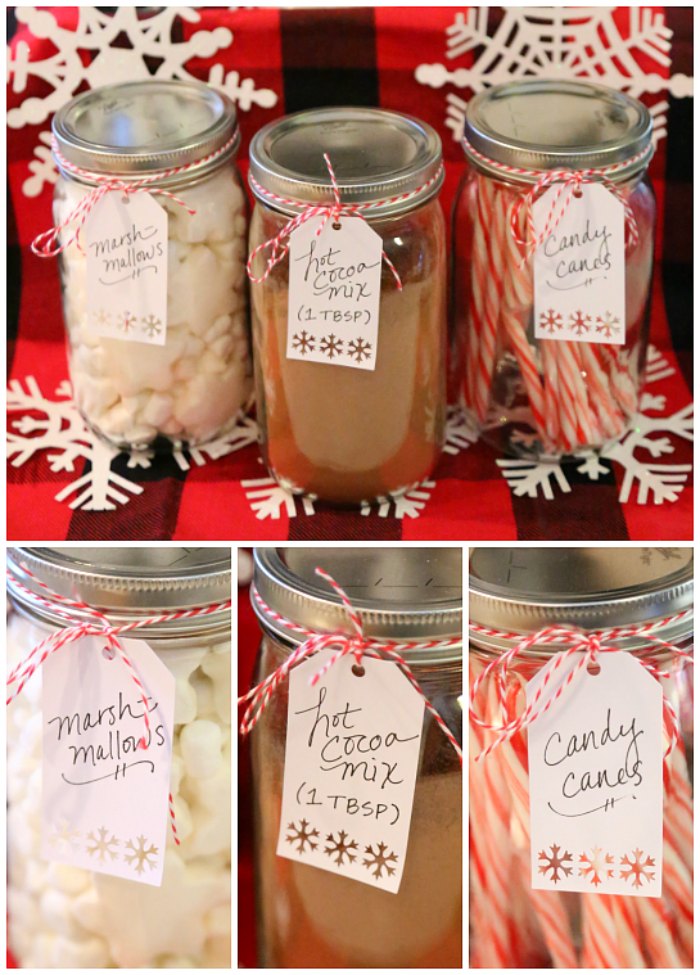 Cute, right?! So carve out a little space in your kitchen, then grab your hot cocoa ingredients, some mugs, and some craft supplies to create a fun hot chocolate bar that you can enjoy all winter long!
Happy hot chocolate drinking!
Like it? Pin it! 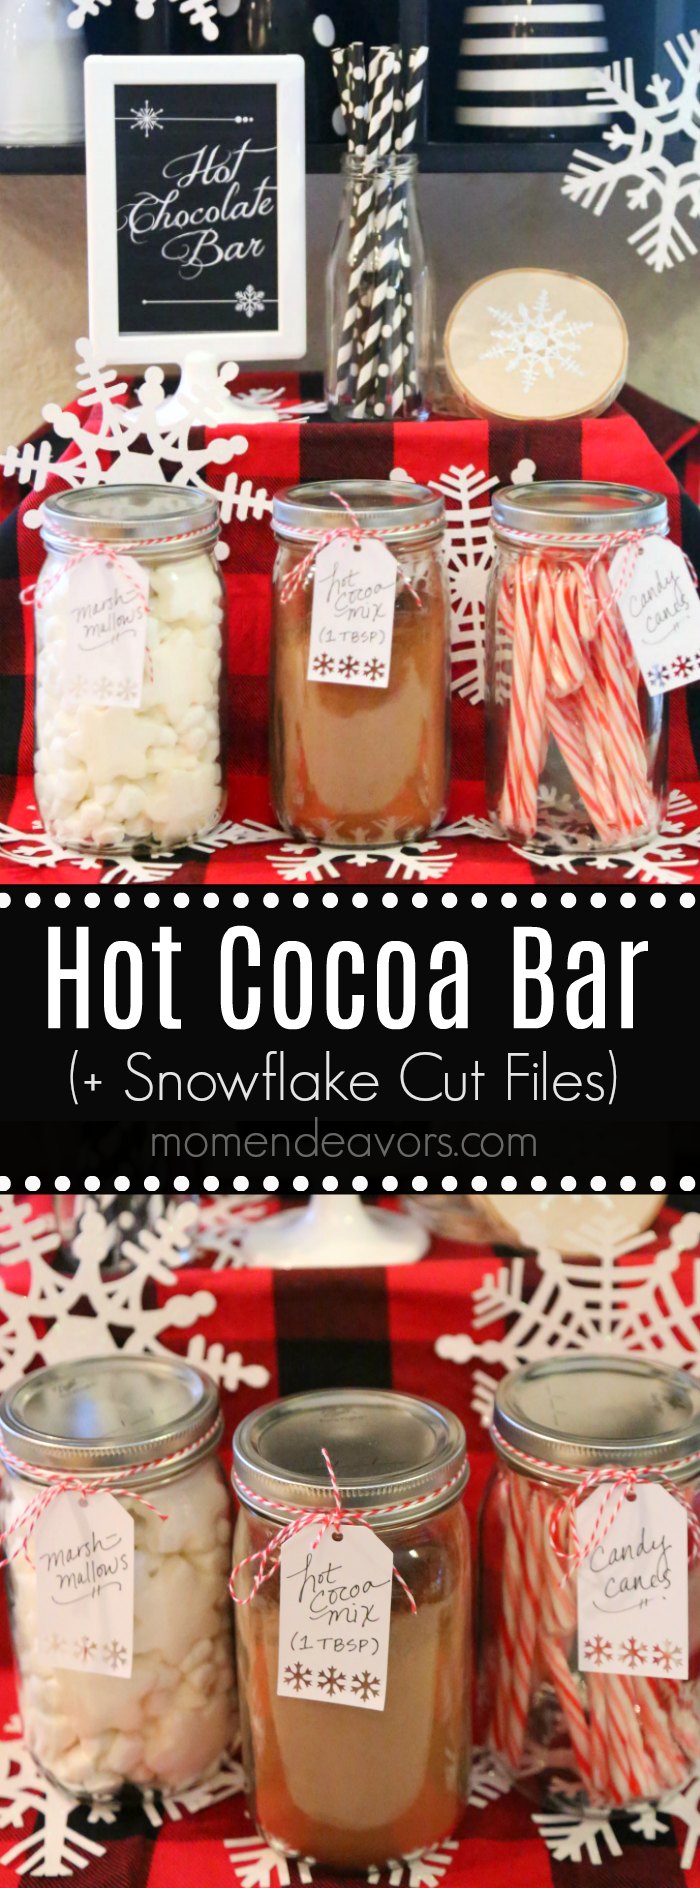
This is a sponsored conversation written by me on behalf of Cricut. The opinions and text are all mine.