I’m so excited to share this DIY Buffalo Check Gift Set tutorial and Cricut cut files with you today, so you make a sweet gift perfect for anyone obsessed with all things Buffalo Plaid.
This is a sponsored conversation written by me on behalf of Cricut. The opinions and text are all mine.
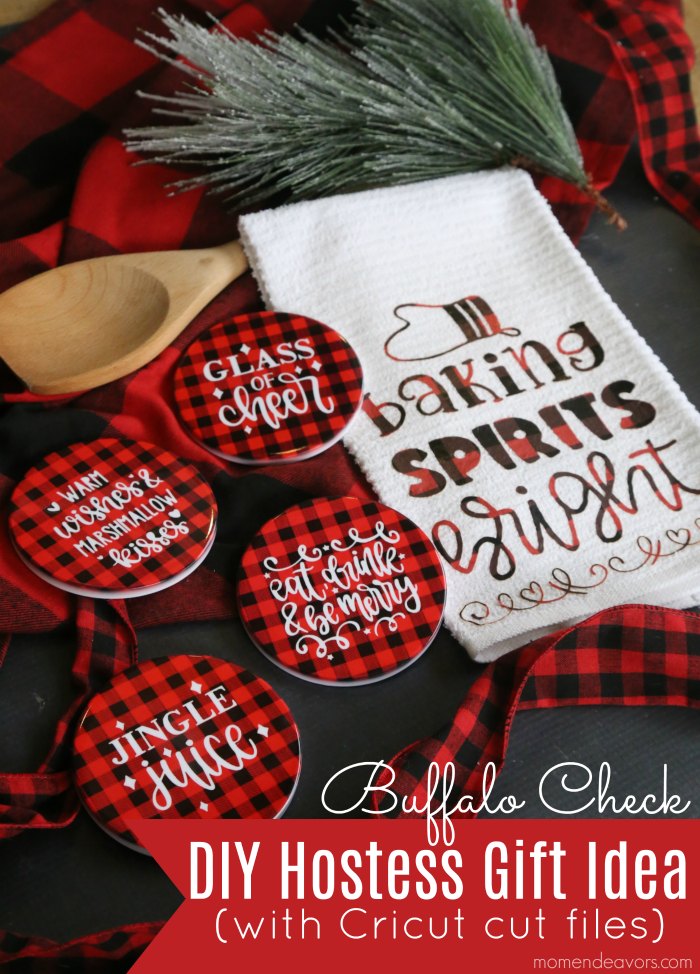 Know anyone obsessed with Buffalo Plaid? I am. Totally and completely! Throughout the year, you’ll find a lot of black & white Buffalo Check items around my house. But during the holidays, I’m all about the red & black Buffalo Check. And it just so happens that many of my friends are too! So, what’s better than a Buffalo Plaid gift set for the holidays? Or feel free to make yourself some cute Buffalo Check items to keep in your kitchen for some adorable Christmas decor. Either way, you can’t go wrong with this DIY holiday kitchen towel & Buffalo Plaid Christmas coasters!
 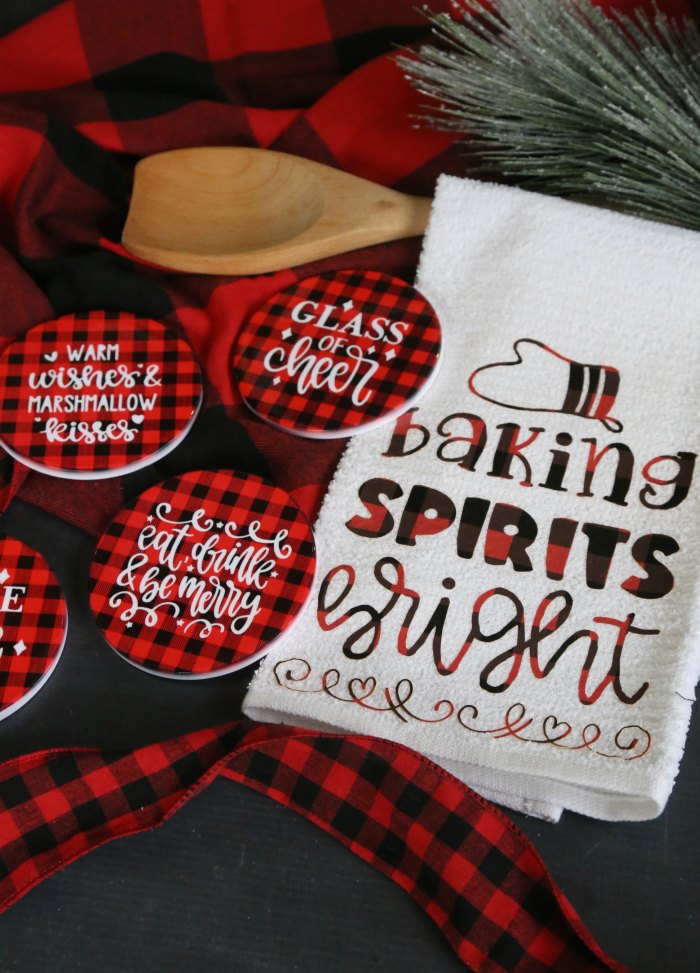 Isn’t it cute?! I’m OBSESSED with the Buffalo Plaid coasters! And I haven’t seen anything exactly like them in stores, which is why I LOVE using my Cricut. I can make customized, unique, and personalized gifts and decor with just a bit of work (and often in less time than going shopping would have taken me). So, whether you’re making this to give as a special gift or you just want some cute Buffalo Plaid items for your own house, you can make both of these projects in under an hour (once you have the supplies).
DIY Buffalo Plaid Gift Supplies
For this particular project, we used a combination of Infusible Ink and Iron-on materials. Here’s the main supplies that you’ll need for both projects (Note: Affiliate links are included below to make shopping easy for you (if you make a purchase, I may earn a small commission. Thanks for helping to support Mom Endeavors!!):
- Cricut Maker – my favorite cutting machine and the most versatile in Cricut’s line
- Cricut Tools Set – the tools are just handy to have for any Cricut project you might be working on
- Cricut EasyPress 2 – With an even heat plate ad a high temperature range (up to 400°!), this is the BEST for heat transfer projects. That even heat and high temperature is necessary for the Infusible Ink process. So, we highly recommend this product. For more information about the EasyPress 2 and how it’s different than an iron, be sure to check out our post here –> Cricut EasyPress 2 Guide.
- Cricut EasyPress Mat – you don’t want to damage your crafty work surfaces!
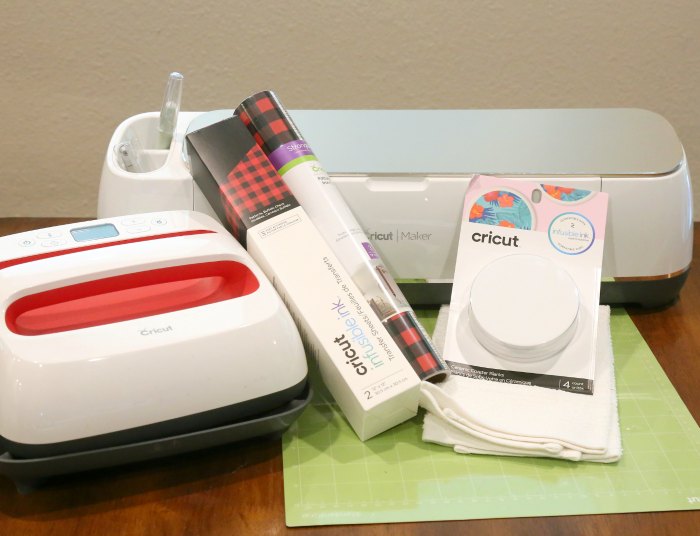 For the coasters you’ll also need the Buffalo Plaid Infusible Ink Transfer Sheets and Infusible Ink Coaster Blanks.The Cricut blanks are specially engineered and tested to give you great results with Infusible Ink products and materials. Currently, there are shirts, tote bags, onesies, and 2 types of coasters available. And, if you haven’t used the new Infusible Ink before you may want to check out our “how to use Cricut Infusible Ink” post first just for some additional info and tips. But, it’s pretty easy to use and makes the most AMAZING coasters! So, let’s start with those!
DIY Buffalo Plaid Coasters
I’ve made the project REALLY easy for you, because everything is already all created for you in Design Space. Just click on my DIY Christmas Coasters Design File to take you to the project. Everything is already sized perfectly for the round Cricut Coaster Blanks, so you can go ahead and just click “make it”. But if there are any changes you’d like to make, feel free to select “customize it”. 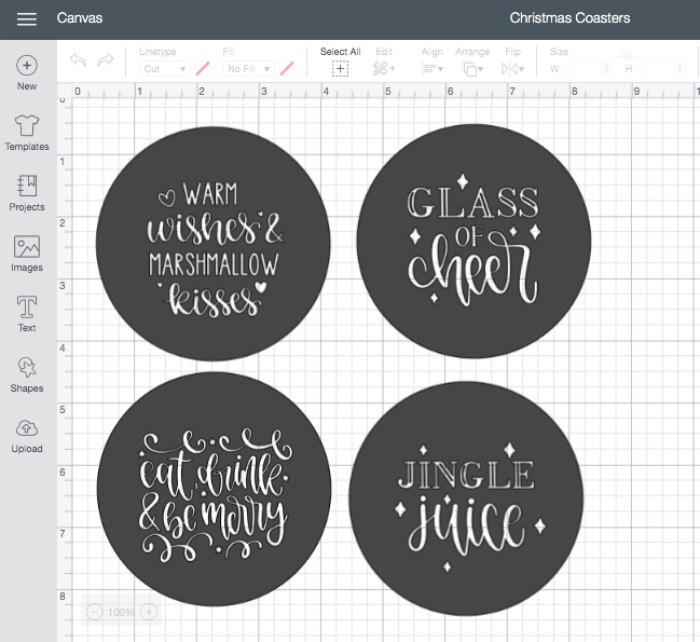 Before you actually cut, make sure that mirroring is turned on. Also check to see that the designs aren’t touching each other on image of the cut mat. Then, get your materials ready to cut. Following the Cricut instructions, you’ll place your Infusible Ink Transfer Sheet print side up (shiny side down) on your cutting mat. I will say that with all the text and little details here, there might be a few small “mess ups” with the cuts. But, I think the end result was still fantastic. Once cut, you’ll weed the image, making sure to remove the text but leave the inside of the scroll letters. The weeding is the most difficult part of this whole project.
 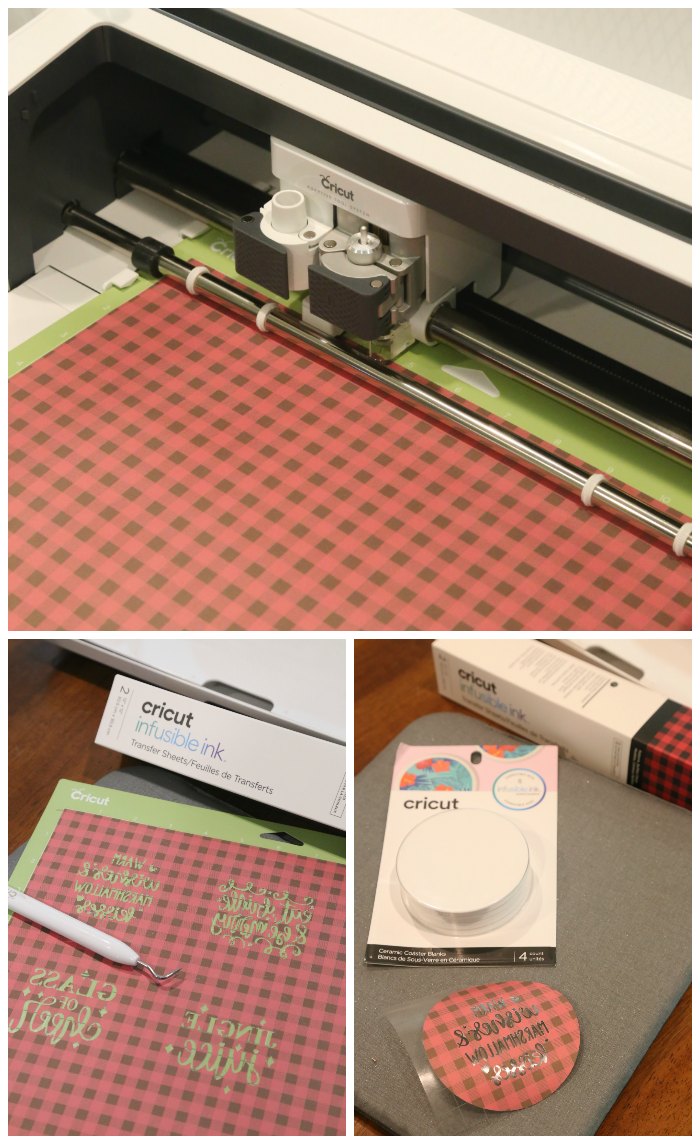 Once everything is weeded, you’ll be ready to infuse onto the coasters. Make sure you wipe each coaster with a lint-free cloth to prepare them for the ink transfers (getting off any lint, finger prints, etc). Then, you’ll place your infusible ink design on the shiny side of the ceramic coaster. You can use heat resistant tape to hold the design in place if needed.
Then, heat up your Cricut EasyPress 2 to 400 degrees F and 240 seconds. NOTE: You do have to have an EasyPress 2 to make these coasters. An iron won’t work. Also, I recommend not doing all the coasters at once. Yes, this takes a bit more time. But I just think you’re more likely to have a successful outcome if you do them one at a time. 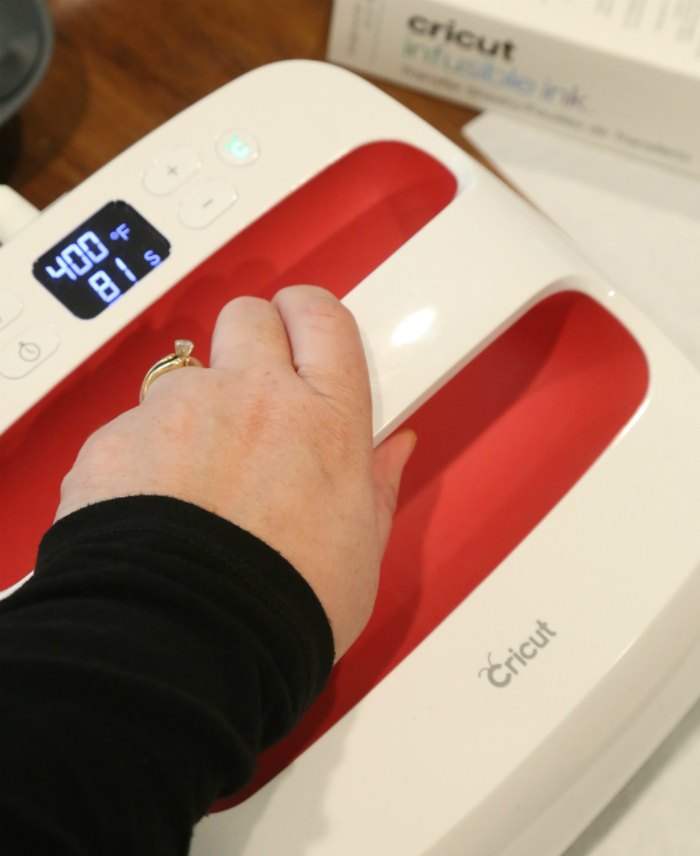 Put your EasyPress Mat on top of a hard surface and place a piece of white cardstock on top of that mat (I forgot to do this once and now have a lovely ink stain on my mat (oops)!!! Next, place your ceramic coaster one the cardstock (design up). Then, use the parchment paper that came with your infusible ink and put it over your coster. Then, heat for 240 seconds. Be VERY careful to NOT move the EasyPress or slide your hands around! Even heat is KEY for this! Once the time is up, slowly lift the EasyPress off and leave the coaster alone to cool.
  Important coaster tip: the coasters are super hot after applying the heat. So, be careful and let these cool completely before you attempt to remove the transfer sheet or handle the coaster.
The end results are SO fabulous! They really turn out looking professionally made! So, these are great for a personalized hostess gift, as part of an adorable Hot Cocoa Bar, or just for some Christmas fun! 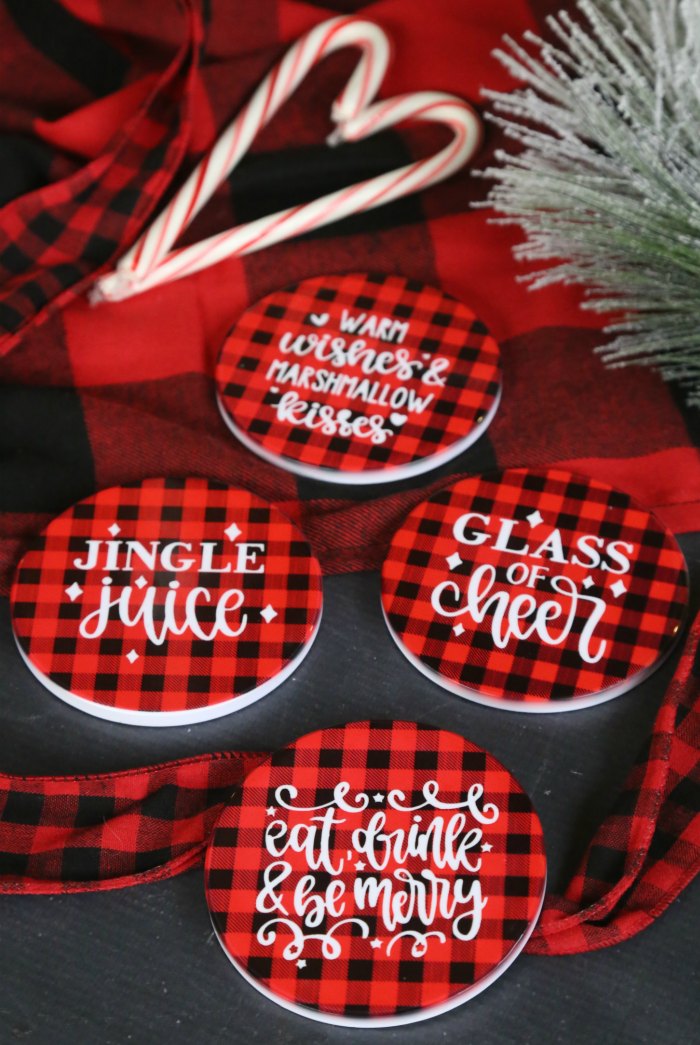
DIY Buffalo Plaid Kitchen Towel
You could certainly just make the coasters (for yourself or as a gift), but I wanted to include another item to make it a proper gift set! So, I decided on a DIY Kitchen Towel. I loved the black & white kitchen towels I made previously, so I decided to do a similar project – only with Buffalo Plaid Iron-on!
In addition to the main Cricut supplies listed above, you’ll need Cricut Iron-On (I used the Buffalo Plaid Patterned Iron-On™) and a plain white kitchen towel (bar towels or flour sack towels will both work). From there, all you need to do is click here to open my “Baking Spirits Bright” Kitchen Towel Design.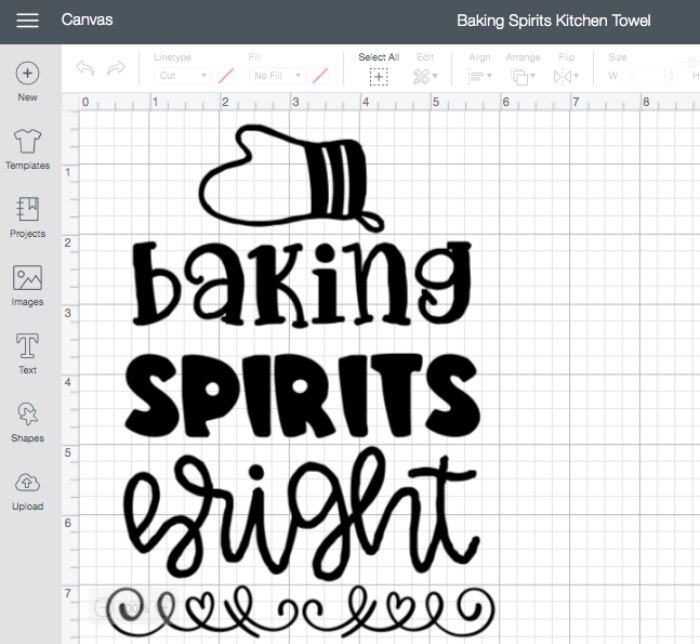 Once you have the file open in Design Space, you can customize as you like. Resize as needed to fit your towel and cut (*remember to click “mirror” on)! Then after the design is cut and weeded, use the Cricut EasyPress 2 and Cricut EasyPress Mat to adhere the design on the towel. So easy!
 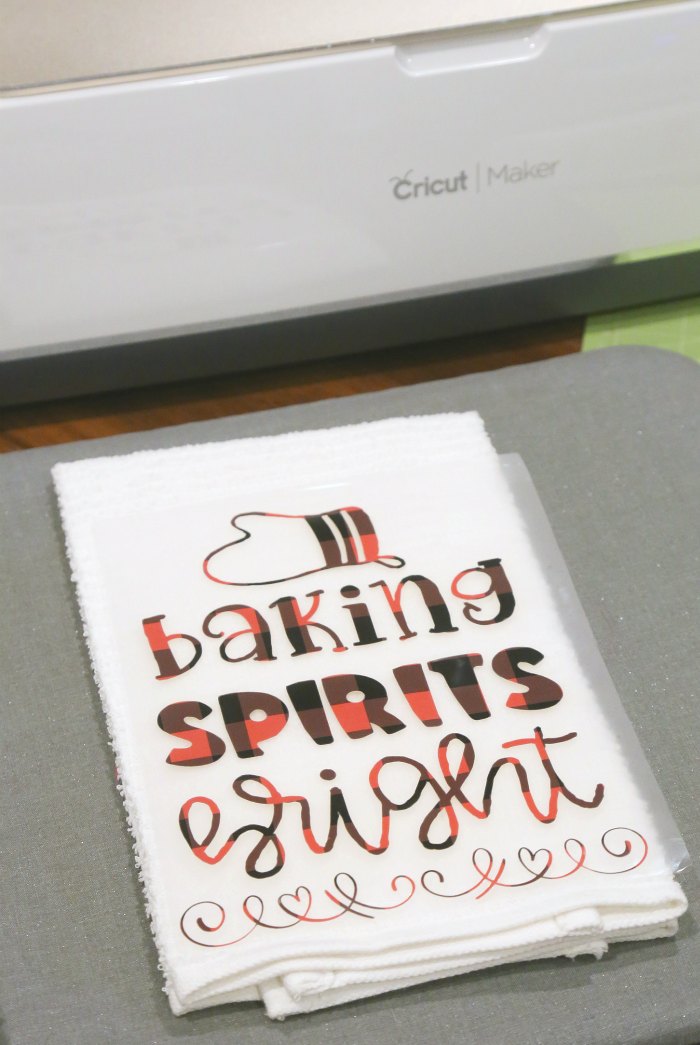 I love the end result! The DIY kitchen hand towels are so easy to make and really do make adorable personalized gifts for all kinds of things- a wedding shower, housewarming gift, hostess gift, or of course a Christmas gift as well! So, whip this up for a Buffalo Check lover in your life!
 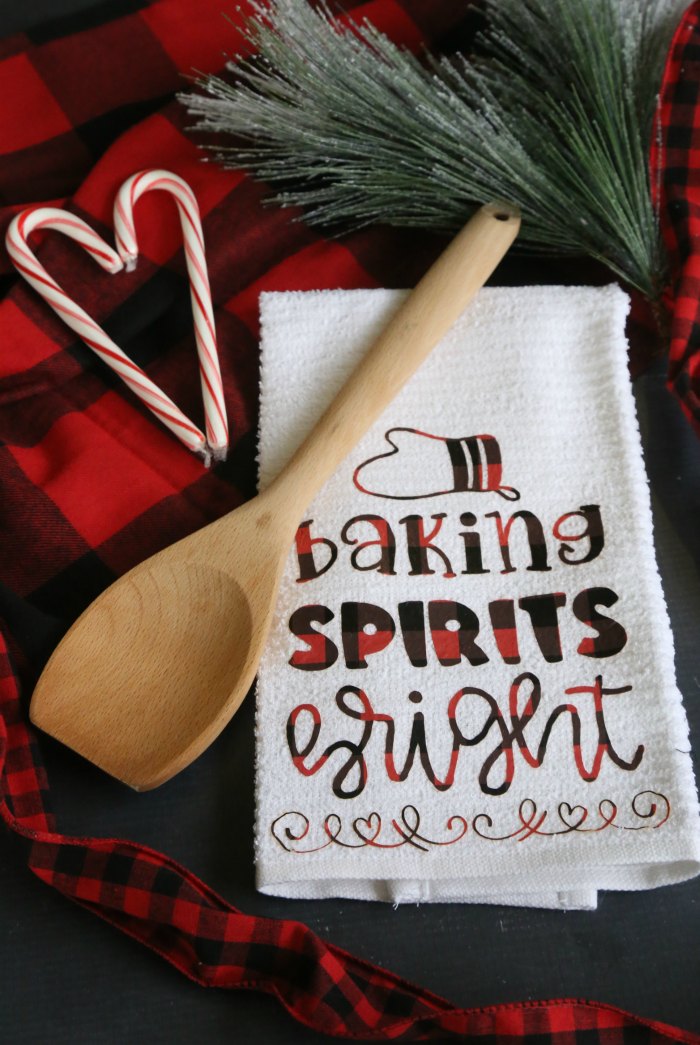 So cute, right?! You really can’t go wrong with personalized gifts like this and the recipient is sure to love the extra time you spent making something they’ll love!
Happy creating!
Like it? Pin it! 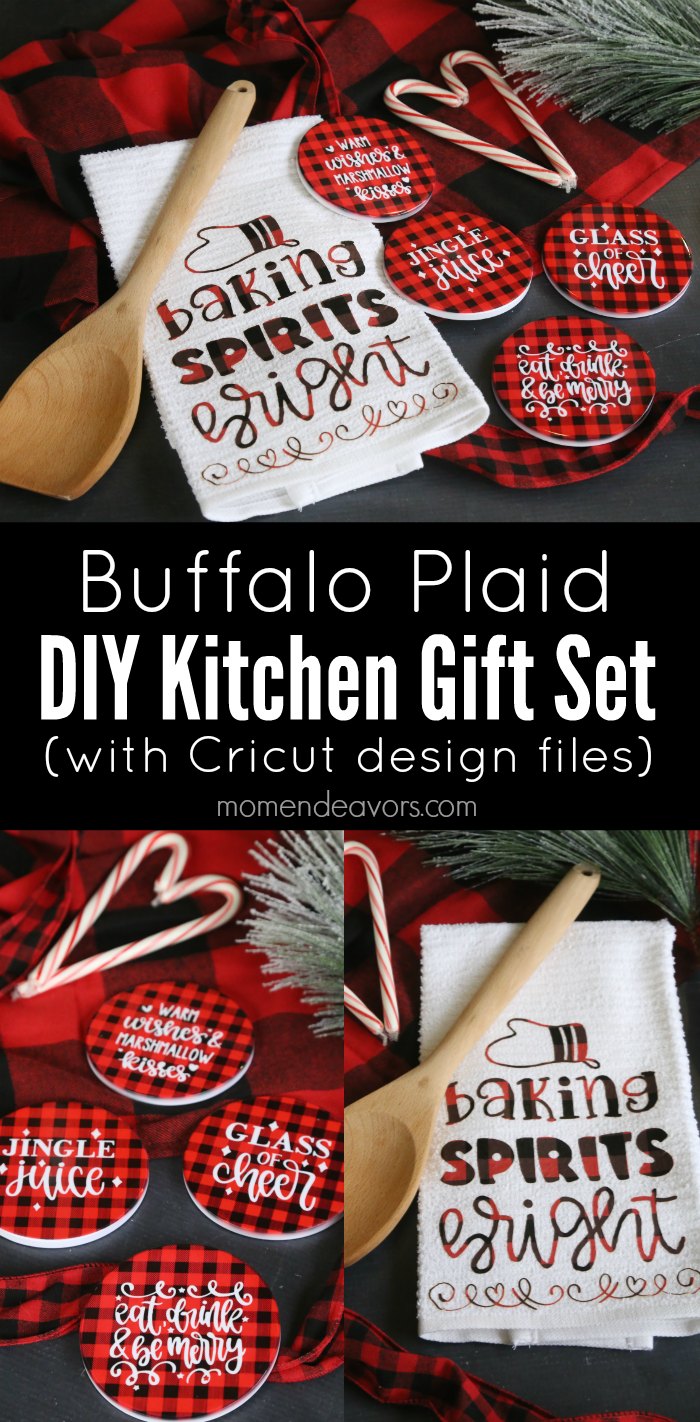


One Response
Love these!! Nice job!! They’re so so cute!!