Did you know the Pantone Color of the Year is emerald?! And, emerald just happens to be the birthstone for May (and my birthday month ;))!! As a Lowe’s Creative Ideas Blogger (*this is a sponsored post), this month’s challenge was all about incorporating the Pantone emerald color into a project! So, since we’re now in May already, I’m sharing some fun DIY canvas art with a beachy emerald theme! 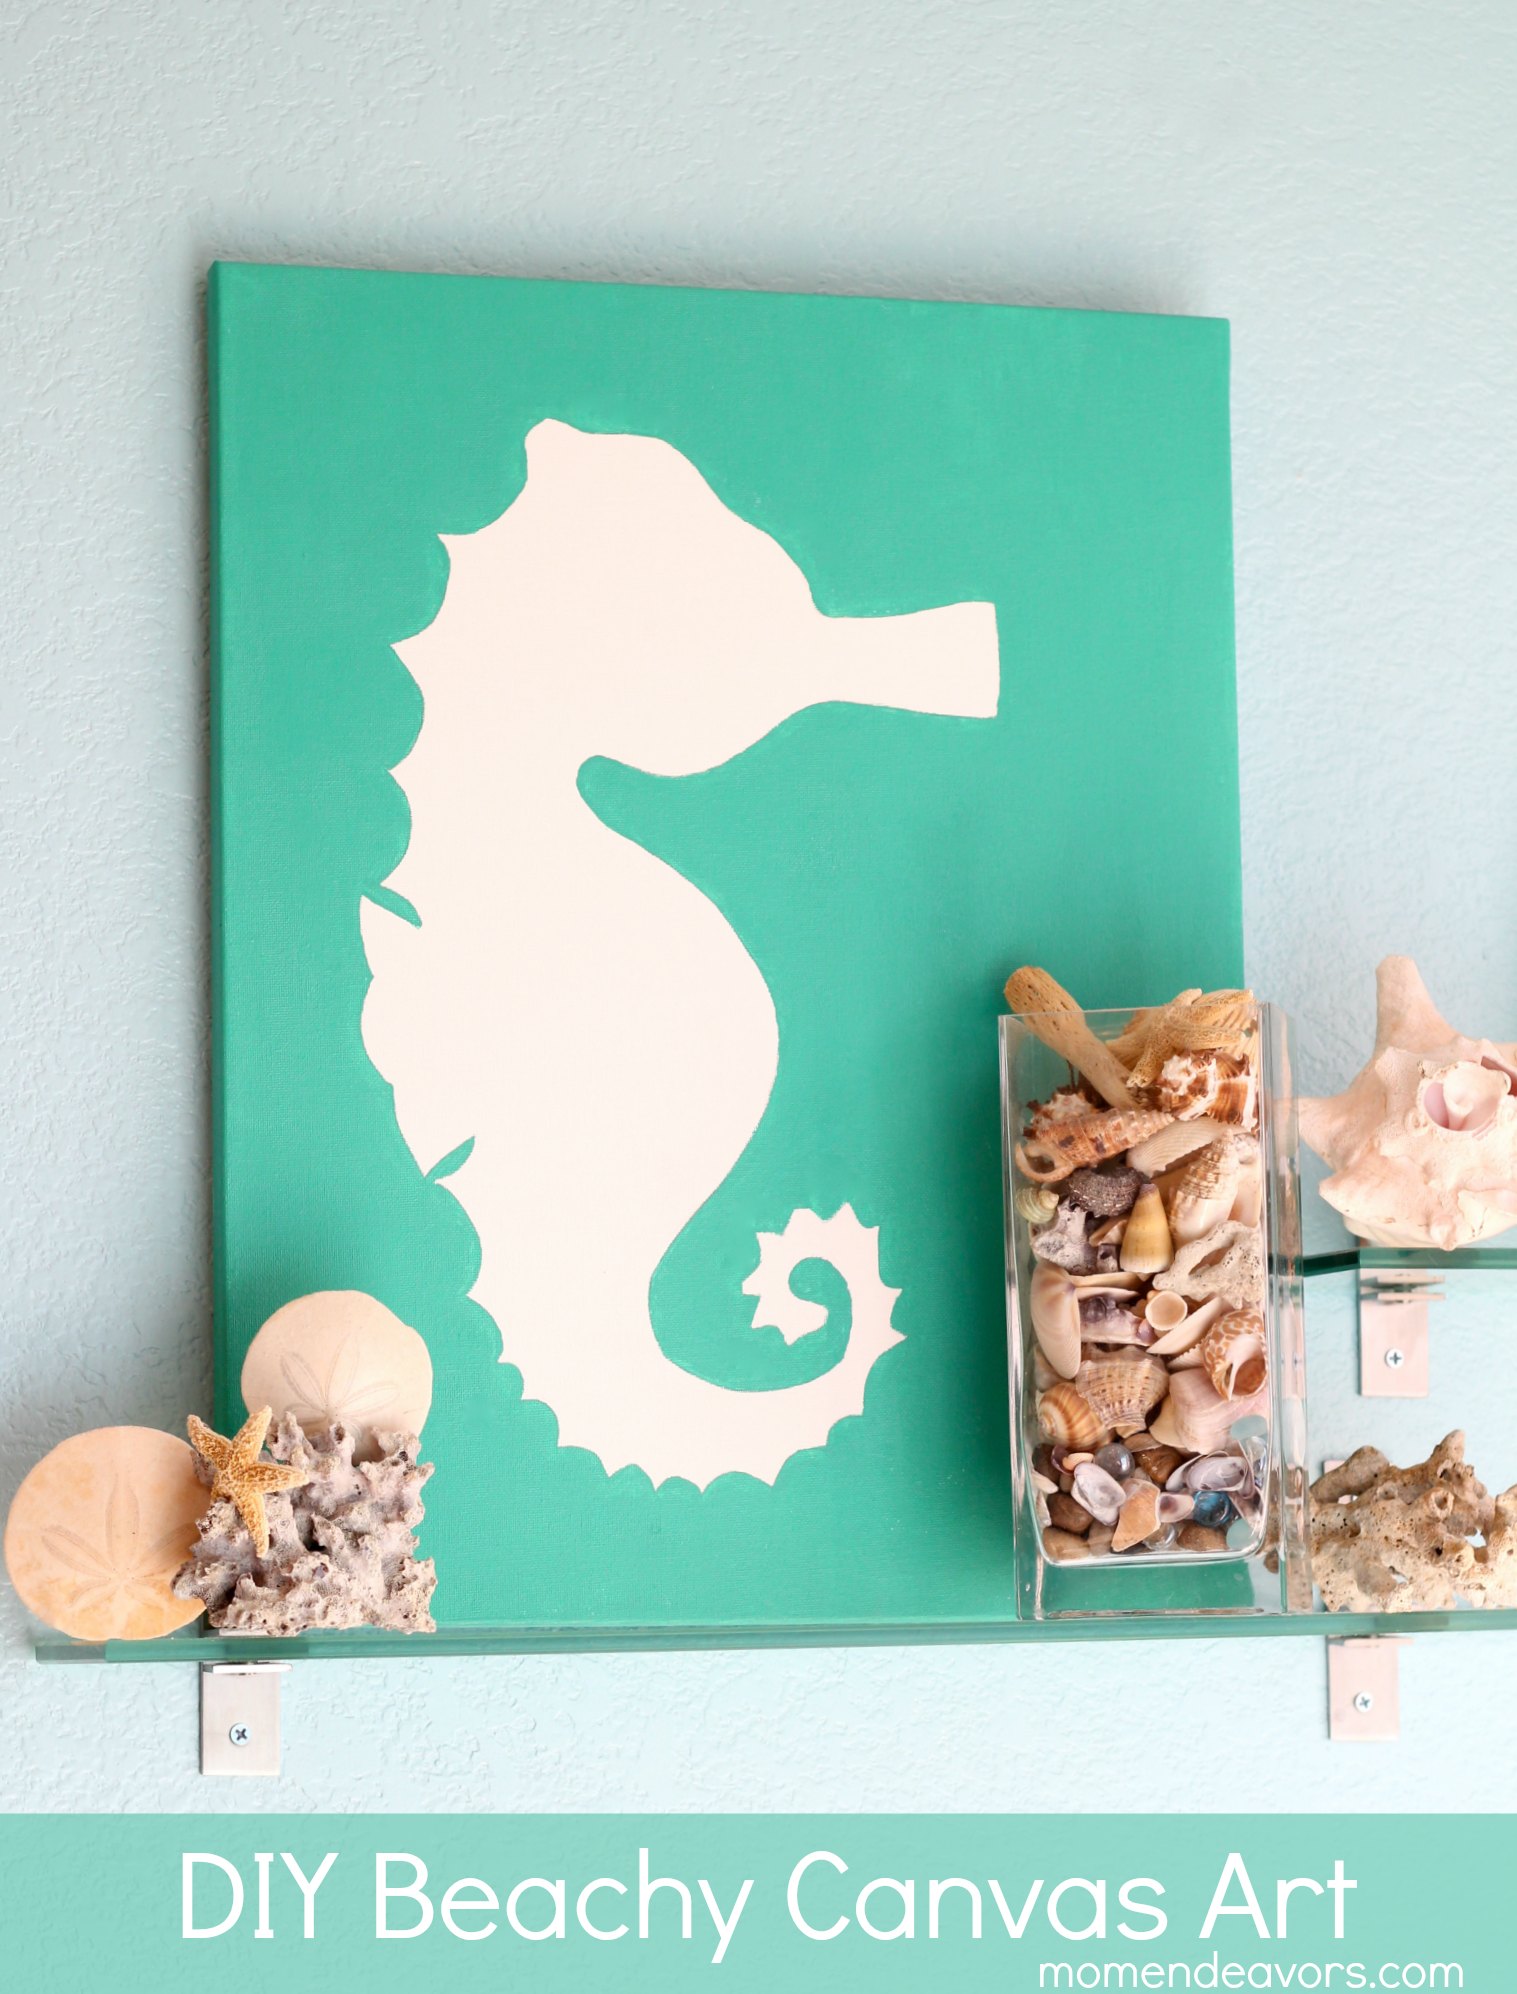
To make this, you don’t need too many supplies–just some paint, a brush, and canvas. You may also want a paper and pencil too. That’s how I started. First up, I decided to sketch a seahorse (modeled after a few different images & graphics). So, I could make it about the same size as the 11×14 canvas, I taped 4 sheets of printer paper together (overlapping where needed). I did the sketch on that paper and then cut out the seahorse. 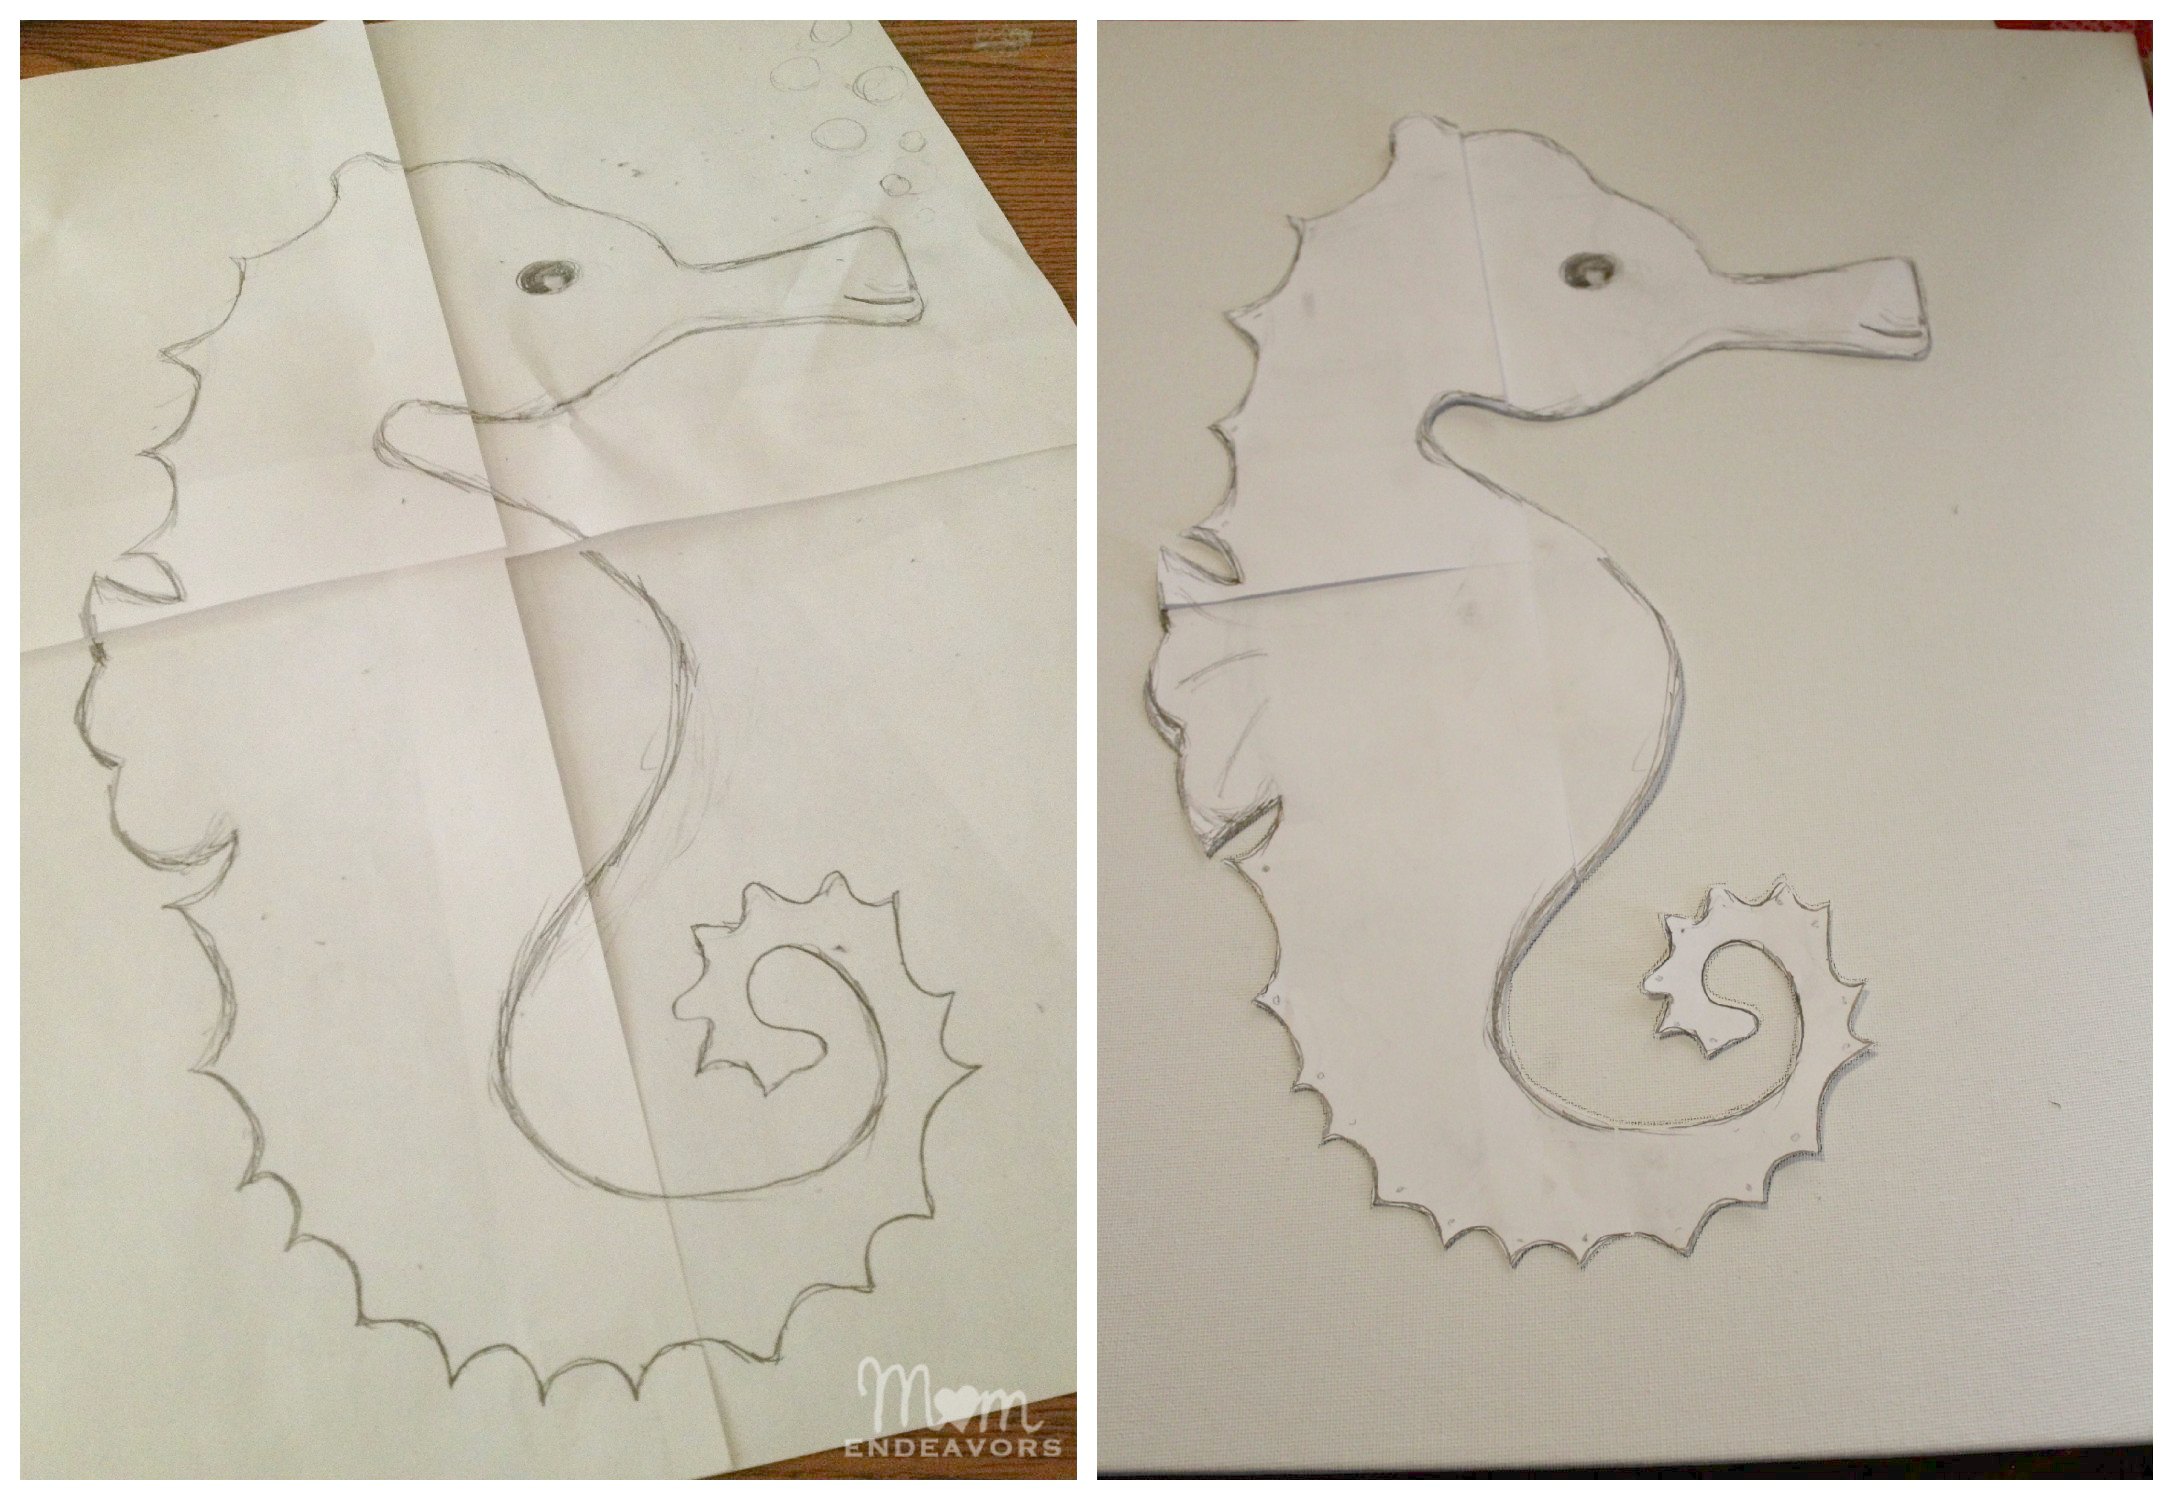 I could have just taped down my seashorse template and painted over it, but I was concerned about bleed through with the paint. So instead, I just traced my sketch right onto the canvas. The next step was just to paint!
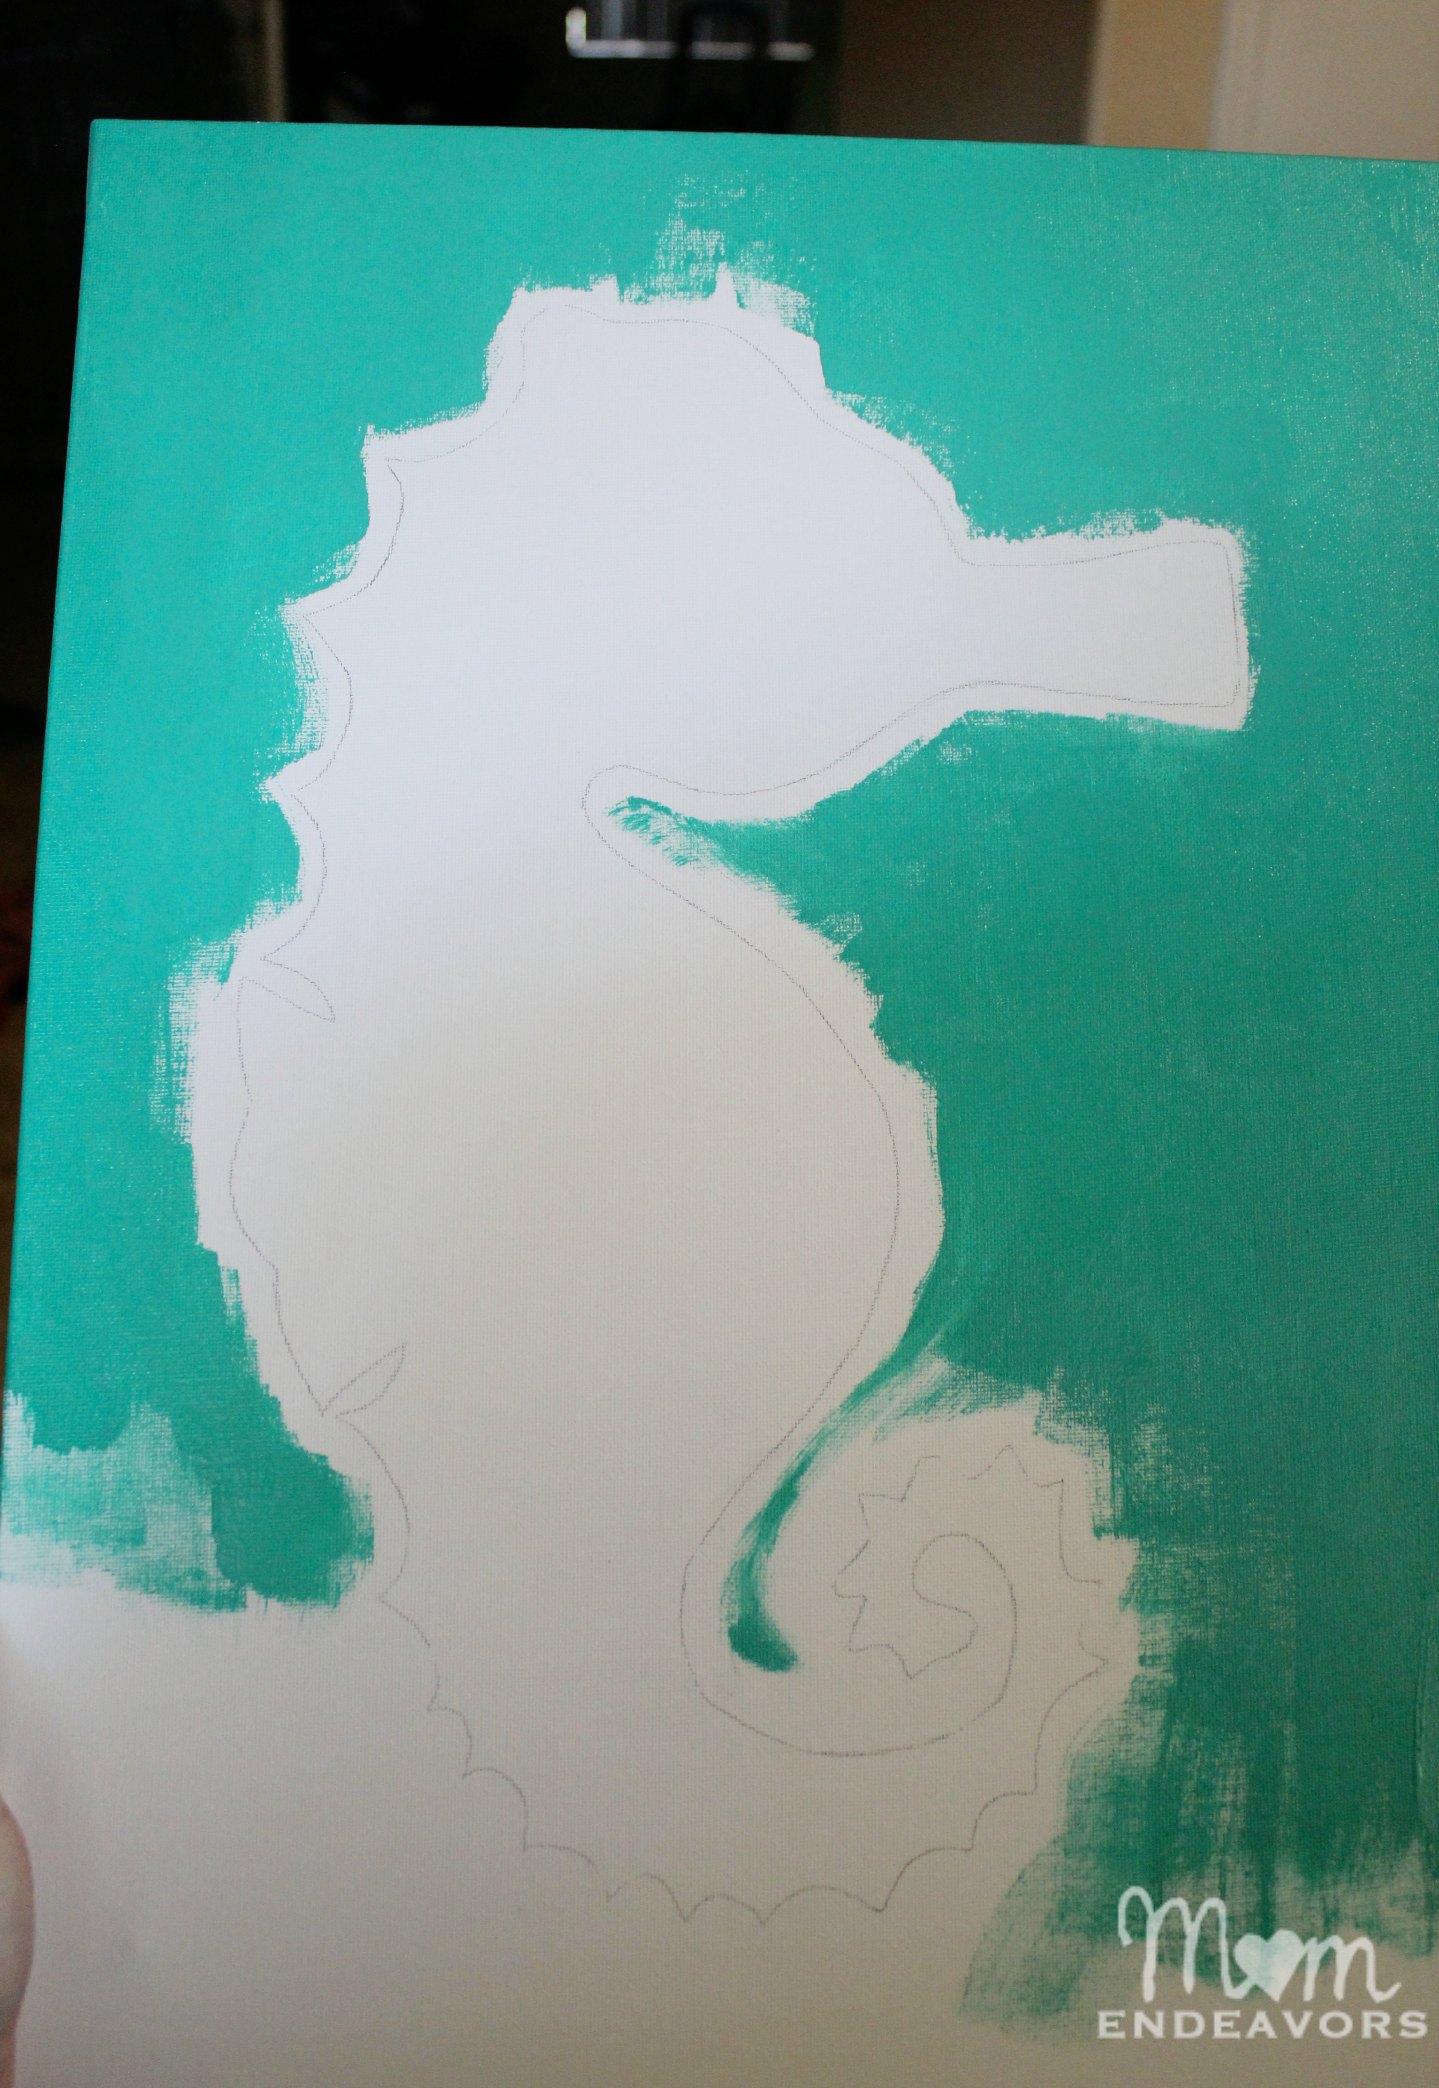 I started with a large brush around the outside, then did a rather fine brush around the edge of the seahorse. Overall, it did need two coats. The canvas was still wet in spots when I took this photo (and I used a semi-gloss paint), but shows the just-finished product:
 It’s the perfect addition to a beachy bathroom. Now the only question is which bathroom should it live in? It’s super cute in the boys’ beach-themed bathroom:
 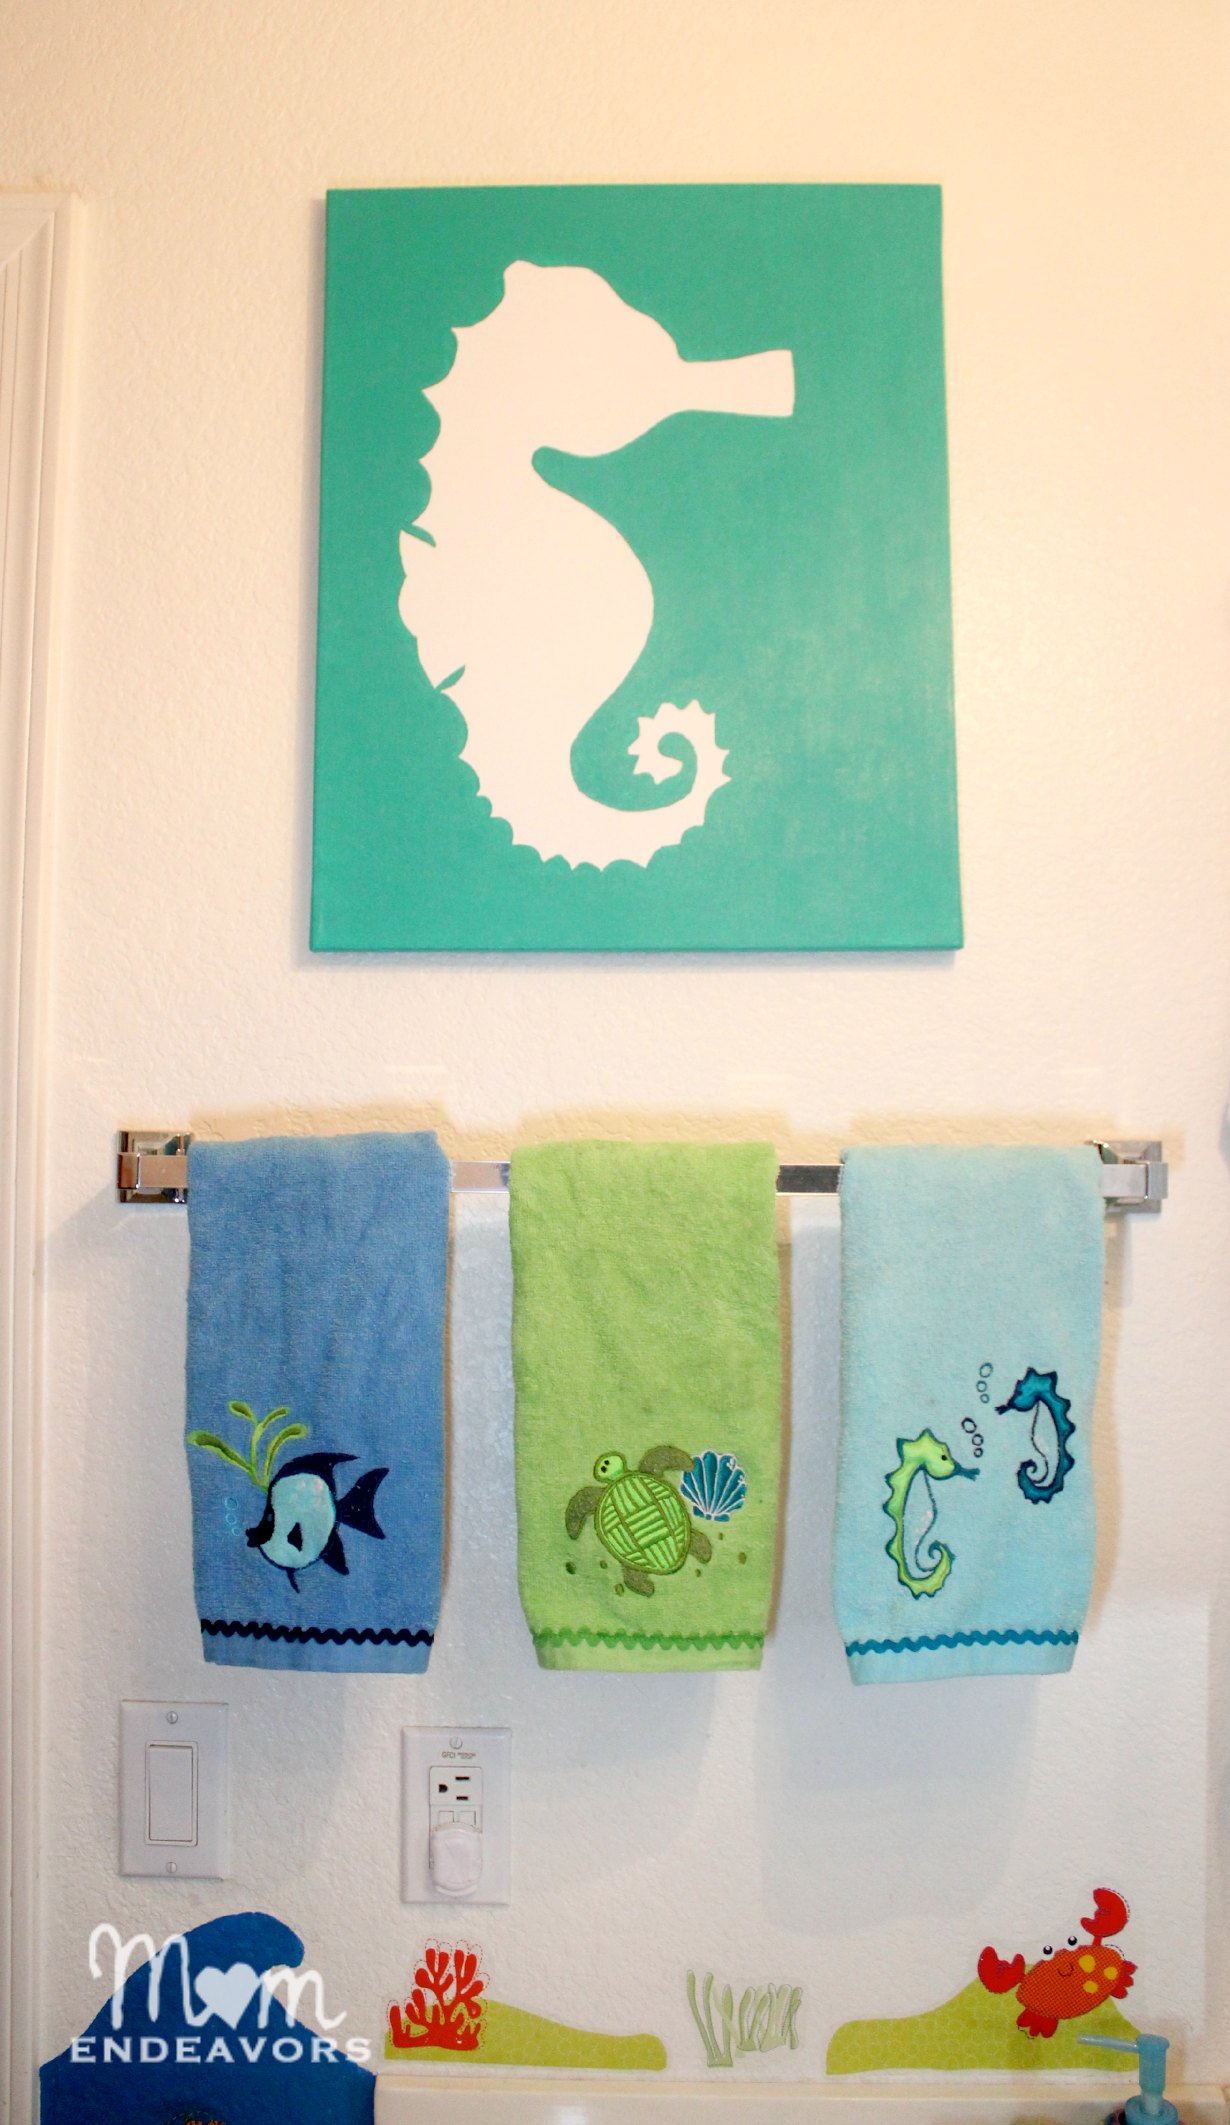 But, I also really like it in our beachy master bathroom too! I have the DIY Starfish art and framed shell art in there, so it’s seems fitting that the seahorse would be added too!
 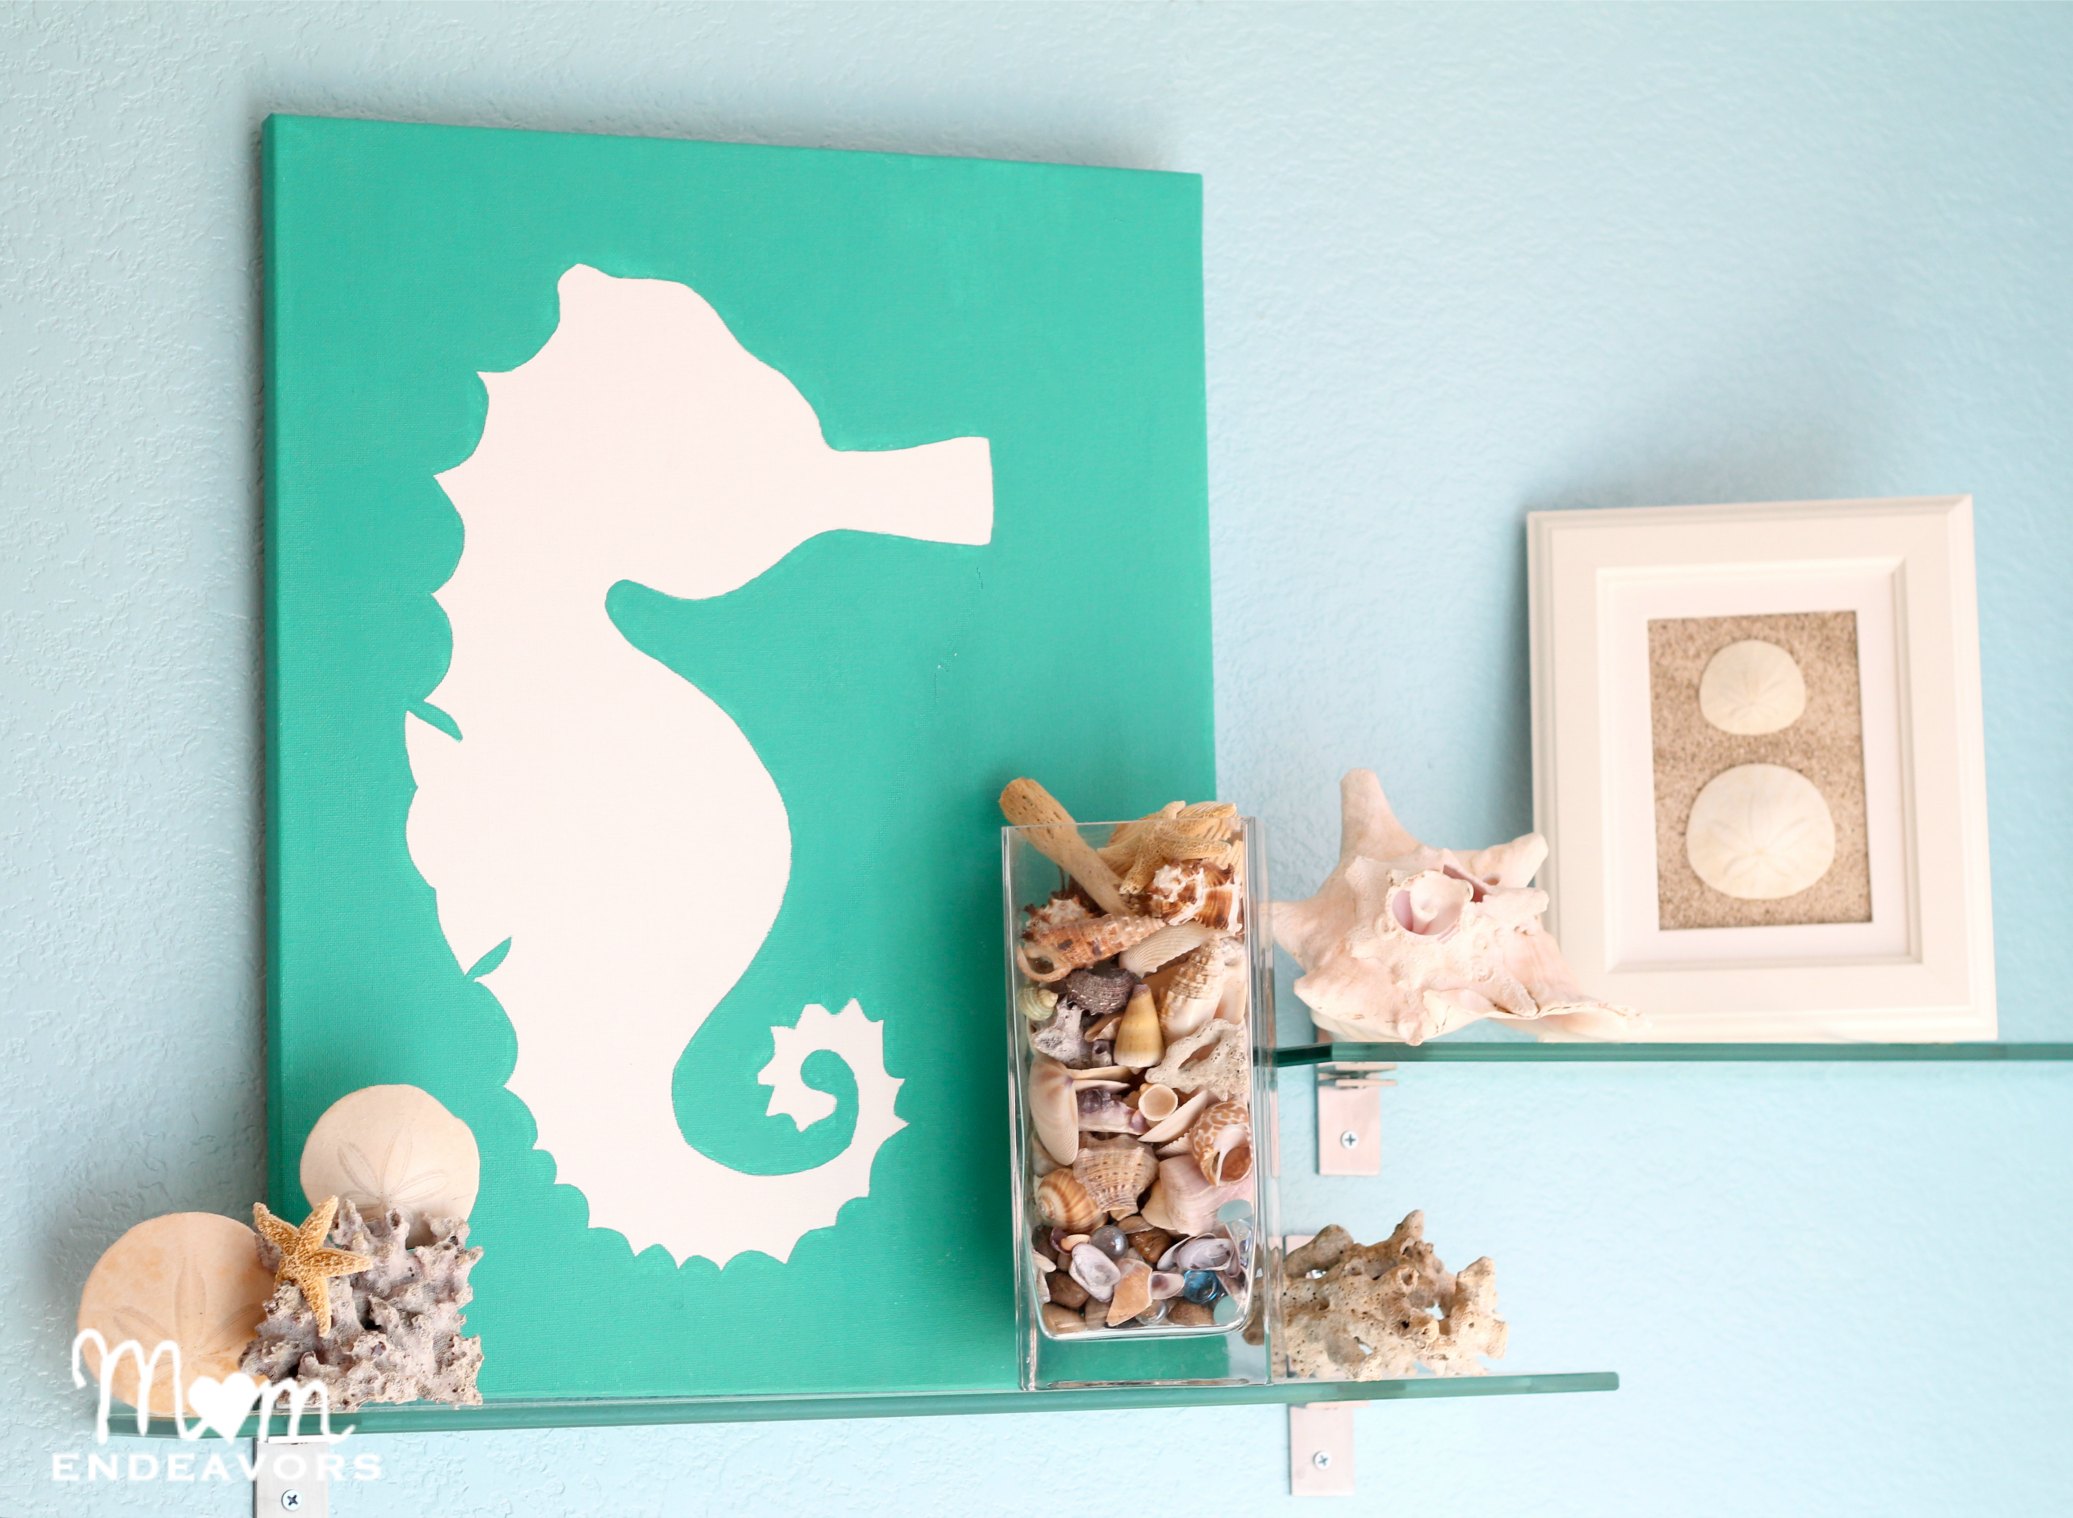 Decisions, decisions! I don’t know! Which bathroom do you think the sea horse should live in??
For even more ideas, visit Lowes Creative Ideas and follow along with Lowe’s on Pinterest or on Instagram! You can also sign up to receive their free Creative Ideas Magazine, which is full of all kinds of ideas & inspiration! There’s also a magazine app so you can have inspiration on the go!
![]()
Disclosure: I am a member of the Lowe’s Creative Ideas Creators & Influencers Network and receive a Lowe’s gift card to complete my projects. However, all ideas, opinions, & experiences are entirely my own.
Linked to: *Summer Decor Party


10 Responses
um.. I think it would look best in my beachy kitchen 😛 Hehe. I like it in the Master bath the best! Super cute!
I think it adds a nice pop of color to your master bath!
Cute!! I like the towels.
I LOVE this! I think it turned out great and I vote that it belongs in the master bath next to the shells! 🙂 You have inspired me to finish up some canvas art I’ve been working on. Thank you!
Thanks so much, Kari! It does give a nice pop of color in there!
Love it! That turned out so cute!
Thank you, Traci! 🙂
Love this! I’m a sucker for sea horses! Featured you on Living Creative Thursday today! http://www.livinglocurto.com/2013/06/home-and-garden-diy-ideas/
What a cute idea! Love the color you used with your white seahorse. I really like it in both bathrooms … but I’m leaning toward the master bedroom. Thanks for sharing this at the Summer Inspiration Decor party!
Well done outlining the seahorse shape with the fine-tipped brush.
The piece belongs in the master bath because as far as I can see, the bolder, brighter, primary colors of the boys’ bathroom would compete with the softer, more understated seafoam green color of the canvas piece (the color reminds me of the colors of beach glass, so that shade of paint worked out well).
Did you have any trouble covering the pencil marks from tracing the seahorse shape onto the canvas? Or did the paint totally cover them?
Lastly, if I may:
Forgive me if I am mistaken, but it seems that this piece was completed by leaving the negative space of the seahorse shape unpainted, allowing the white of the canvas to provide the the white fill of the seahorse shape. Simply for the reason that this piece is intended to be hung in a bathroom- a place which can, of course, become rather warm and humid- I might suggest that a thin protective transparent layer of water-resistant finish be gently sprayed over the finished painting. I suggest this only because I would hate for anyone to end up with water spots (especially if a piece like this does end up in a children’s bathroom) or- dare I say it?- mildew staining, on the unpainted white canvas seahorse (which was so carefully outlined in that lovely shade of paint!), lest the blank portion of the white canvas become discolored. Perhaps I am just being a bit silly, and maybe a protective topcoat really wouldn’t be necessary- I just mention it in case it may be a helpful idea for someone.
Great idea for simple-to-make artwork that looks classy.