Ok, so the train birthday party posts got interrupted and now it’s finally time to wrap things up! I loved doing quite a few homemade decorations for the party, but the cake was my favorite.
The birthday cake is usually my biggest party undertaking, but I LOVE making them (often with the help of my mom)! This year was no different and I’m really pleased with the way it turned out!
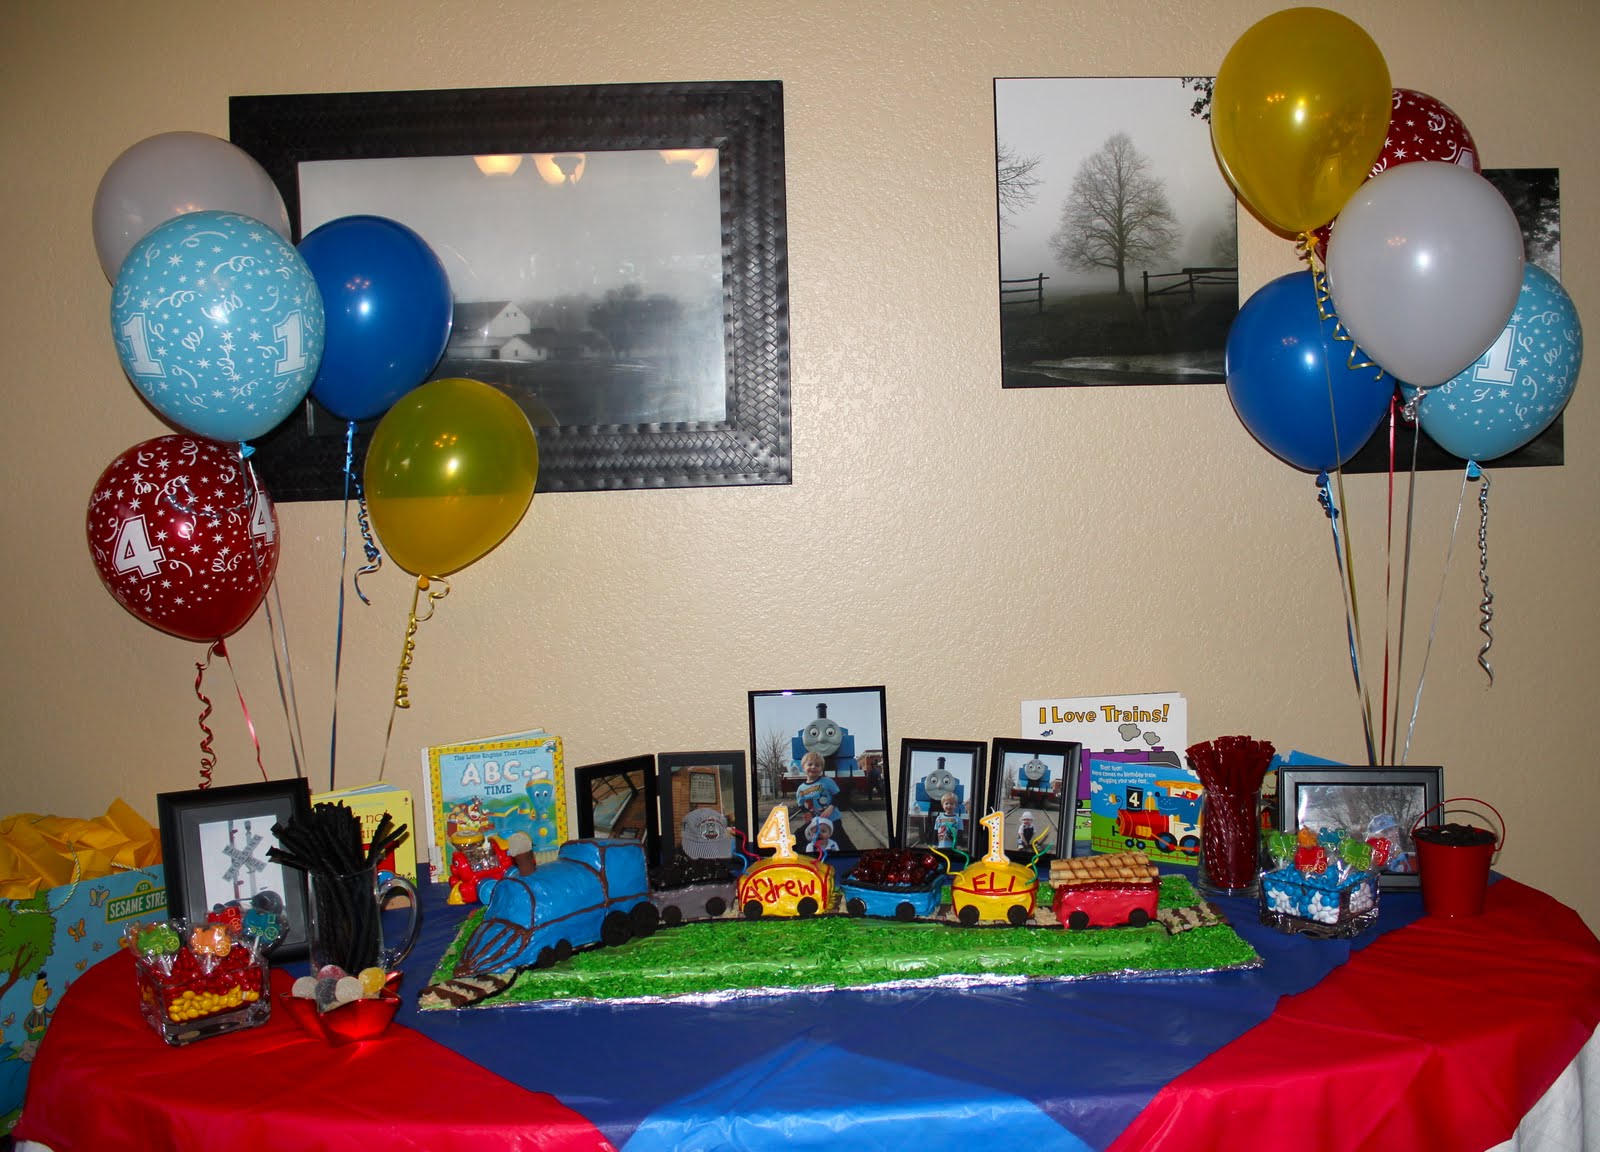
Here’s a better shot of the completed cake:

For those that would like to make one, here’s the run-down on how to make the train cake!
Materials:
-Two large cut pieces of card board (just slightly larger than my jellyroll pans), wrapped in aluminum foil.
– Toothpicks and/or craft wire
– 4 boxes of brownie mix (no, I didn’t bake from “scratch”)
– 2 cake mixes
– quadrupled batch of cream cheese frosting (recipe below).
– shredded coconut
– kit kat bars
– rice krispies
– normal & bite-size oreos
– black & red licorice, plus licorice pull ‘n peels
– root beer barrels
– chocolate sticks like Pepperidge Farm Pirouettes (I found a MUCH cheaper generic version).
– bakers chocolate (or chocolate candy melts)
– 2 rolos
– 1 large gum drop
Instructions:
{1. Baking the brownies & cakes}
– prepare brownies and bake in two large jelly roll pans (two mixes per pan). This formed a base for the train & made sure we had enough dessert for all the guests.
– prepare one cake mix (or recipe of your choice) and bake in two loaf pans.
– prepare the second cake mix. Bake in one loaf pan & one 8×8 square pan.
I suggest doing this in advance of decorating. I did all of these in one session, 24 hours before decorating. After cooling, place all in the fridge (even in the freezer if you have less time). This will make frosting easier.
{2. Making the frosting}
Recipe:
8 oz. package cream cheese
1 stick butter
1t vanilla
3C powdered sugar
– Cream together cream cheese & butter, add vanilla, then slowly add in powdered sugar.
I quadrupled the recipe and made the large batch all at once in my stand mixer. Afterward, I divided it between 5 different bowls and added food coloring. Obviously, I used more green & blue than the other colors.
{3. Preparing the base}
– Cut & cover your cardboard with alumnimum foil.
– I constructed everything with the two pieces together and separated to be refrigerated

– Step 1: Line up the brownie “cakes”, so they meet right in the middle (for easy separation).
– Step 2: Frost with green frosting (doesn’t need to look “great” as the coconut will go on top later)
-Step 3: Start laying your track. Decide on an approximate path for your track and lay the kit kat bars (1/2 – 1 inch apart). Then, cut your black licorice sticks in half & place right up against the kit kat bars.
-Step 4: Fill in the track with rice krispies.
{4. Building the train}
– For the train, you first need to get a “game plan” of what size your cars will be & where they will go. Here’s what I decided on:

I left one cake loaf whole (to be the engine); I cut one loaf into even thirds; and one loaf I cut into 2 sections (one about 2/3rds of the pan & one the other 1/3). The larger 2/3 size section was used for the logs.
*Note: this is where my camera battery died. There was no way I could wait in order to continue taking pictures. So, I just went ahead with assembly. Then, of course, I forgot all about taking any more pictures until the cake was done. Sorry!
The Engine:
– The engine was really the only remotely difficult part of doing this cake. Remember there is still one 8 x 8 cake. So, cut two squares from that (both the same size & measured to fit on the engine loaf cake) and use frosting to attach them to the back of the engine. Then cut a rectangle from what’s left of the 8 x 8 cake. Attach it (with frosting) just in front of the squares.
If your cake poofed up & is domed, you might not need to attach anything else to get that rounded look to the engine. If not, then use the tops cut off the other rounded cars.
To give it more of a classic engine look, I decided to add the “cowcatcher” (that front grate thing that sticks off the front). To do that, I cut off the raised part from the last car and using a lot of frosting and two toothpicks, attached it to the front of the engine.

It should give you this basic shape:

Train Cars:
– For the rest of the train cars, just decide if you want them domed or flat. I decided to leave two raised & have those be the boys’ birthday train cars. For the other 3, I just cut the tops off so they could carry “cargo”.
{5. Decorating}
Note: I did all the frosting of each cake on a separate small plate (NOT on the track). All the licorice was added then too. Each car was *carefully* added to the track, starting with the engine. Then, once the train cars were in place, I added the additional candies and oreos.
– Start by doing a frosting crumb coat on all of the cakes. As I finished a car, it went into the freezer. Once all had their crumb coat, they came out one by one to get fully decorated. We’ll go through each car one by one:

Engine: 4 large oreos in back, 4 small bite-size oreos (2 on each side) for wheels, 2 rolos stacked together with a large clear gum drop on top (laced together with craft wire) for the stack in front. Piped with melted chocolate candy coating
Coal car: 4 bite-size oreos. Black licorice around top of car (to hold “coal” in. Coal = semi-crushed oreos.
#4 & #1 Cars: 4 bite size-size oreos each. Licorice pull ‘n peels for name & outline. Fun birthday candles on top
Barrel car: 4 bite-size oreos. Black licorice around top of car. Filled with rootbeer barrel candies.
Log car: 4 bite-size oreos. Red-licorice around top of car. Filled with logs (chocolate cookie sticks)
{6. Finishing touches}
– in a large baggie add about 2 cups of coconut & green food coloring. Seal baggie and shake well. Add green coconut around the train. This will cover up any issues with the frosted brownies & the aluminum foil.
– Set up your dessert table and (the best part)…
watch the kiddos’ eyes light up when they see the awesome train cake creation!

What special themed-cakes have YOU made?
*If anything doesn’t make sense or you have a question, please ask. And, if you make a train cake, I would love to see how it turns out!!
*Linked to *Sundae Scoop, *Making Monday Marvelous, *Made by You Monday, *Get Your Craft On,*Tip Me Tuesday, *Strut Your Stuff, *Ultimate Recipe Swap Birthday Cake Roundup


11 Responses
Im planning a train birthday party for my soon to be three year old (goodness that makes him sound so big!). This cake is going to be PERFECT. I cant wait to see his reaction! Thanks for the tutorial!!
Mom of the year, for sure!
The cake is so cute! I love making homemade cakes for birthday parties … I think they add such a fun and memorable touch. You did a great job on the train!
That cake is adorable! I love the names on the cars:)
This is so cute! Job well done indeed!
Your cake is amazing! I made a Thomas cake for my son nearly 5 years ago….it was so much work but he sure loved it! Here's a link if you're interested in seeing it.
Again, great job!
http://rebekahsfamilyfoodandfun.blogspot.com/2010/08/thomas-tank-engine-cake.html
Making this cake starting today for my daughter’s birthday on Sept 8th… wish me luck!!
Oh, how exciting! Thanks for sharing! Hope it comes out ok! 🙂
Love the train idea for my son’s 2nd bday (much smaller scale though) but I especially love your trees and pictures in the background!! thanks for the step by step tut, it looks great!
Thanks so much, Shannon! Hope it turns out great! 🙂
I came across this on Pinterest and am So glad I did!! I am starting to gather ideas for my sons first birthday (November) we want to do a polar express theme and I this will be an adorable addjtion!!!