As a part of the Lowe’s Creative Ideas Blogger team, this month’s challenge was to create some Valentine’s décor. I don’t know about you, but I’m not a big Valentine’s decorator. Now, that we have a mantel, I might do a little more holiday decorating with that. But, I don’t usually put out a lot. So, I wanted to create something that I could possibly keep out year round. I decided on some photo-holder wooden blocks. While they are indeed Valentine’s colors, they happen to also be our wedding colors. So, I can keep our “love blocks ” out year round by our wedding photos!  Those are our engagement photos! Awwww! 😉 I loved the look of the black & white photos with the blocks. Though, I’d really like to get some 4x6s of our wedding to display on the blocks since the color scheme is just right. Here’s one of my favorite snapshots (& one of the few digital) of our wedding festivities:
 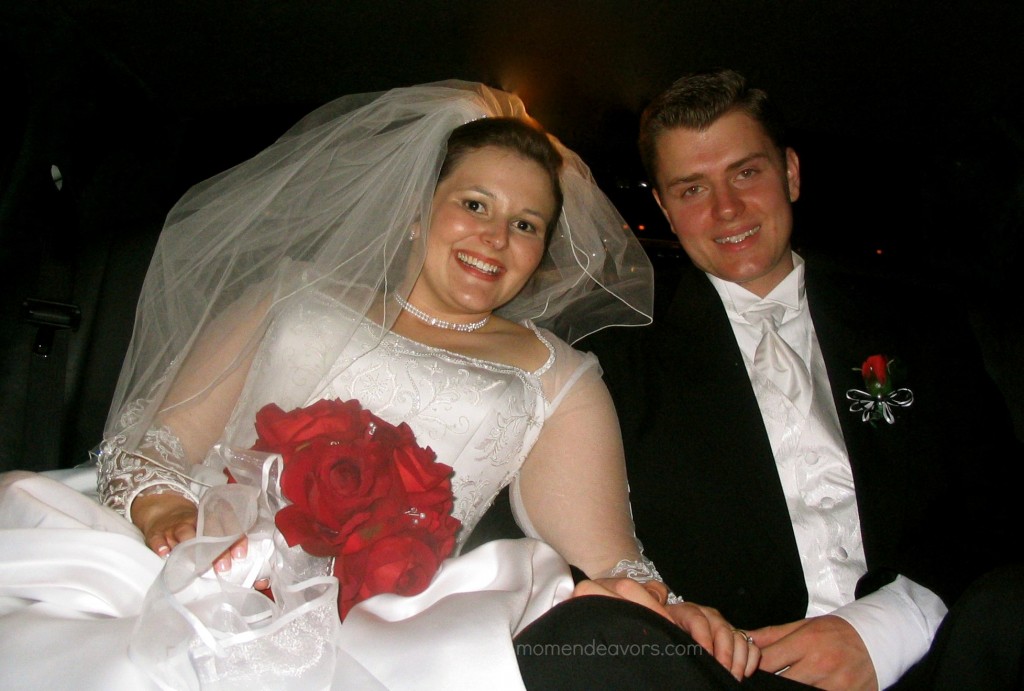 So, these fun “love” blocks are not only perfect for Valentine’s Day, but for displaying our wedding photos! They would also make a fun wedding gift! You could do them in whatever the wedding colors are!
Supplies:
- 1 4x4x8 piece of wood cut into 4-inch cube blocks
- sand paper
- two spray paint colors (I used white & red)
- vinyl letters
- clothes pins
- hot glue & glue gun
Directions:
First up, you’ll need to get the wood. We snagged a 4x4x8 at Lowe’s for just over $8 with tax. Many stores will even do the cutting for you (that’s what we did)! If everything is cut perfectly, you should get 24. Ours weren’t, so we ended up with 23! 😉 I love the larger size of the 4×4 AND how inexpensive it is for 20+ wooden blocks! I have so many projects in mind! 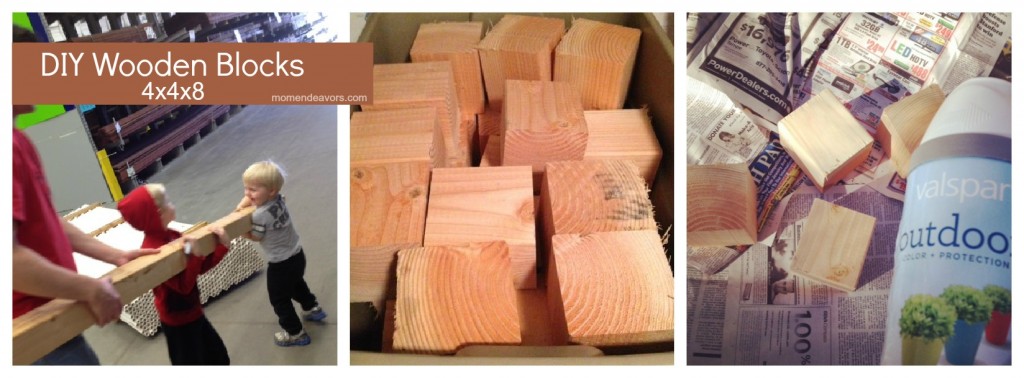 Once you’ve got the wood cut, then you’ll either sand first and then spray paint. Or, the other way around. I knew that I wanted a more distressed look, so I opted to spray paint first and sand later. Plus, that way, if there are any drips or unevenness with the paint, I could take care of that after with the sandpaper. I sprayed the blocks with white paint first (because I wanted the white to show through after sanding). After the white was dry, I sprayed the blocks red. When spraying, just note that the cut sides (with the rough wood) do seem to soak up much more pain than the outer sides. While spraying the blacks red, I also sprayed the clothes pins red.
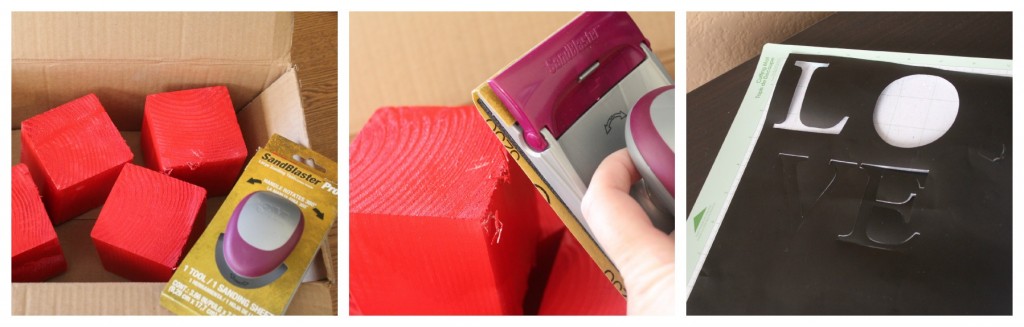 I let the blocks dry for about 24 hours and then got to sanding (using a fine sandpaper). I used a little hand-held sand paper holder which was really nice. Much easier for gripping! There were quite a bit of wood splinters around the cut edges. So, I sanded those off, as well as giving the blocks a distressed look by gently rubbing all edges & fronts with the sandpaper. For the letters, I used vinyl (3″ size). If you don’t have access to an electronic cutter (like Cricut or Silhouette), look for vinyl letters at Lowe’s. My store carries some. Also, you could free hand paint the letters on or paint with a stencil.
At this point, you could totally just stop here. But, I wanted to be able to use them as photo holders also. I had thought about doing cute wire holders coming out the top, but then I wouldn’t be able to configure the blocks in different ways. And, that’s the fun thing about blocks! You can do vertical…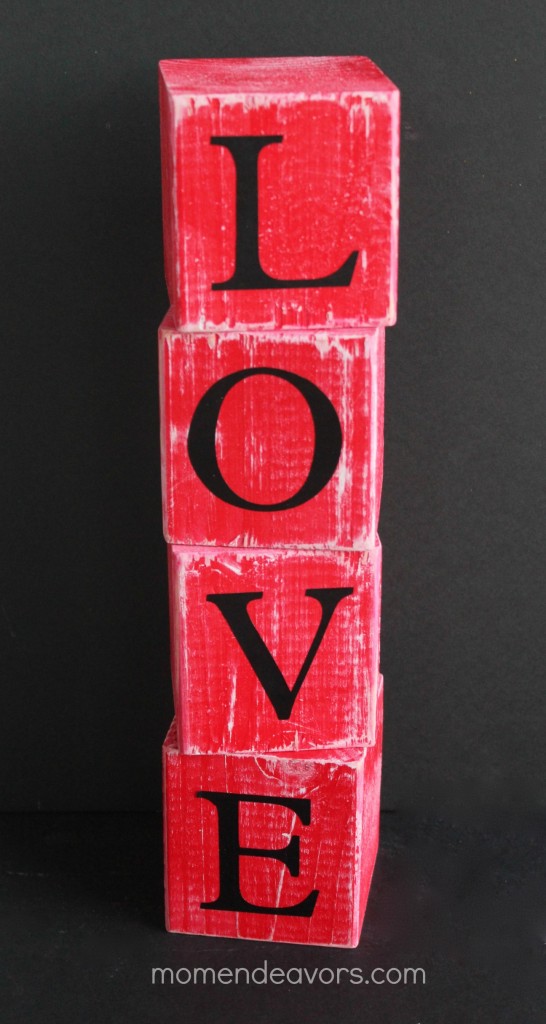 Or, put them in a square similar to the famous “Love” letters statue:
 To be able to use the blocks as photo holders, just hot glue a clothes pin on the back! That way, you can attach photos if you want, but the blocks can still be stacked and configured however you like. They’ll look great out for Valentine’s Day or just in our bedroom with wedding photos!
 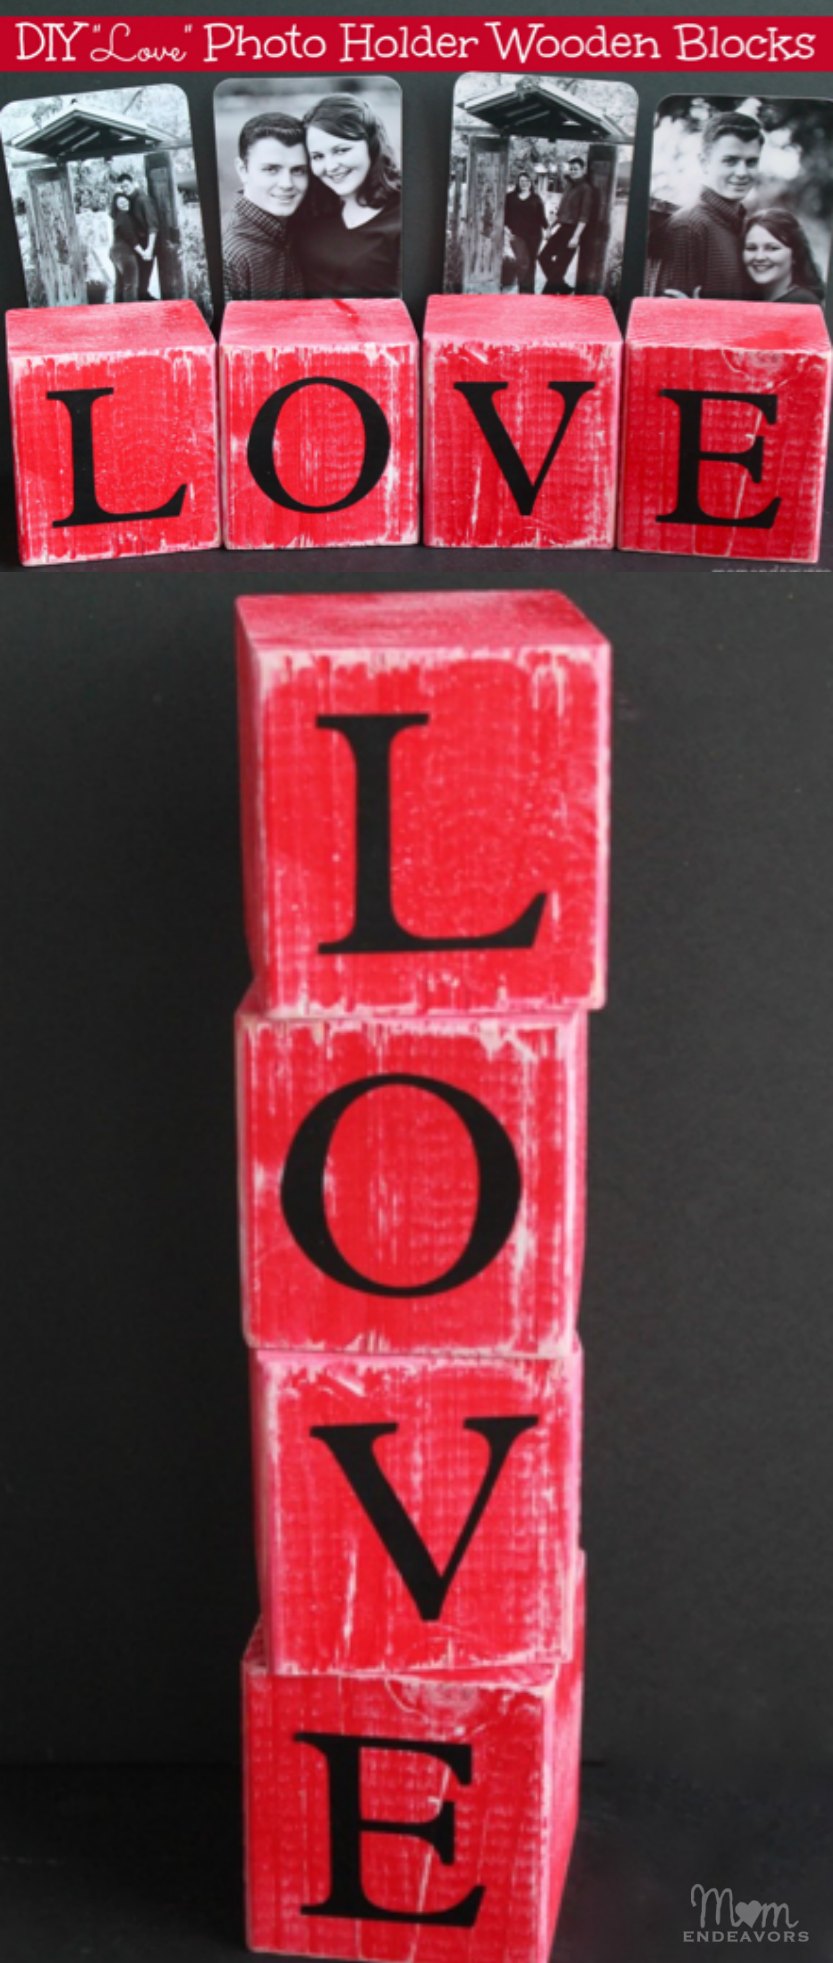 For even more ideas, visit Lowes Creative Ideas and follow along with Lowe’s on Pinterest.You can also sign up to receive their free Creative Ideas Magazine, which is full of all kinds of ideas & inspiration!

Disclosure: I am a member of the Lowe’s Creative Ideas Creators & Influencers Network and receive a Lowe’s gift card to complete my projects. However, all ideas, opinions, & experiences are entirely my own.
Linked to: *Flamingo Toes, *Craft-O-Maniac Monday, *Home Stories A to Z


15 Responses
I love this and need to make some for my mantle now.
Great idea, Love the wedding photo. (You two are soooo cute.) 🙂
Aww, thanks, Carol! 🙂 After being constantly tired after having 3 boys, I feel like we look MUCH older now! 😉 Ha!
Wow, those are cool. I love the fact that they’d make great gifts!
Thanks, Kristin!
Oh, I want to do this! Totally pinning this to do next weekend. I might also make some for the baby’s room (just decorative, of course). I wonder what paint I would need to make them child safe? Oh, so many great possibilities! Thanks for sharing.
Thanks, Andrea! Instead of a spray paint, maybe try a kid-safe craft paint. 🙂 There’s also a kid-formula of mod podge that you could try if you wanted to go that route.
I’ve been looking for an easy project for my fireplace mantel and this may be it! Thanks so much for sharing this.
i love this project! I think I could handle it! Ps LOVE your wedding photos, so vintage chic, absolutely beautiful!!
I have been wanting to make blocks like this for all of the holidays! Cute!
I LOVE the love blocks!!
Great idea! Thx for sharing!
HOW CUTE!! Love it! Great project & you did a terrific job! 😉
Simply yet stunning. Those turned out great!
Thanks, what a lovely idea. I have to make these.