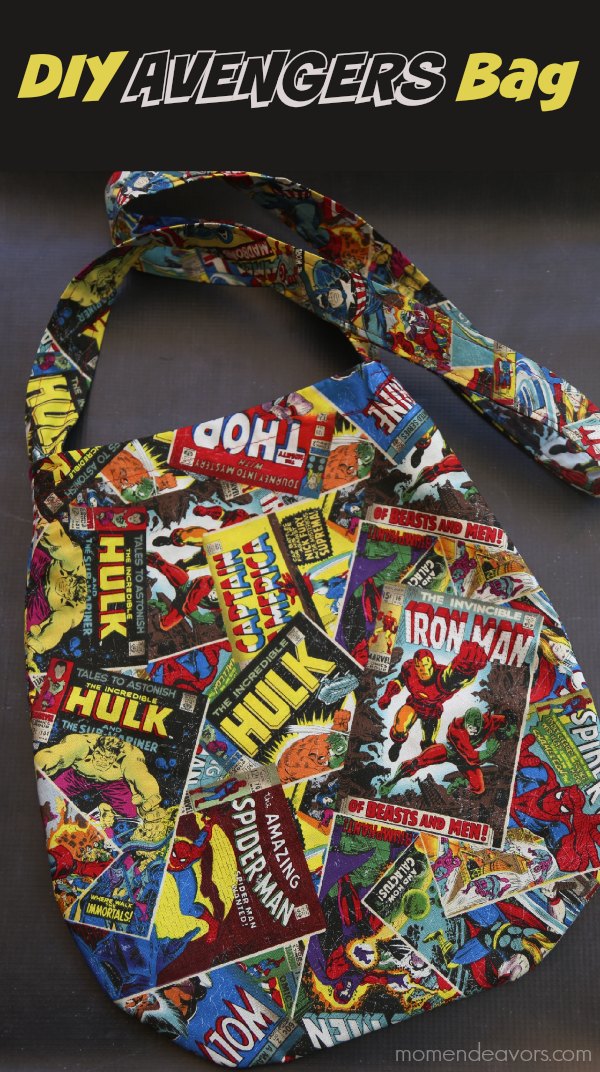
 As a “boy mom”, I’m no stranger to all the fun super hero action! In fact, we just had a BLAST at the Marvel Universe Live show and I’m at a special Avengers: Age of Ultron press event in LA! So, I bought a few new Marvel/Avengers themed items. But, then found some awesome Marvel Comics fabric and wanted to make something too! I almost made an Avengers fabric tie headband, but then decided on a simple cross-body bag to show off more of that fun fabric! And I love the way it turned out!!
  I found the fabric at a local craft store (Jo-Ann) and couldn’t pass it up. I bought 1.5 yards of it, which was plenty to do the bag. For added support a bag like this really needs double fabric (a piece for the outside and for the inside). You could go with a neutral solid or contrasting color for the inside of the bag. But, I just kept it super simple and went with the fun fabric on the inside too (especially since I had plenty).
Unfortunately, I don’t have an exact pattern tutorial for this, because we used an old bag that I already had at home for a pattern. If you don’t have that, you could buy a simple pattern or draw something out on your own. It really is quite simple – just a couple steps beyond making a simple pillow case! So really, even simple sewing skills will do!!! Below, I’m sharing a very rough overview of what we did to make this. 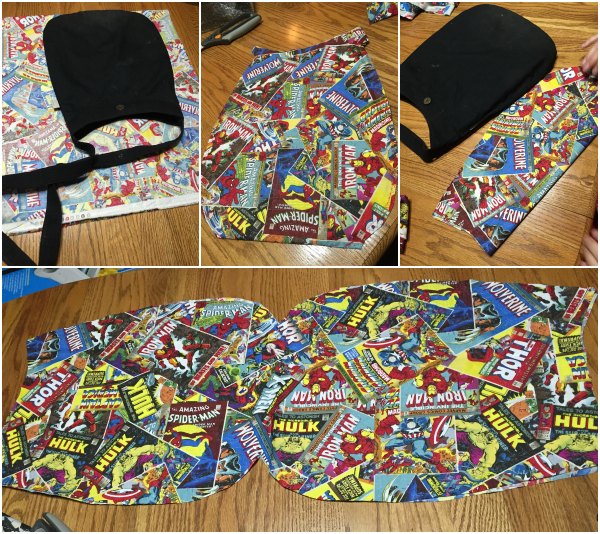 You’ll start by cutting out the fabric for the bag – both for the inside and outside (according to the pattern you decide on). If you fold the fabric (or keep the fabric on the fold from the bolt), then you won’t need to stitch along the bottom! Then, you need to adhere your two fabric pieces together. You can do a simple quick stitch or even just use some heat ‘n bond or fabric glue. Decide what will be the outside of your bag and the inside, then sew the fabric together to form the bag inside out! Cut access edges off & flip right side out (just like making a pillow case). And, at this point you would essentially have a pillow case, just with rounded corners instead of pointed.
  To make this a bag though, you’ll need a strap. So, we cut a long piece of fabric and folded it over on itself. To keep the edges nice, we sewed this inside out and then flipped it. But, that took FOREVER! I would recommend buying a tool to do that OR just using heat ‘n bond to “sew” the edges together. To keep the fabric flat, I recommend sewing a simple straight stitch down the whole strap at least twice! Once you have the strap, you’ll sew it to the inside of the bag – making sure you go over it a few times so it’s well reinforced!
 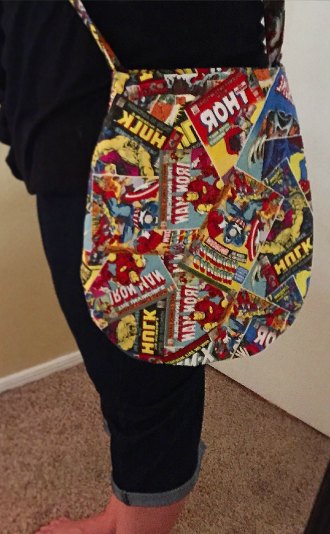 If you want (and have the supplies/skills), you can certainly add a snap, button, or velcro for a closure. But, as is, it’s a simple & cute (yet still functional) bag! Definitely a relatively inexpensive & simple way to add some themed flair to your outfit! And, you have plenty of time to get this one done before Avengers hits theaters on May 1st!! I actually just got to see the movie tonight at Walt Disney Studios (and yes, I wore this bag)…and it’s REALLY good!!


One Response
I am not great at following sewing tutorials but I definitely want to attempt this one!