It’s been a frightfully crazy weekend! In addition to all of the Monsters fun I’ve been sharing here, we had something not so fun happen..as Little Brother broke his arm on Friday! It’s our first time dealing with a break around here, so it’s been a little stressful on this mama. But, thankfully, he was so much better today that we were able to all go see Monsters University! He loved it ( I think I liked it even better the second time!!)!! And, for some extra fun, I made these Mike & Sulley Monsters oreo pops! 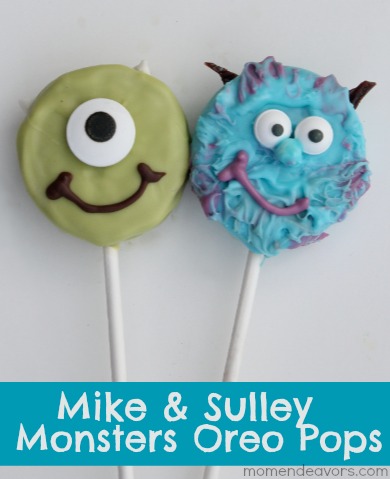 Little Brother just about screamed with delight when he saw these! Fitting for the top scaring team, don’t you think?! 😉 I had so much fun making these! To make your own Monsters oreo pops, here’s what you’ll need:
- Oreos (Double Stuff are preferable)
- Candy Melts/Bark Coating (chocolate, vibrant green, blue, and lavender)
- Popsicle or lollipop sticks
- Candy eyeballs (both large and small)
- marshmallows
To make:
Start by placing the sticks into the cream layer of the Oreos. It can help everything stick better if you dip the end of the stick in the chocolate first. Then, as it hardens, it helps hold the stick in place. If you don’t have double stuff, then flat popsicle sticks definitely work better. Then, melt your chocolate/candy melts according to package directions. I always just put them in a bowl & use the microwave–way easier that way! Coat each “oreo on a stick” with melted “chocolate” (vibrant green for Mike Wazowski and blue for Sulley). I usually sort of pour it on instead of trying to dunk them in the bowl.  I tried to smooth down the front of the pops as much as possible for Mike, but left Sulley a little “messy”. To cool & harden, I usually just prop them up in glasses. While the “chocolate” was still melty & warm, I stuck in the horns. For Mike, I cut little, triangular-shaped sections of marshmallows. You could totally do the same for Sulley, but I happened to have some chocolate twizzlers from a previous decorating project. So, I cut little sections and used them for Sulley’s horns. Then, I put them in the fridge to harden!
While those were cooling in the fridge, I melted the lavender and chocolate. Then, I put those each into separate baggies so that I could “pipe” it on to the Oreo pops! Once hardened in the fridge, you can take out the pops to add details. For Mike, use a little dab of the melted “chocolate” to attach one large eye. Then, pipe on the chocolate for mouths! I had fun trying different “Mike” expressions! 😉 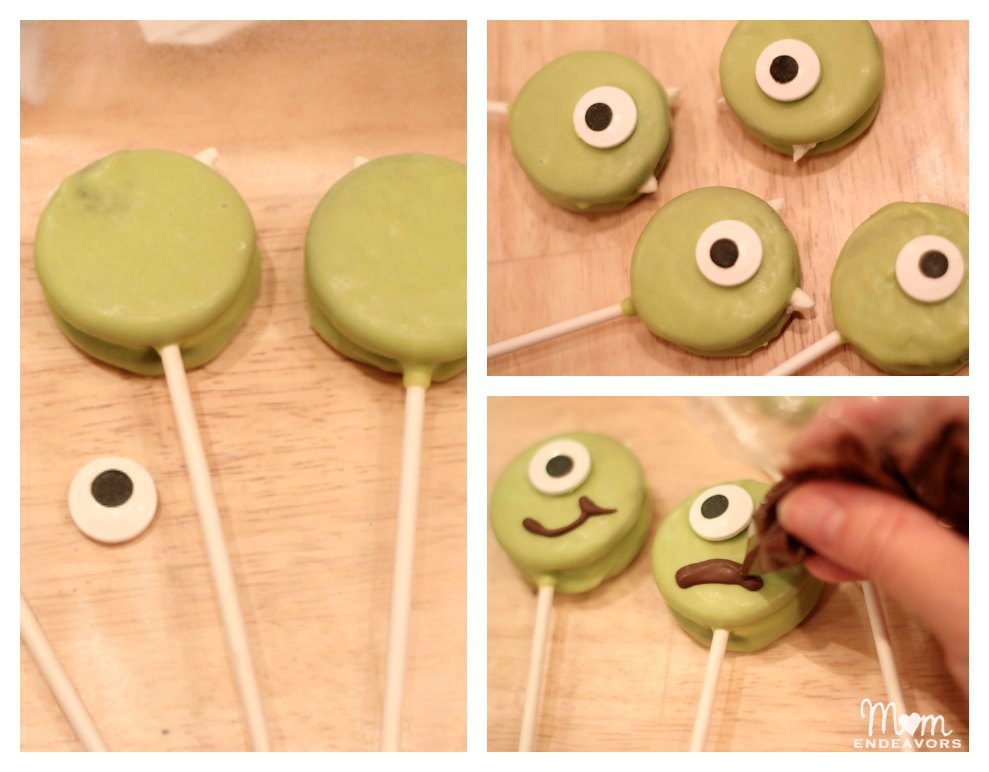 Sulley was a little more complicated. I started by adding the two smaller eyes. But, he didn’t look quite right without a nose. So, I snipped off pieces of marshmallow, covered them with the melted blue “chocolate”, and stuck on for noses. I added some extra blue above the eyes (for eyebrows), some purple spots, and a purple Sulley half-smile. Then, I decided to make them look a little “hairy” by just using the end of one of the lollipop sticks dipped in a now slightly less “melty” blue and smeared it around a bit.
  Not an exact replicable, but I think they were still pretty cute…I mean scary! 😉
 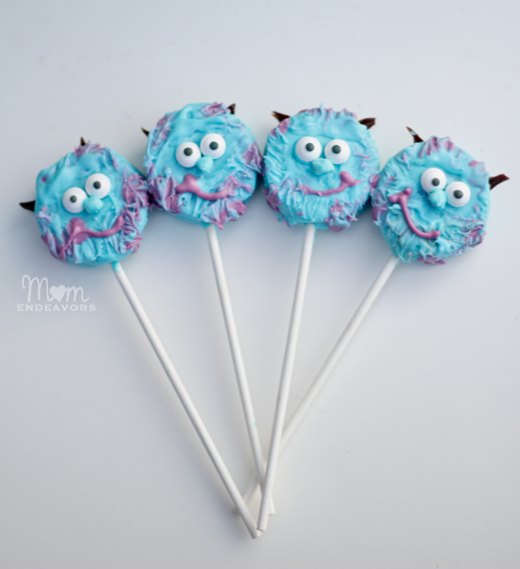 These are sure to be a hit with the kids and perfect for a Monsters-themed party! Perfect for a frightfully good time! 😉
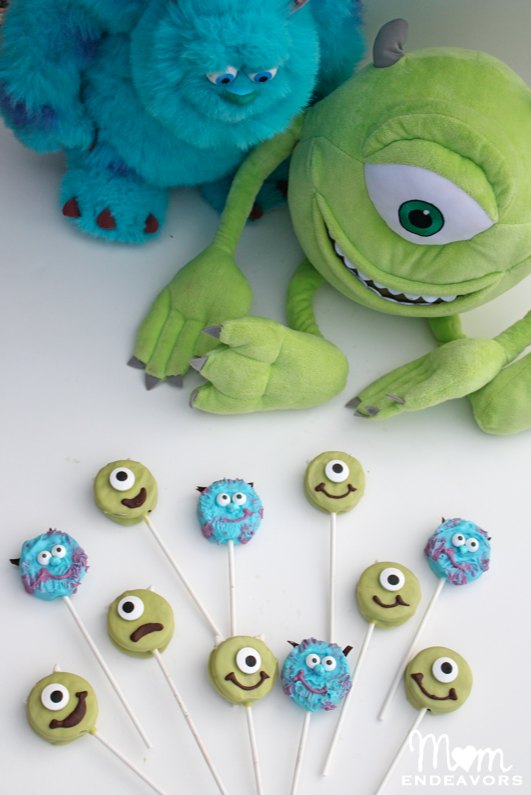
So, who is YOUR favorite… Mike or Sulley? 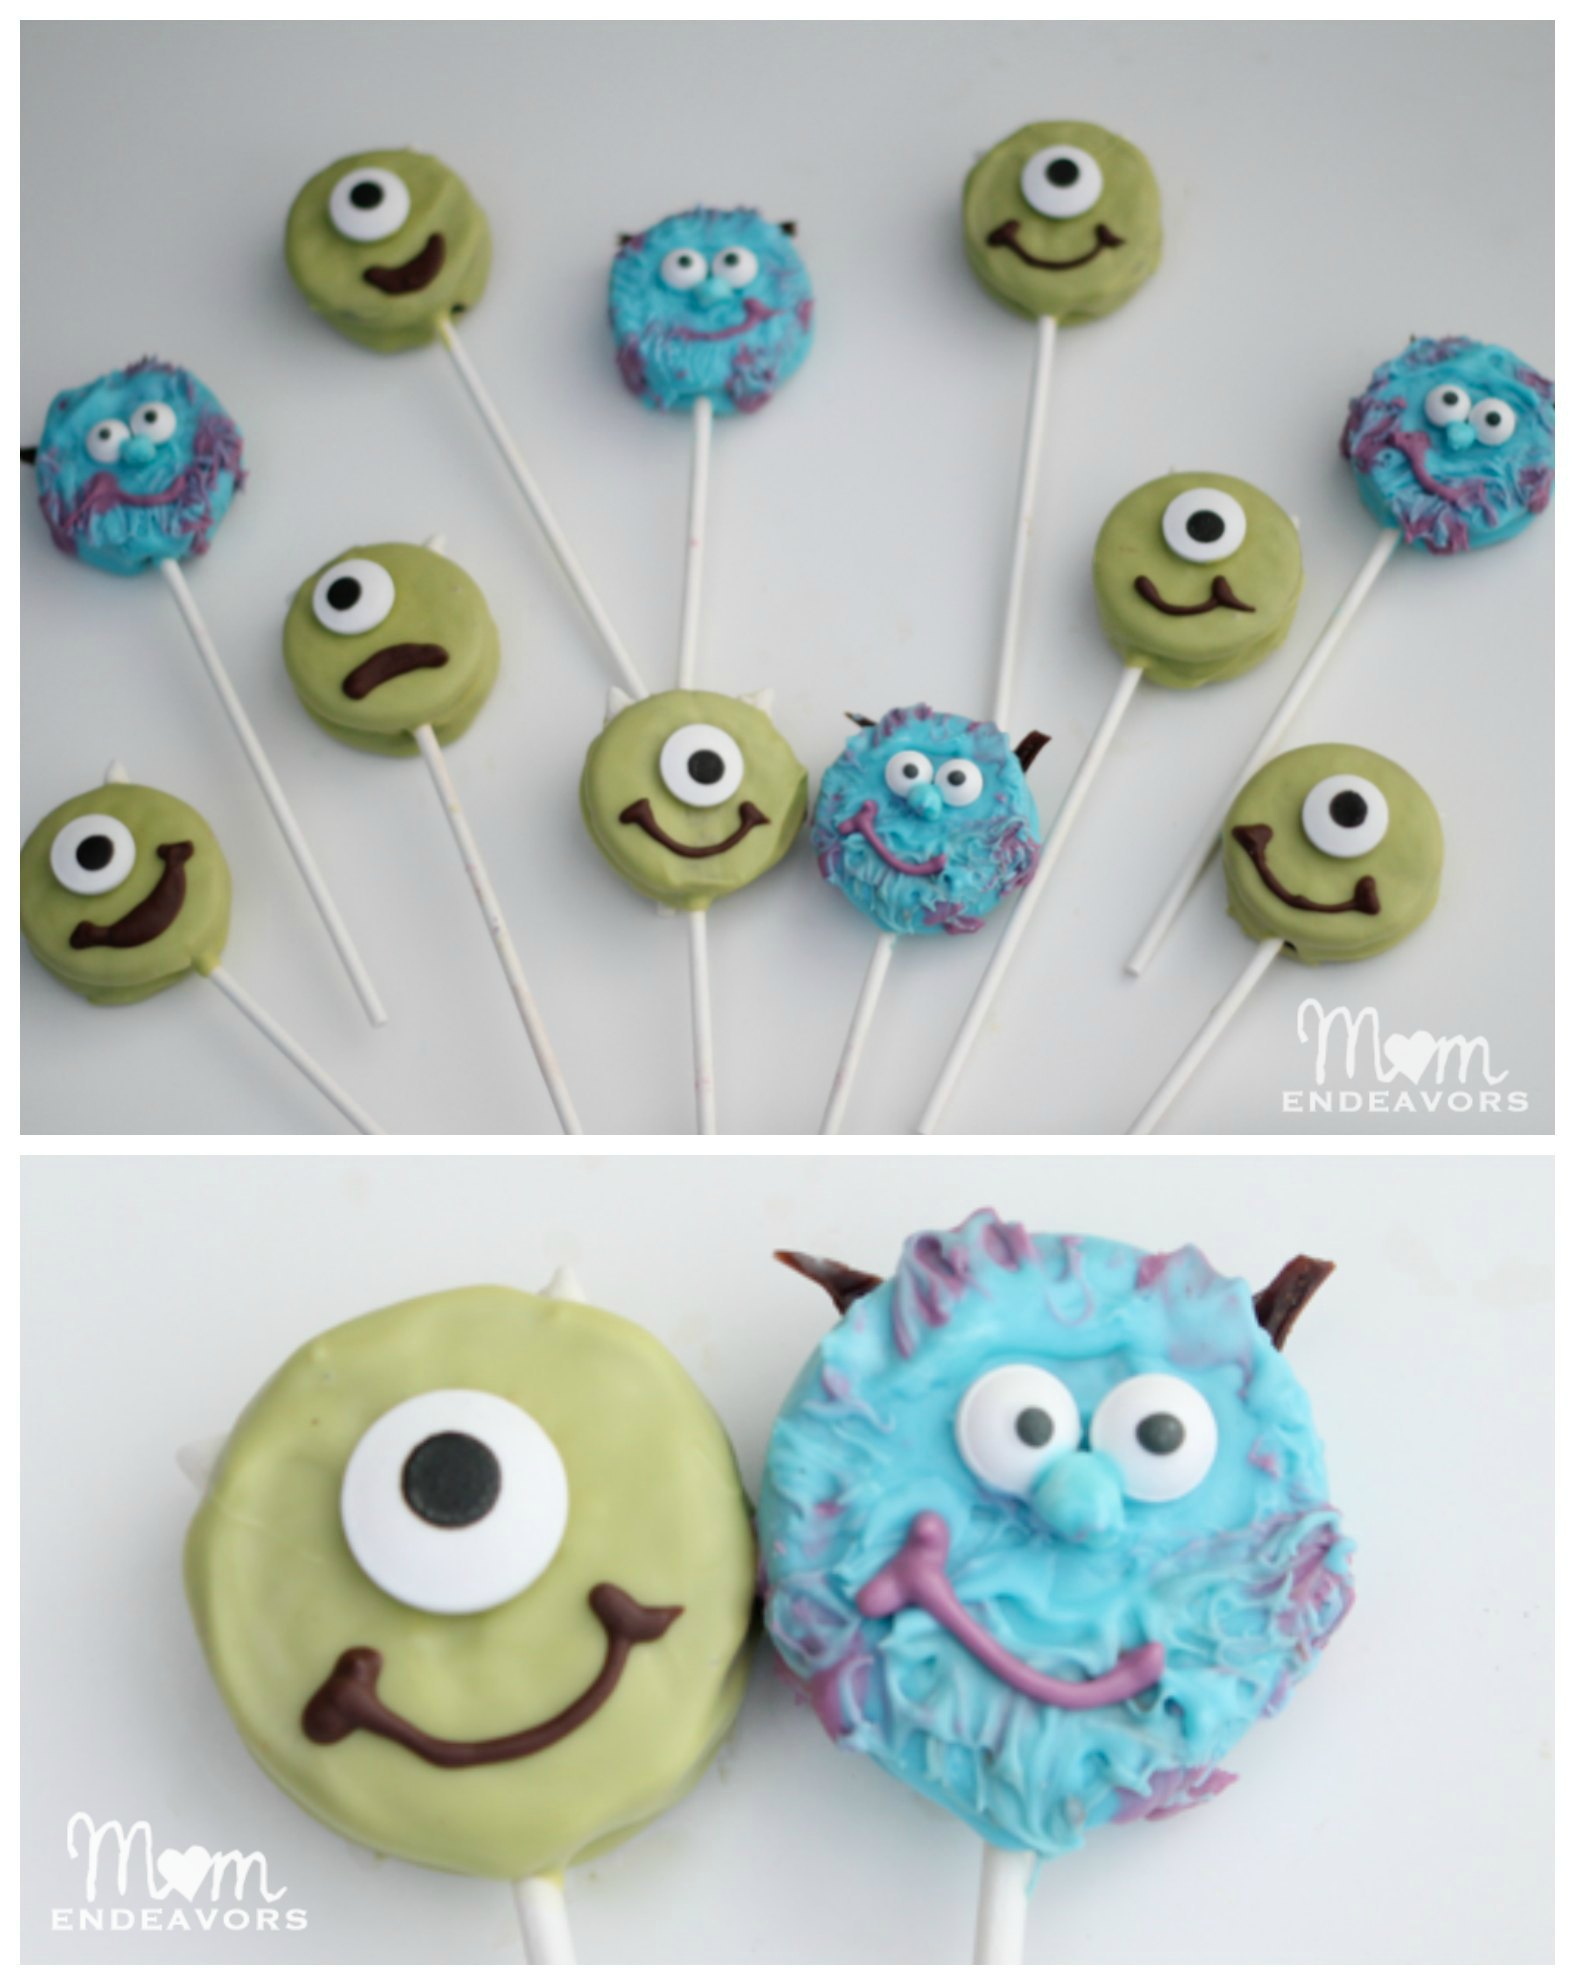
For more Monsters fun, you can check out the following posts:
- Monsters University Movie Review
- Monsters University Printable Activity Sheets
- Mike Wazowski Monster Green Smoothies
- Mike Wazowski Monster Apples
- Monsters University Cereal Treat Bars
Linked to: *Skip to My Lou


20 Responses
so cute!
Thanks, Ashlee! Coming from you with mad cake decorating skills, that is a huge compliment! 🙂
OMG these are adorable. What kid (or adult ) would not LOVE these!
Ha! Thanks, Carol! They were so fun to make!! 🙂
These are so cute! You did a much better job with Sulley then me! I love them!!
Thanks, Karen! Your cupcake cones were great! 🙂
So cute! I love this!
Thanks, Amy!!
Those are awesome!!! And adorable!
Thanks, Gena!
Those are Adorable! I am sharing your creativity by pinning you. Thanks so much for sharing your talents.
lisa from Princess Mousey Cards
Thanks so much for commenting & pinning, Lisa!! 🙂
Absolutely adorable! You did an amazing job. My kids would freak if I made these for them. We loved the movie!
Thanks, Erin!! 🙂
Awesome idea! about how long do they take to make? I am on a tight schedule and would love to make these. Probobably about 50 – 60 of them!
Thanks, Michelle! That’s tough to say. Mike is easier than Sully. It totally depends on how “perfectionistic” you are with stuff like this. The more you make, the fast you’ll get. But, 50-60 is a lot!!! Maybe 2 hours? Just a guess though! Good luck!
These are really amazing.
Wow! They are really cute? How do you make Mike’s eyes? Thanks!
Thanks! They’re just the large candy eyes you can purchase!