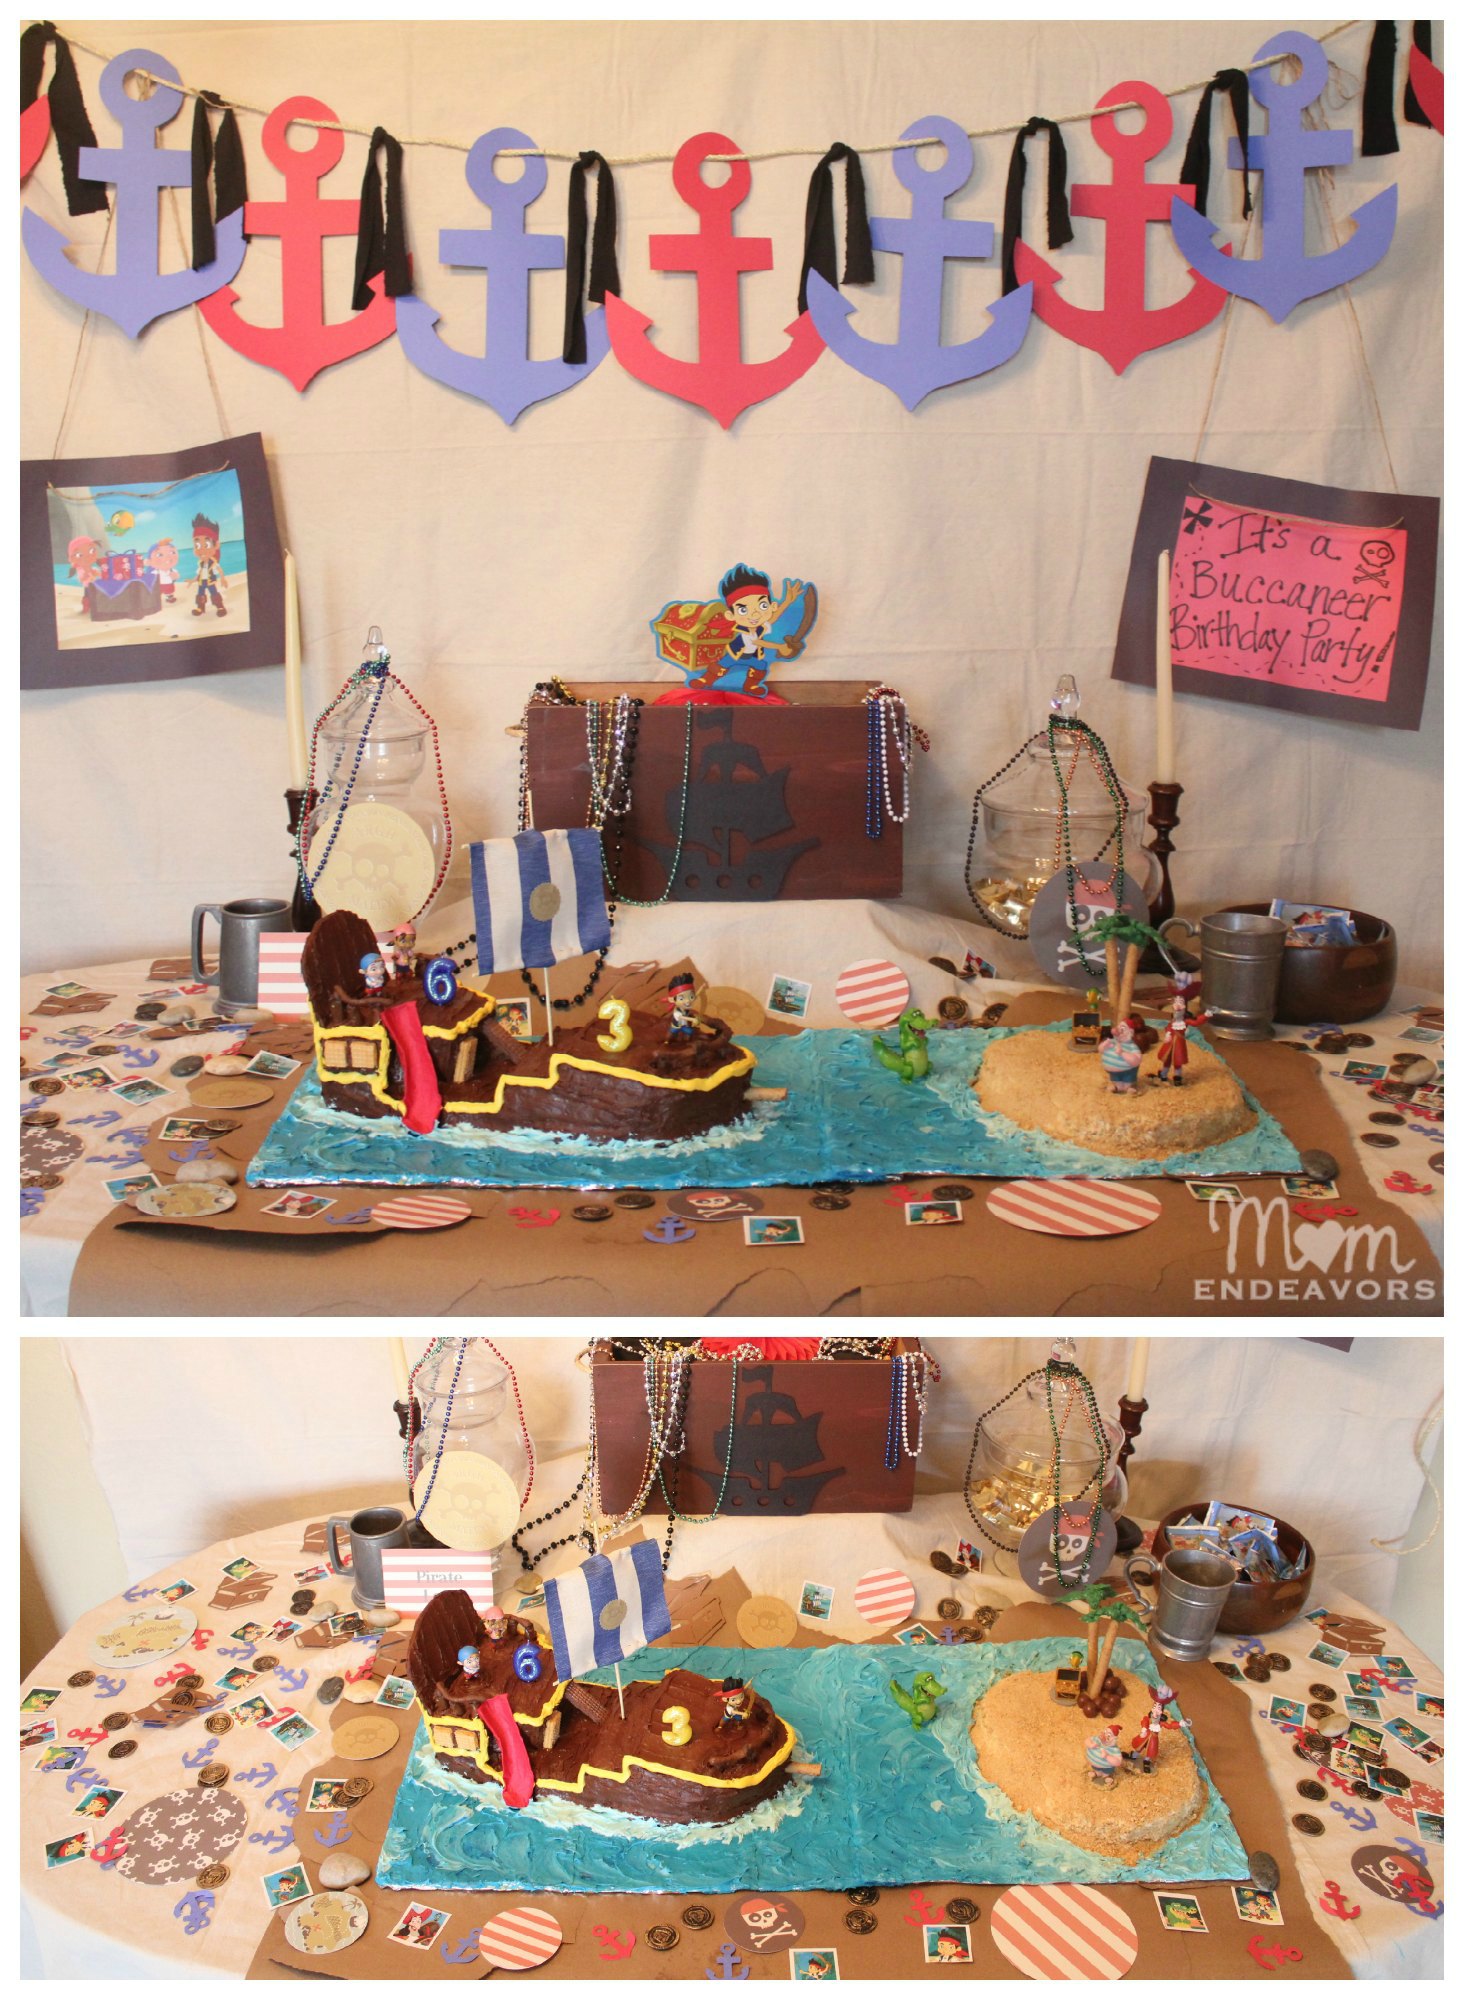
Finally. After a couple of months and numerous emails since the Jake and the Never Land Pirates Birthday party, I’m sharing details on how I made a Bucky cake (that’s Jake’s Pirate ship). I was super nervous about doing this cake. Not only was the pressure on to make a cake that actually was shaped like a pirate ship, but the boys wanted it to look just like Bucky! But, I LOVE how everything turned out! The best part is that it really wasn’t that hard and there weren’t any fancy ingredients–no fondant or anything like that. In fact, this cake is just made from plain ‘ole boxed cake mix and store-bought frosting (gasp. really!)! So, without further ado, here’s a full tutorial on how to make your very own Bucky pirate ship cake! 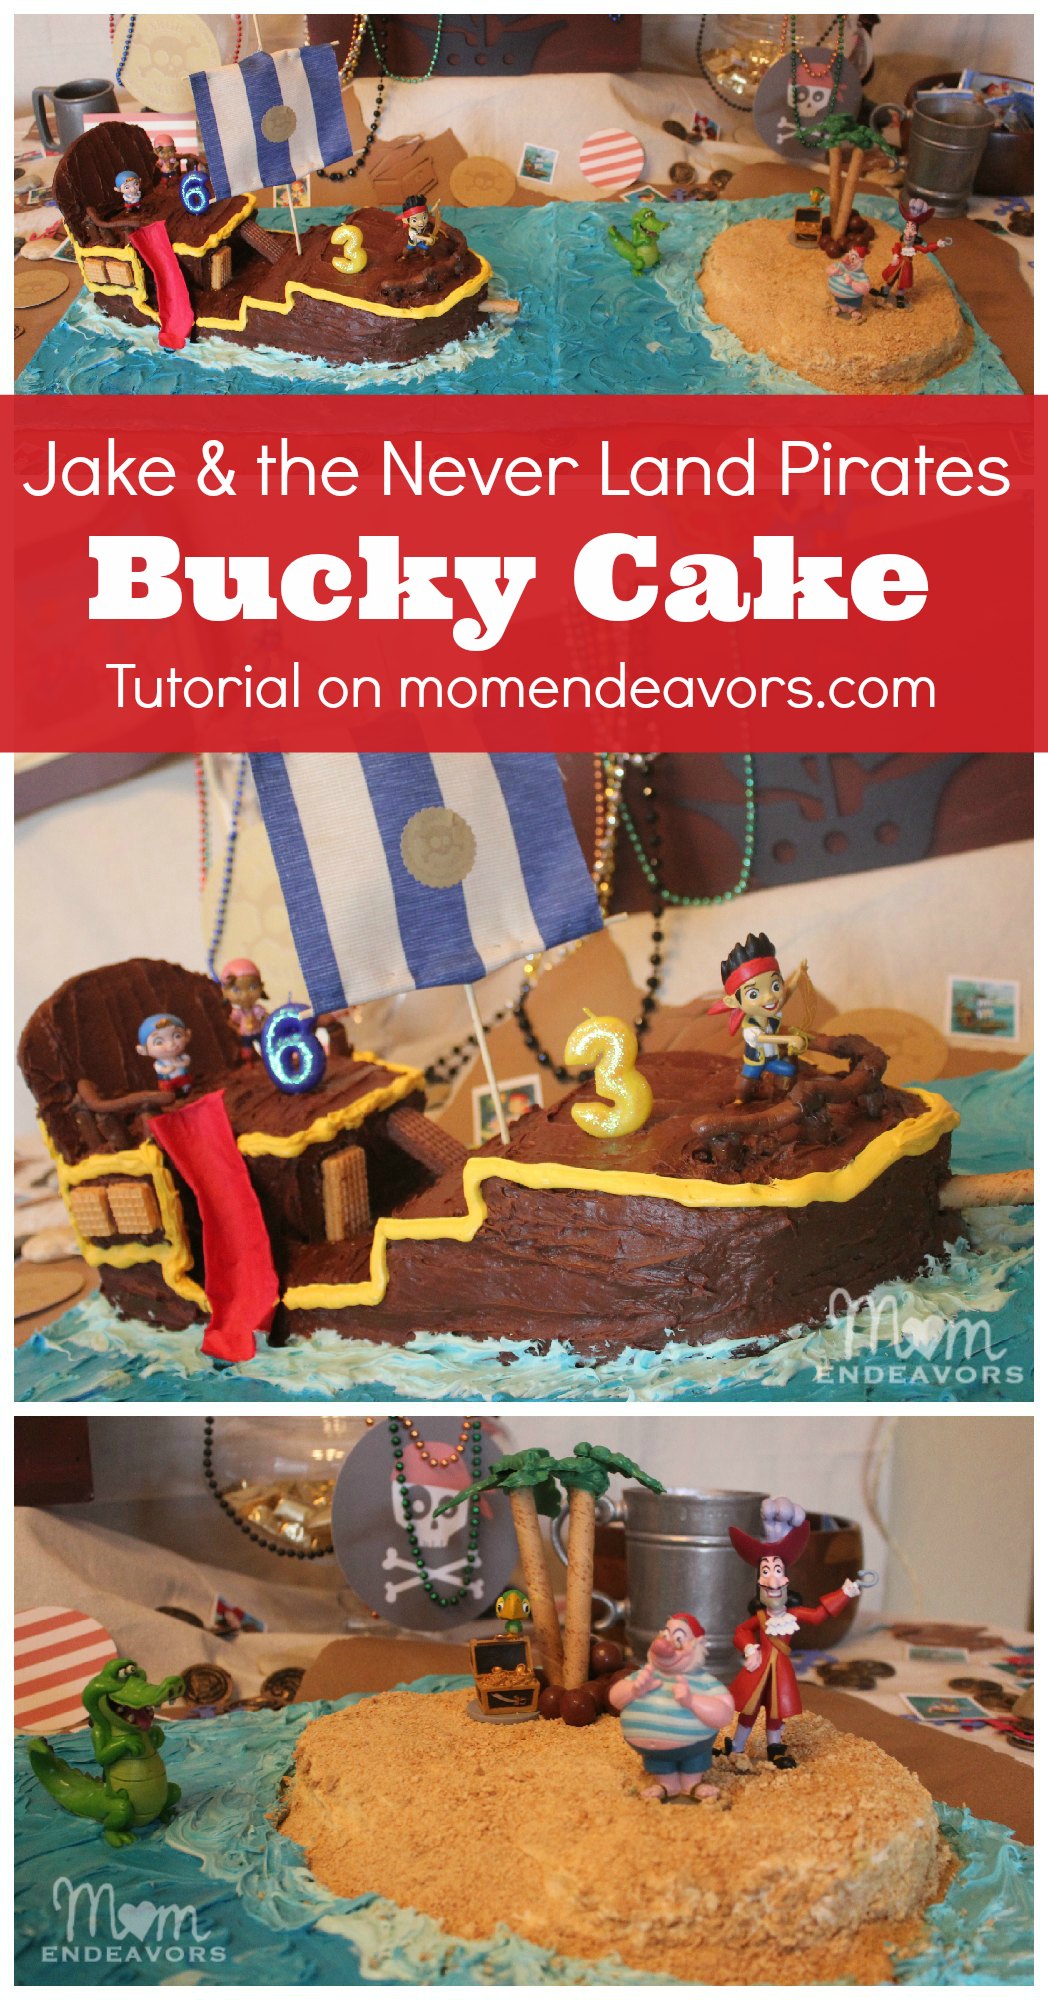 To make a Bucky cake & little pirate island just like this, here’s what you’ll need:
- 3 cake mixes (or your favorite cake recipe…I just used yellow cakes)
- Chocolate and white frosting (You’ll need two-three tubs of each or vats of your own homemade recipe).
- Blue & yellow food colorings (I prefer the powder if you can find it)
- Wafer cookies
- Tootsie rolls
- Whoppers
- Rolled Wafer Cookies (like Pirouettes from Pepperidge Farms)
- Green candy melts
- Crushed graham crackers
- Bamboo skewers
- Small piece of blue & white striped fabric
- Cardboard
- Aluminum foil
- Small piece of a red plastic tablecloth (or bright red fruit roll up)
- Jake and the Never Land/Neverland Pirates 7 Piece Action Figure Figurine Play Set
(affiliate link)
I did use quite a few different items, but nothing hard to find or difficult to work with. When making special cake designs like this, I really recommend baking the cakes at least the day before. Our party was on Saturday evening, so I baked the cakes Friday evening and then put them in the fridge. That way, everything is very cool, making it easier to cut, the frosting go on better, etc. I did the decorating on Saturday morning. Also, I recommend decorating the cake on a piece of sturdy cardboard wrapped in aluminum foil (I usually just cut pieces from cardboard boxes).
I wasn’t sure exactly how much cake I would need, but ended up going with the three cake mixes. With those, I did a 9×13 pan, 1 large loaf pan (yes, cake in a loaf pan), and 2 rounds. It ended up working out really well and I used the leftovers to make the little pirate island.So, that’s how I started. For the base of the ship, I used the 9×13 cake. But, it was way too wide, so I cut in half (to give me 2 long pieces). Then, began the ship construction. I started with the back of the ship by cutting one end of the loaf pan cake and cutting some strips off the remaining half of the 9×13 cake. I then put those all together to make the deck-like structure. Make sure you put frosting in between each layer to help hold everything together! And, for some additional support, I stuck a couple of skewers through it! 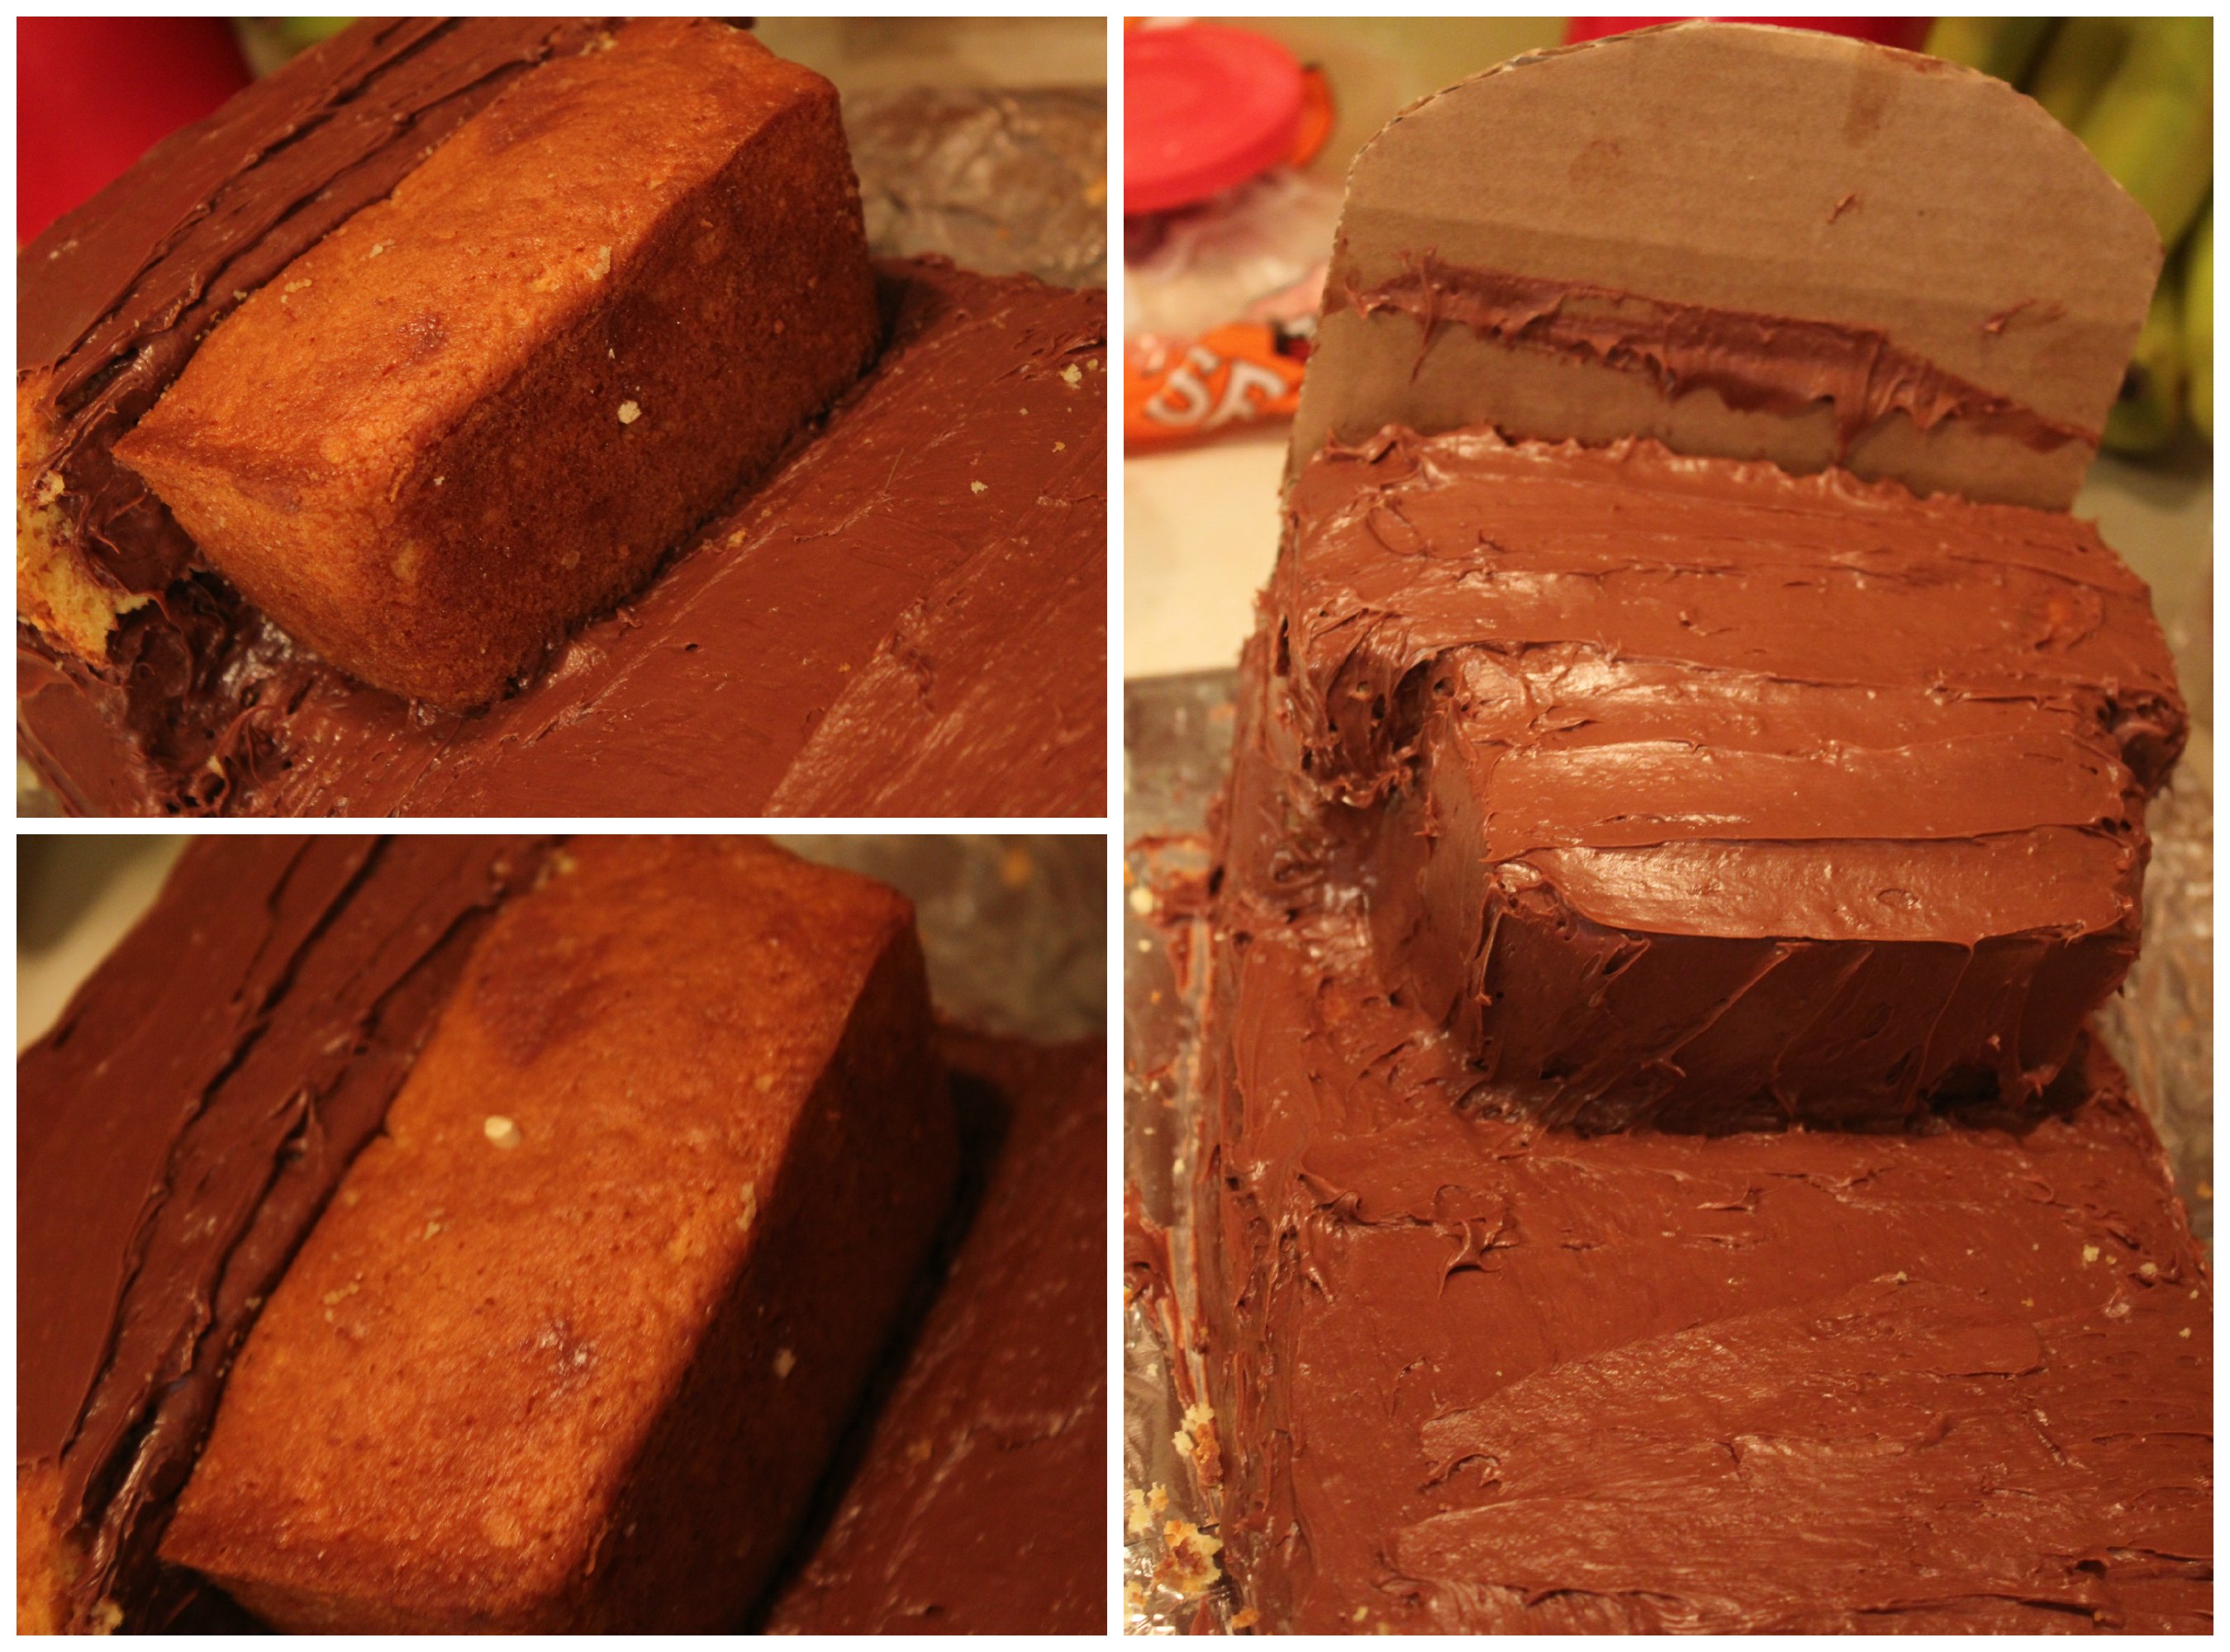 There was NO way the back arch of the ship was going on with something edible. So, I just used a cut piece of cardboard (from a food box), covered with frosting, and helped attach it by poking toothpicks through it. By the end of the night, it had started to come away from the rest of the cake just slightly, but really not too bad at all! Now…to the front of the ship (I was most nervous about this part!)
For the front, I used part of all of the cakes again. I cut one of the round cakes in half and stacked them together for the front. Then, I used sections from the remaining 9×13 half and the loaf pan cake. Once I had things arranged that way I wanted, I then carved the edges a bit, making it look just a little bit more pointed instead of a perfect round shape. I tried to even attach an extra piece on the front end, but it fell apart trying to frost it. The ship looked fine without it! 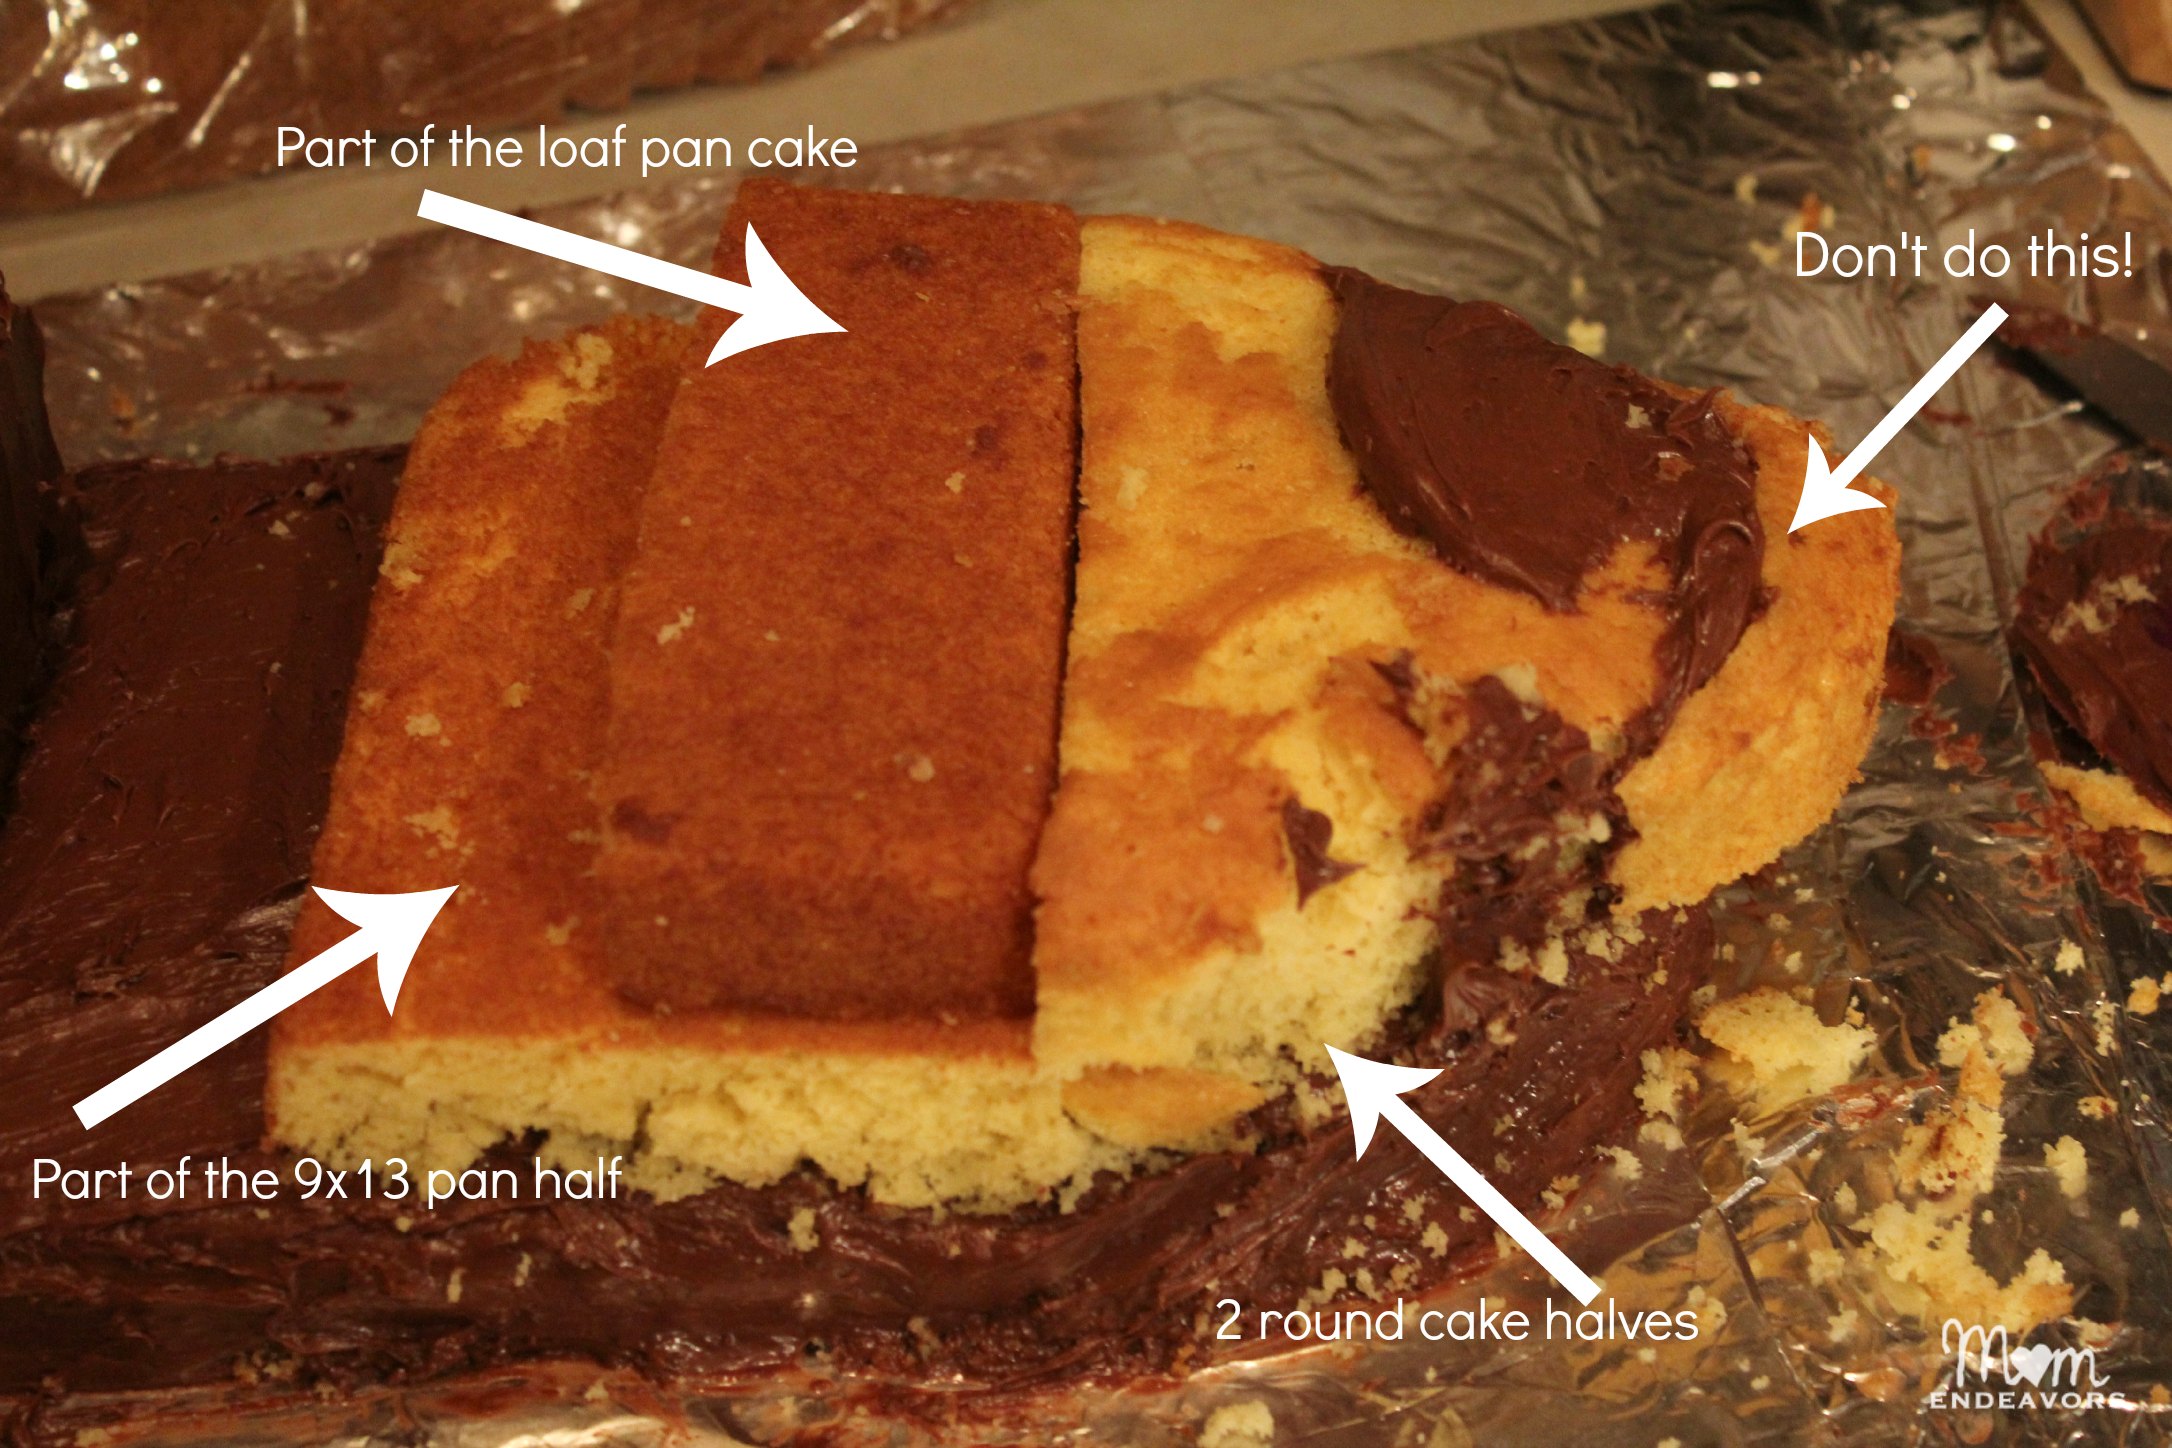 Once all those pieces are in place, then do one generous layer of frosting (your crumb coat) over the entire cake. Then, place it in the fridge for a bit. While that was in the fridge, I decided to make use of the remaining cake pieces (no part of my original cake plan) and do a little pirate island. So, I cut another piece of cardboard (to match the width of the one for the ship), covered in foil, and started to work on the island. I used the remaining cake round (cut in half) and the remaining section of the 9×13 half. Put the pieces together and cover with frosting. I wanted a non-chocolate option for party goers, so I used a cream cheese frosting. Since the whole cake gets covered in crushed graham cracker, you don’t have to worry about your frosting job at all! 🙂 Once you’ve got it slathered, the cover the whole thing in crushed graham crackers (I just put a whole sleeve of the in a biggie and smash them with something ;))!
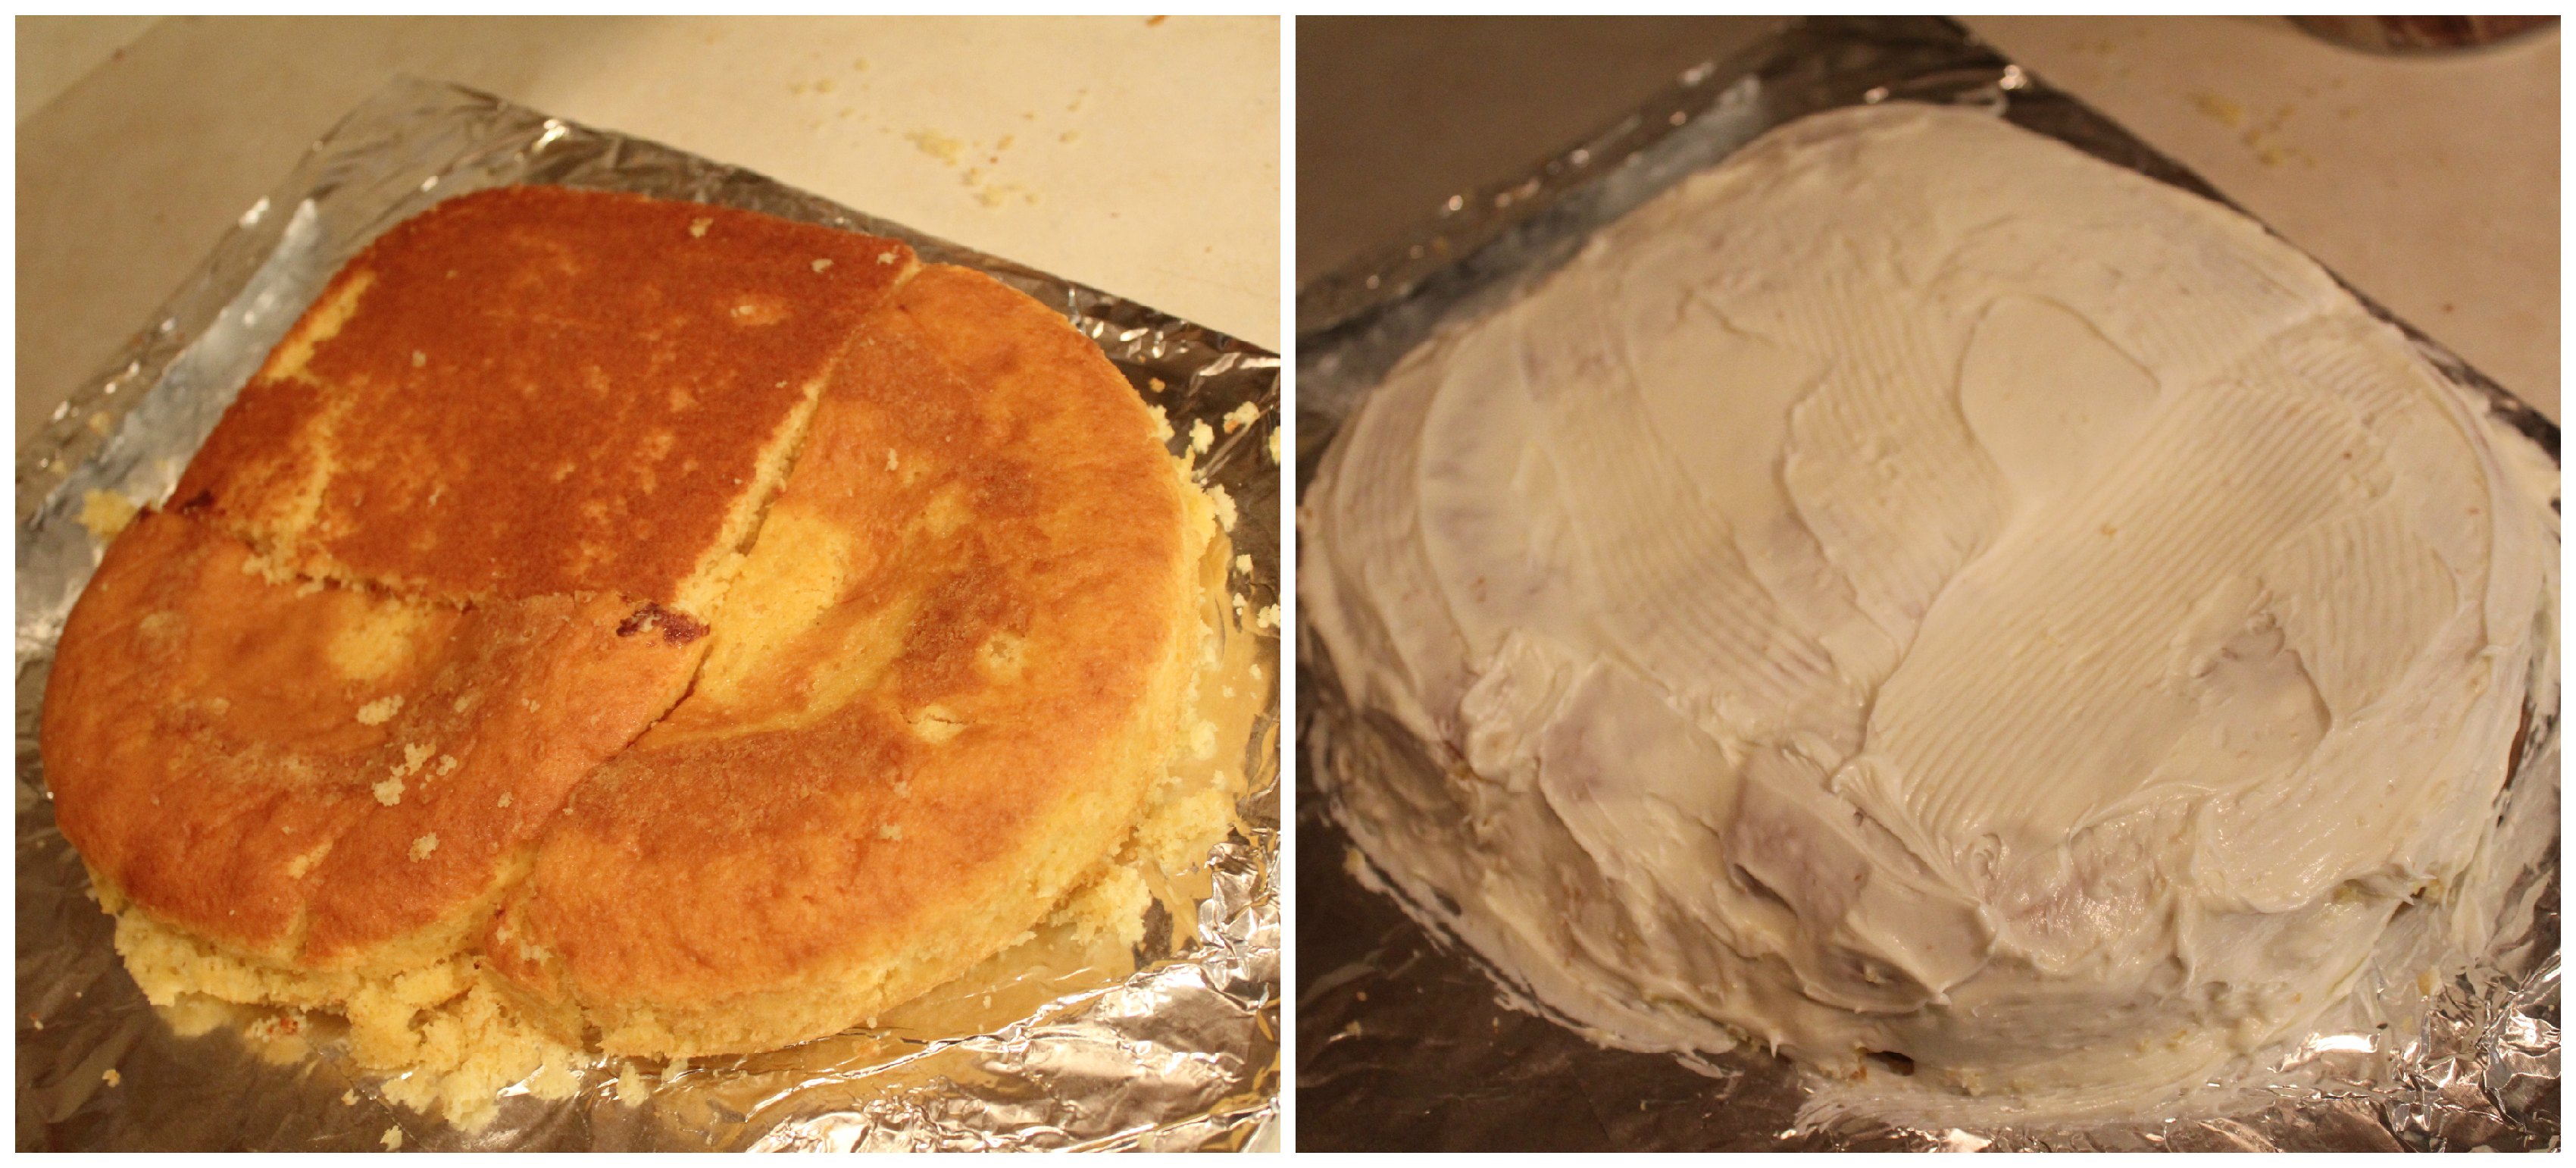 Then, I set that aside and got started on all the real decorating! First up, you need to do a second coat of frosting on the ship (to cover up the crumb coat). Then, you can get to work on all of the embellishments. I used cut wafer cookies for the windows & ramps) and rolled tootsie rolls for the railings. For those, I used the small tootsie rolls (for the beams going into the ship) and rolled out tootsie rolls into longer, thinner strands to be the railing on the top. To stick them together, I just used some frosting. On the very front of the ship, I stuck in one of the rolled wafer cookies. It was really started to come together, but something was missing–Bucky’s bright red slide. A bright red fruit roll up would have potentially worked well as an edible item, but I didn’t have any (I had planned for that). So, I took some aluminum foil and shaped it like a slide, then covered it with a piece of red plastic table cloth. It worked GREAT and really helped the ship look like Bucky.
 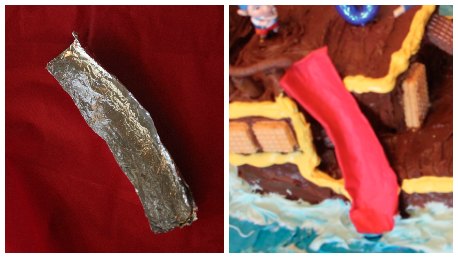 Once that was attached (just stuck on to the frosting), I then outlined the ship in yellow by piping yellow frosting all the way around. Last step was adding the mast & the characters (I let the boys pick where they should go). To make the mast we lashed together a couple of bamboo skewers (one broken in half) and attached a small piece of blue & white striped fabric (from the GIANT outside DIY Mast). To hold the “sail” on to the skewers, we literally just stapled it!
Since I still had some time, I did some embellishments then on the pirate island cake too. For that, I made edible palm trees. I had made some years ago (for Big Brother’s 2nd Birthday) and it was time to try them again. They’re a bit tedious, but so fun to have fully edible stuff! To make the palm trees, you need to melt down green candy melts (green melting chocolates) and place the melted “liquid” in a plastic baggie. “Pipe” on a sort of palm frond shape on the back of a spoon (covered in foil or parchment). Let those harden in the fridge. 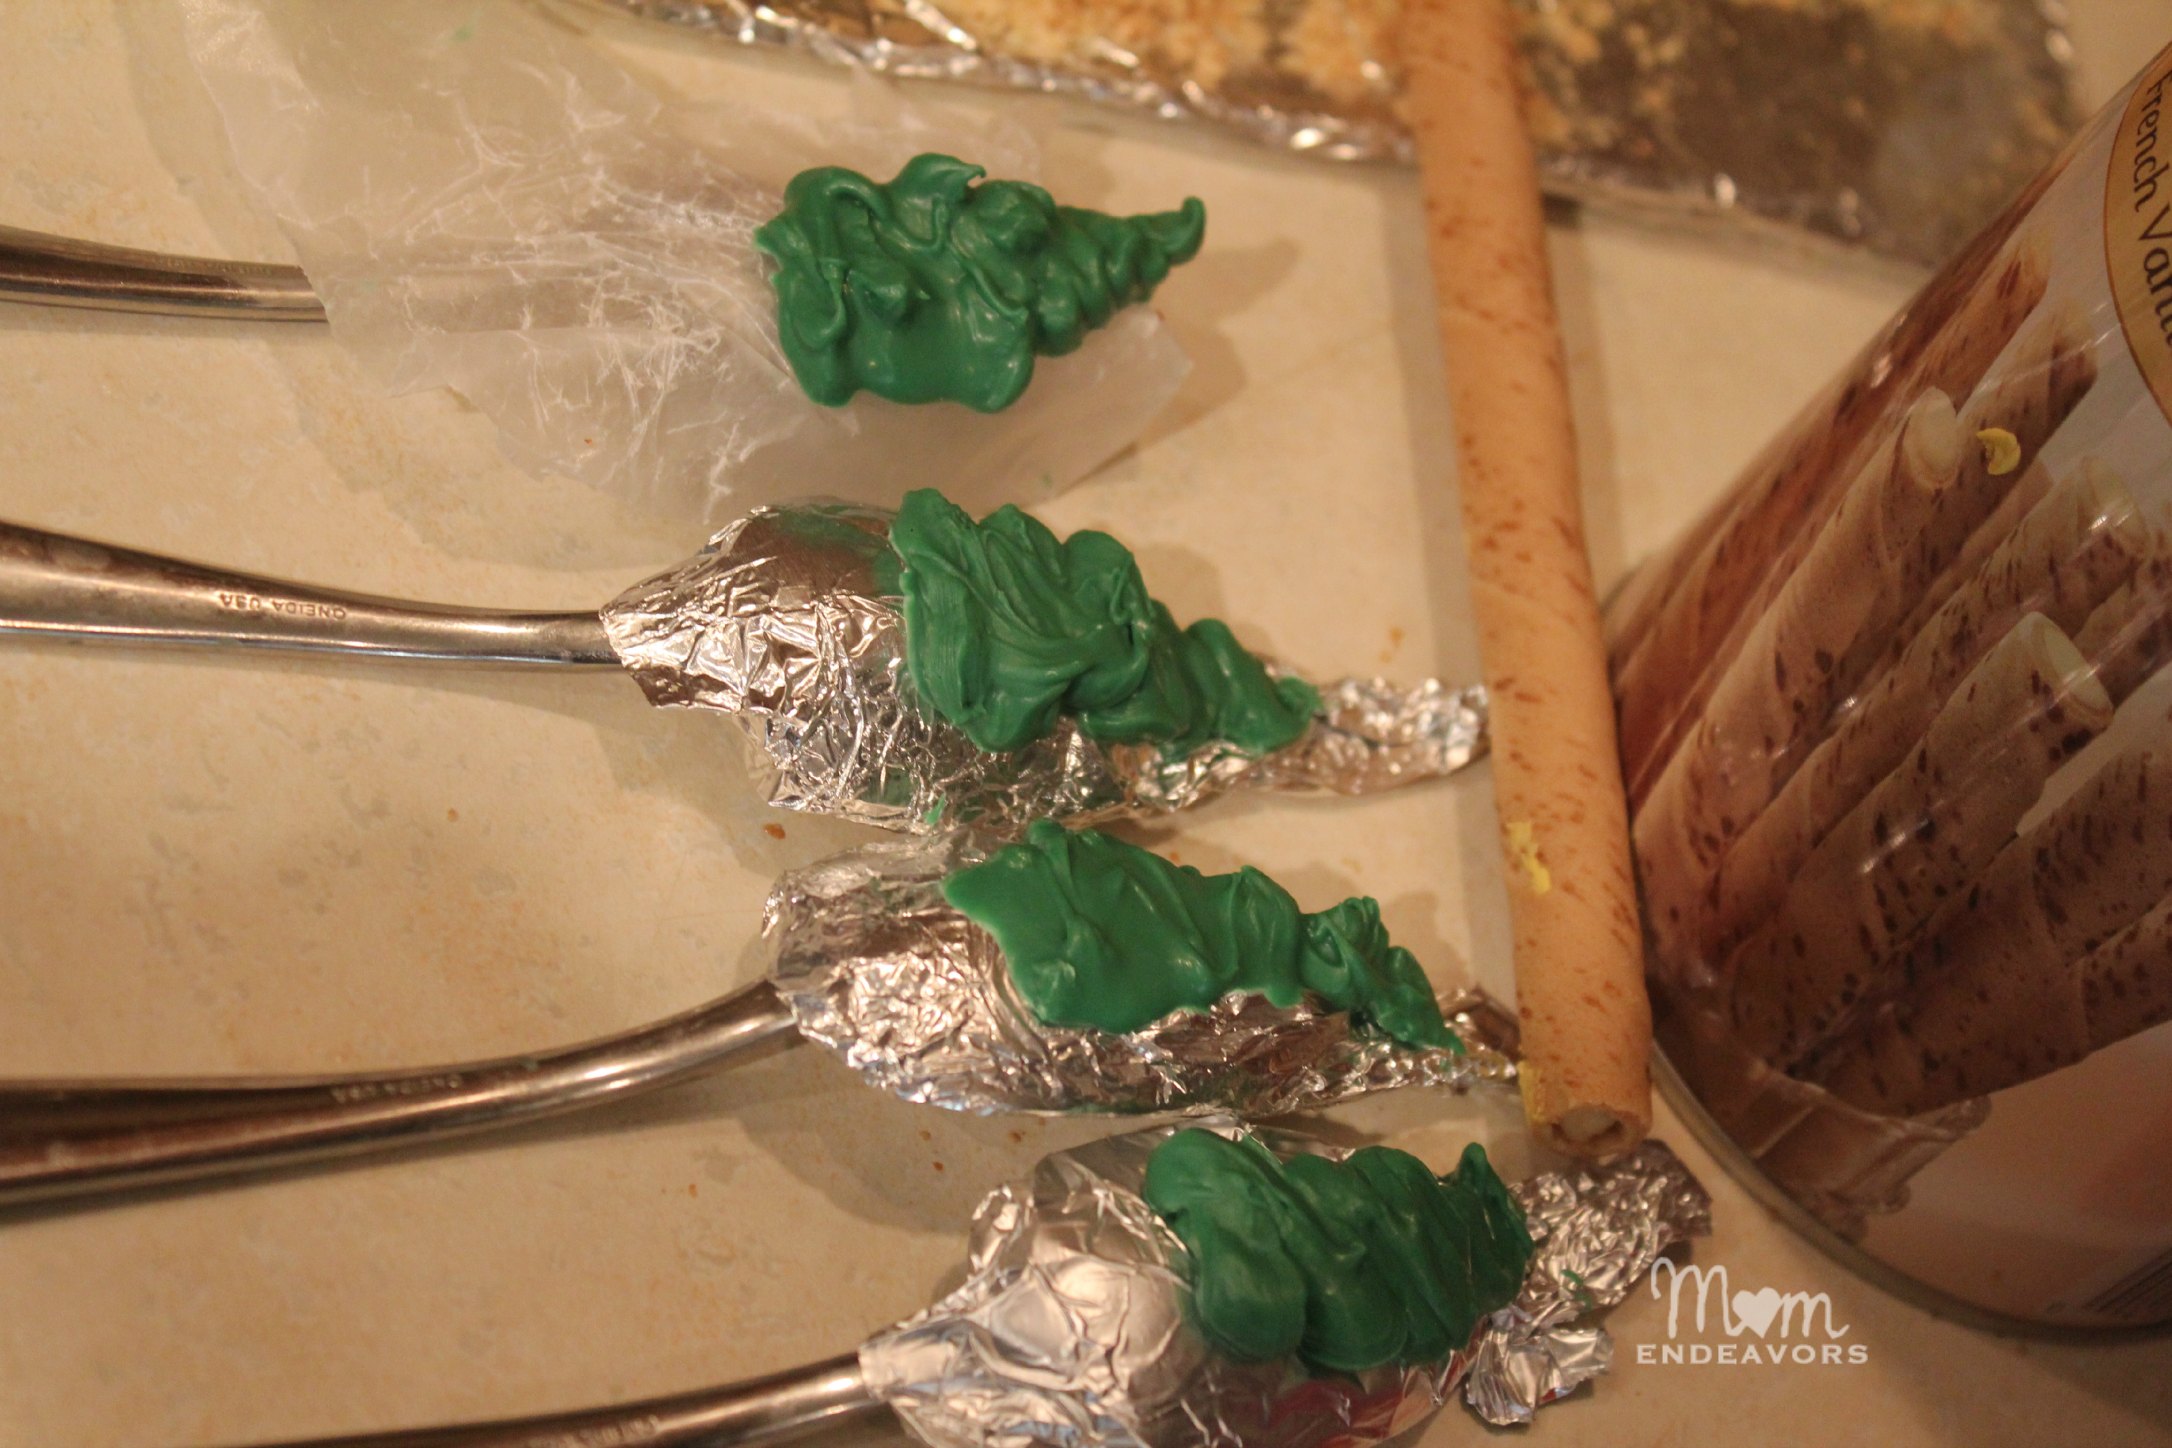
Then, to make the palm trees, gently peel the “fronds” off the spoons and attach them to one end of the rolled wafer cookies. I actually stand the rolled wafer cookies in a cup to do this part. To attach, use some of the melted chocolate (you will need to sit and hold in place for a minute or two). Once the “fronds” are stuck on, then move to the desired location on the cake. For added fun, add some malted milk balls (coconuts)! So, yes, this is indeed a bit tedious. But the end result is all edible and super fun, like this…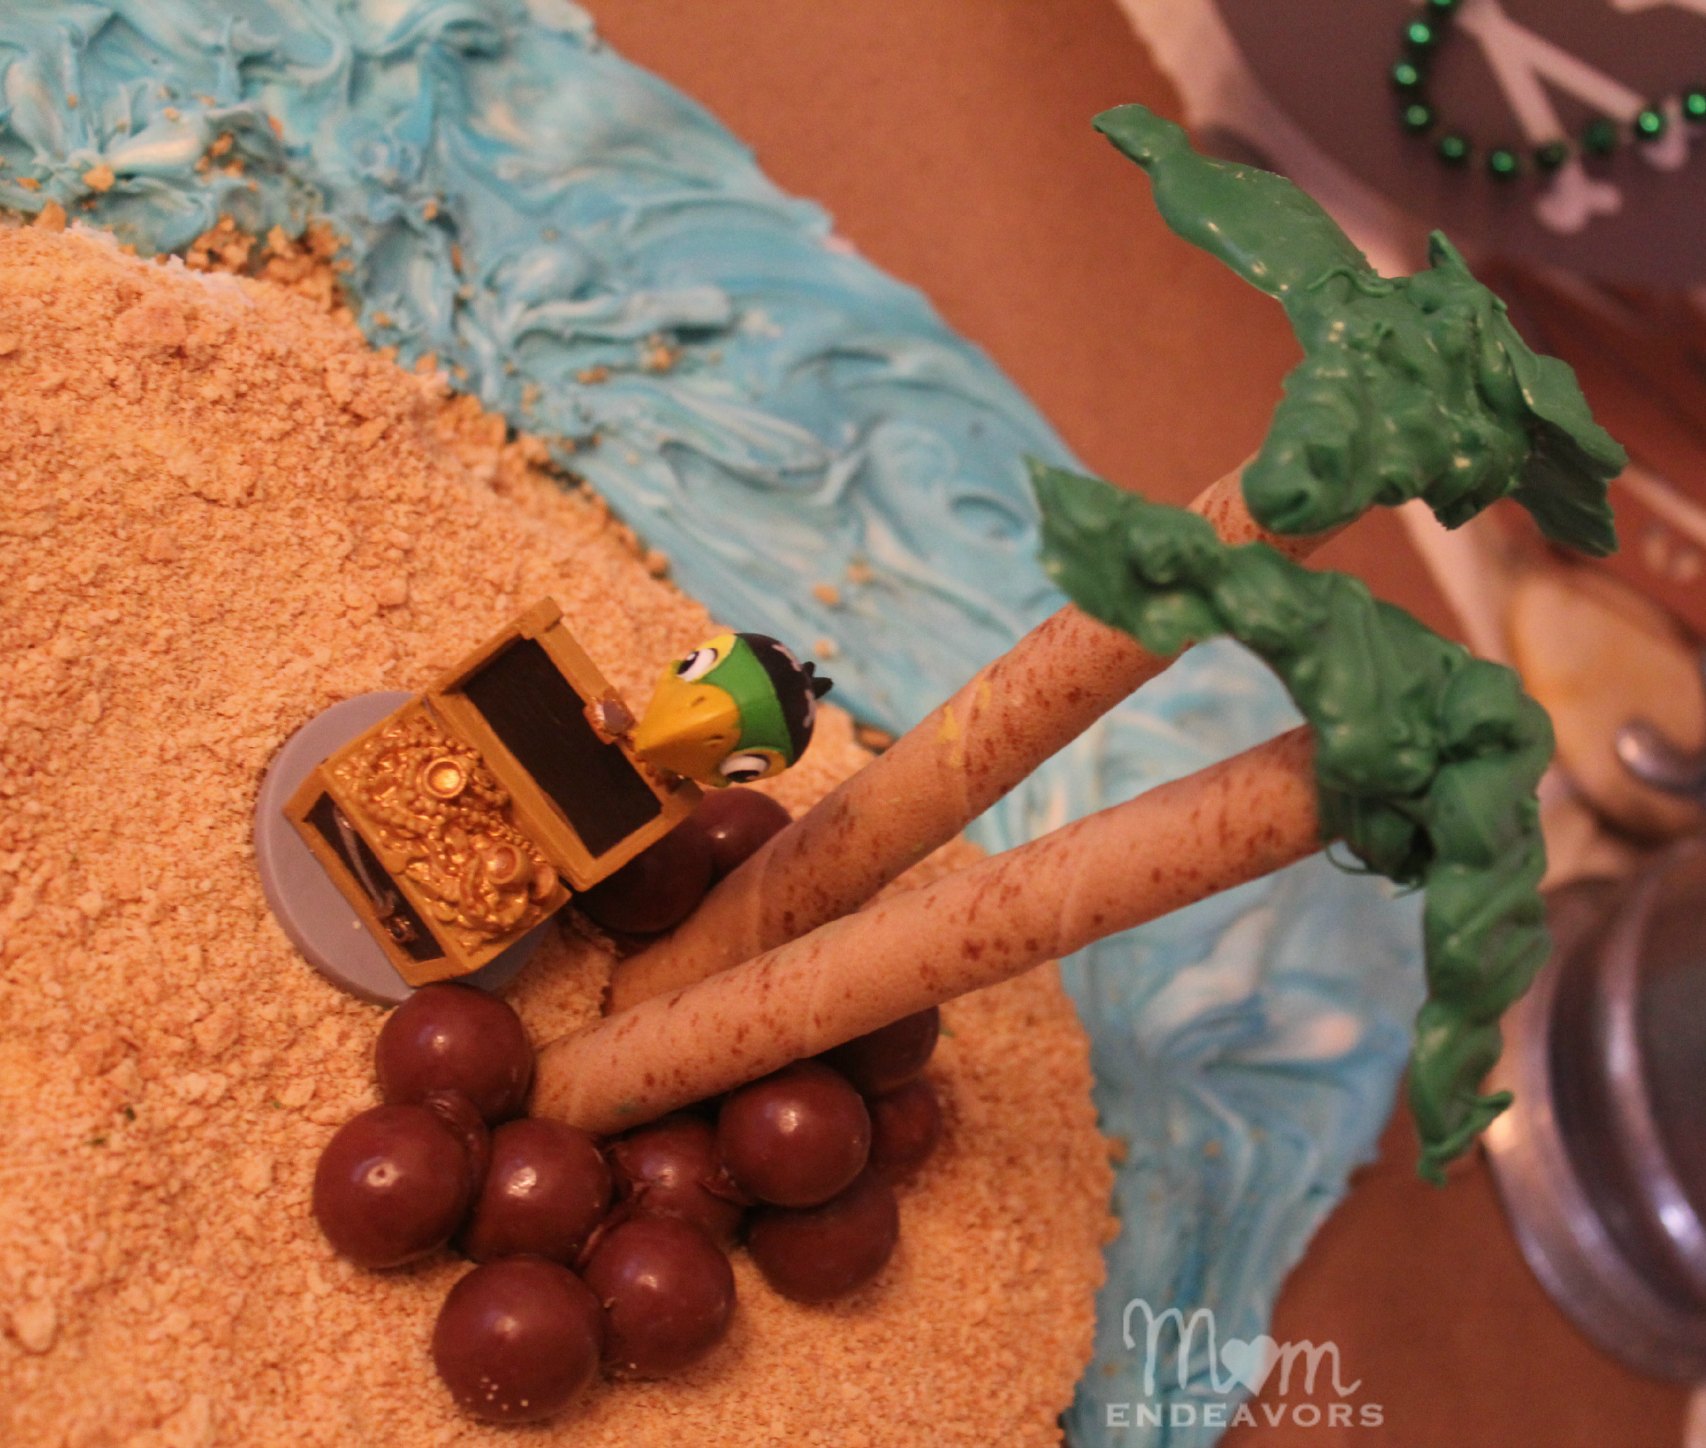 So, the last part in this cake creating process was to get everything set up on the table and creating the water! I couldn’t transport the cake with the bases already frosted, so I had to carry both cakes out to the table, put the cardboard pieces together, and then do the water. I canNOT stand when I see a super awesome cake creation just left on a plain cardboard or aluminum sheet. That’s why you’ll notice that most of my other cake creations have colored coconut around them. But, grass doesn’t work for a pirate ship! 😉 I put blue food coloring in one container of frosting and then started spreading it on the cardboard–easy water! The awesome thing is you don’t even need to mix it up super well. Use the brighter blue frosting in the middle. Then, use the lighter parts around the ship and island (like waves crashing)!
  Once the waves are done, stick in the Tic-Toc Croc and you’re done! Whew! It was indeed an undertaking, but the end result was so worth it! The boys absolutely loved the cake!
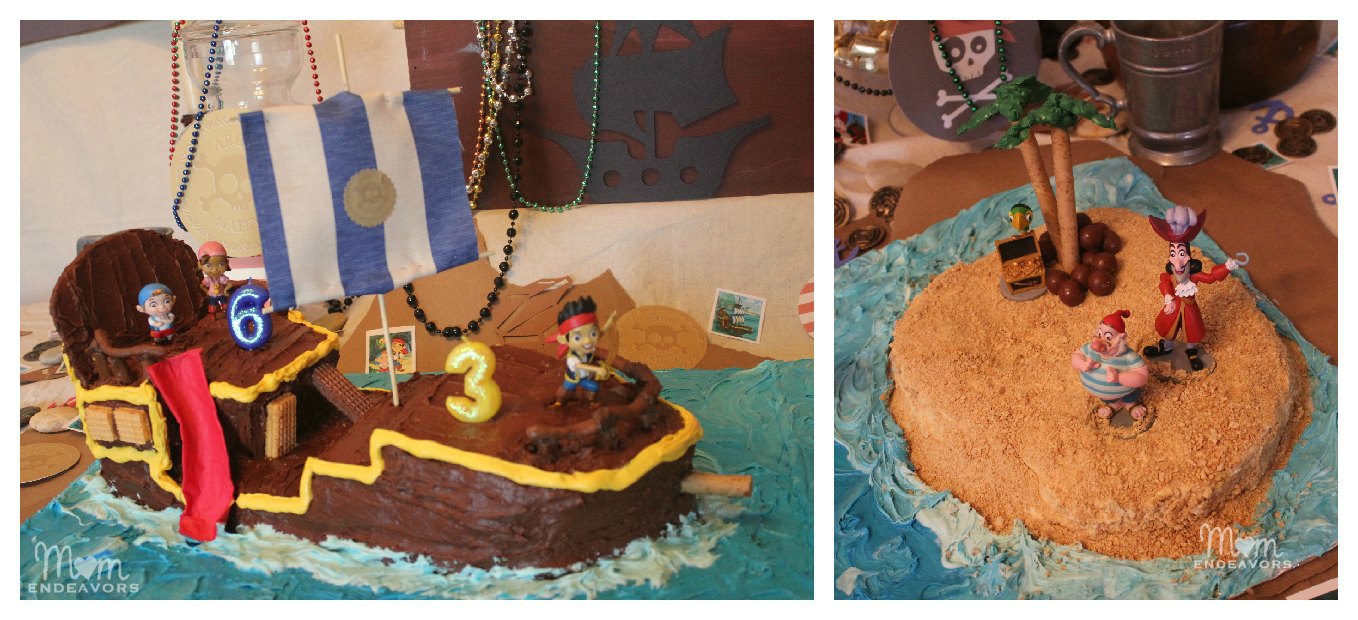
 For a complete look at the party, make sure you check out the birthday party post here —> Jake and the Never Land Pirates Birthday Party
And, if you end up trying a version of this cake or have questions, let me know! 🙂
Linked to: *Do Something Crafty; *Sundae Scoop, *Show & Tell


26 Responses
This is amazing!! Great job mama.
Thanks, Andrea!
OMG !!! This is amazing !!
I know I will be needing this tutorial in the future so .. Thank you in advance !
Thanks, Jessie!!
So cool!! I bet your little guy loved it!
Thanks, Vanessa! They both did! 🙂
Wow! You are totally the coolest mom I know! OMG! Aarya would love it if I could do something like this 🙂
Ha! Thank you! 🙂
Awesome and great job! We should call you the Cake Boss! 😉
Ha! 😉 Thank you!
It looks like your party and cake turned out really great! I love pirate parties! Visiting from SNAP linkys.
Thanks so much for stopping by, Barb! Pirate parties are indeed lots of fun!! 🙂
I have this tutorial printed and ready to be made for our Pretty Pirate Party this weekend for both of my little girls, who LOVE Jake and the Neverland Pirates. I showed this to them and they were so excited! Hoping mine turns out as well as yours!
How fun, Jackie! Thanks so much for sharing!! Hope it goes well for you!
You are just absolutely amazing. My son just turned 8 and my daughter turned 3 and they are only 2 weeks apart, so I did a joint pirate and mermaid party. I also based the majority of it on your ideas. You are so great. I usually buy everything when I have a themed party but you made me want do it myself. You made it look so easy. And I did it exactly how you showed except didn’t make it Jack and the Neverland I just made
it pirate and mermaid. It was so easy and my Son told me I was the best mom ever. You gave me the inspiration to help make my kids party perfect. . Thank you for what you do
Wow, Cassandra! Thank you for taking the time to leave such a sweet comment!! It made my day! I’m SO glad the post gave you inspiration and ideas for making everything turn out like your kiddos wanted.
I love this! I am doing a Jake party for my daughter’s second birthday and I really want to try this. Where did you get the little figurines?
Thanks, Danielle! I bought them on Amazon! There is a link closer to the top of the post! 🙂
I am so confused. I’m making this right now and I wish there were more instructions. What cakes do I put in each pan? I bought 2 chocolate and 1 yellow so that the island could be all yellow cake and ship all chocolate…. Is this not possible? And if I put chocolate in the 9×13 and yellow in the round pan. I only have one remaining mix for the other round pan and loaf pan. Oh, I hope somebody can see this in the next 20 minutes. My son’s birthday is tomorrow and I’ve already spent about $80 on the items for the cake.
I think I figured my last questions out myself. But, is there supposed to be a bunch of leftover cake? Like half the 9×13 and half the loaf cake?
Just saw these comments! Glad you figured it out. For making the cake, no, I didn’t have hardly any leftover cake. I used the everything (well, except for some small pieces that got “shaved” off). The 9×13 is the bottom base, plus a good chunk up front. I used the entire loaf pan cake to make the decks and part of the rounds on the front. The pieces you see for the island were basically my “leftovers”. I only made the island because I had those leftovers (it wasn’t part of my original plan). Hope that helps!
Hi, i am working on this and when i try to ice the cut side of the cake it just crumbles. Should i have bought a less moist cake mix? No icing is sticking i am just taking chuncks of the inside with me with every swipe.
Hi Danielle,
Ugh! I hate when that happens. 🙁 It really depends on the cake, the temperature of everything, etc.
If you have time…put the cake in the freezer right now! Leave the frosting out so it’s room temp and have the cake be frozen…or as cold as possible when you frost. Some crumbs with still come off, but it shouldn’t be chunks. Also, being generous with the frosting helps from the crumb coat. So, put a generous amount of room temperature frosting on a COLD cake. Then, put the cake back in the fridge or freezer is possible to get the crumb coat frosting to harden some. Then, frost over it.
Wonderful tutorial. Thanks! Just what I needed for my little boy’s birthday. 🙂
This site was a game changer for my daughter’s ‘neverland birthday party’. She wanted a mix of jake, Peter Pan and all things pixie hollow (since naturally they DO all take place on neverland thanks to disney magic)
I made your buckey ship and put the fairies all over it! Then it also worked out that the island could be gluten/dairy free island to avoid allergy issues!
Thanks for all the details!