Since tomorrow is December 1st (where did November go?!), we will really kick off all the Christmas festivities by starting to use the muffin tin calendar I made.
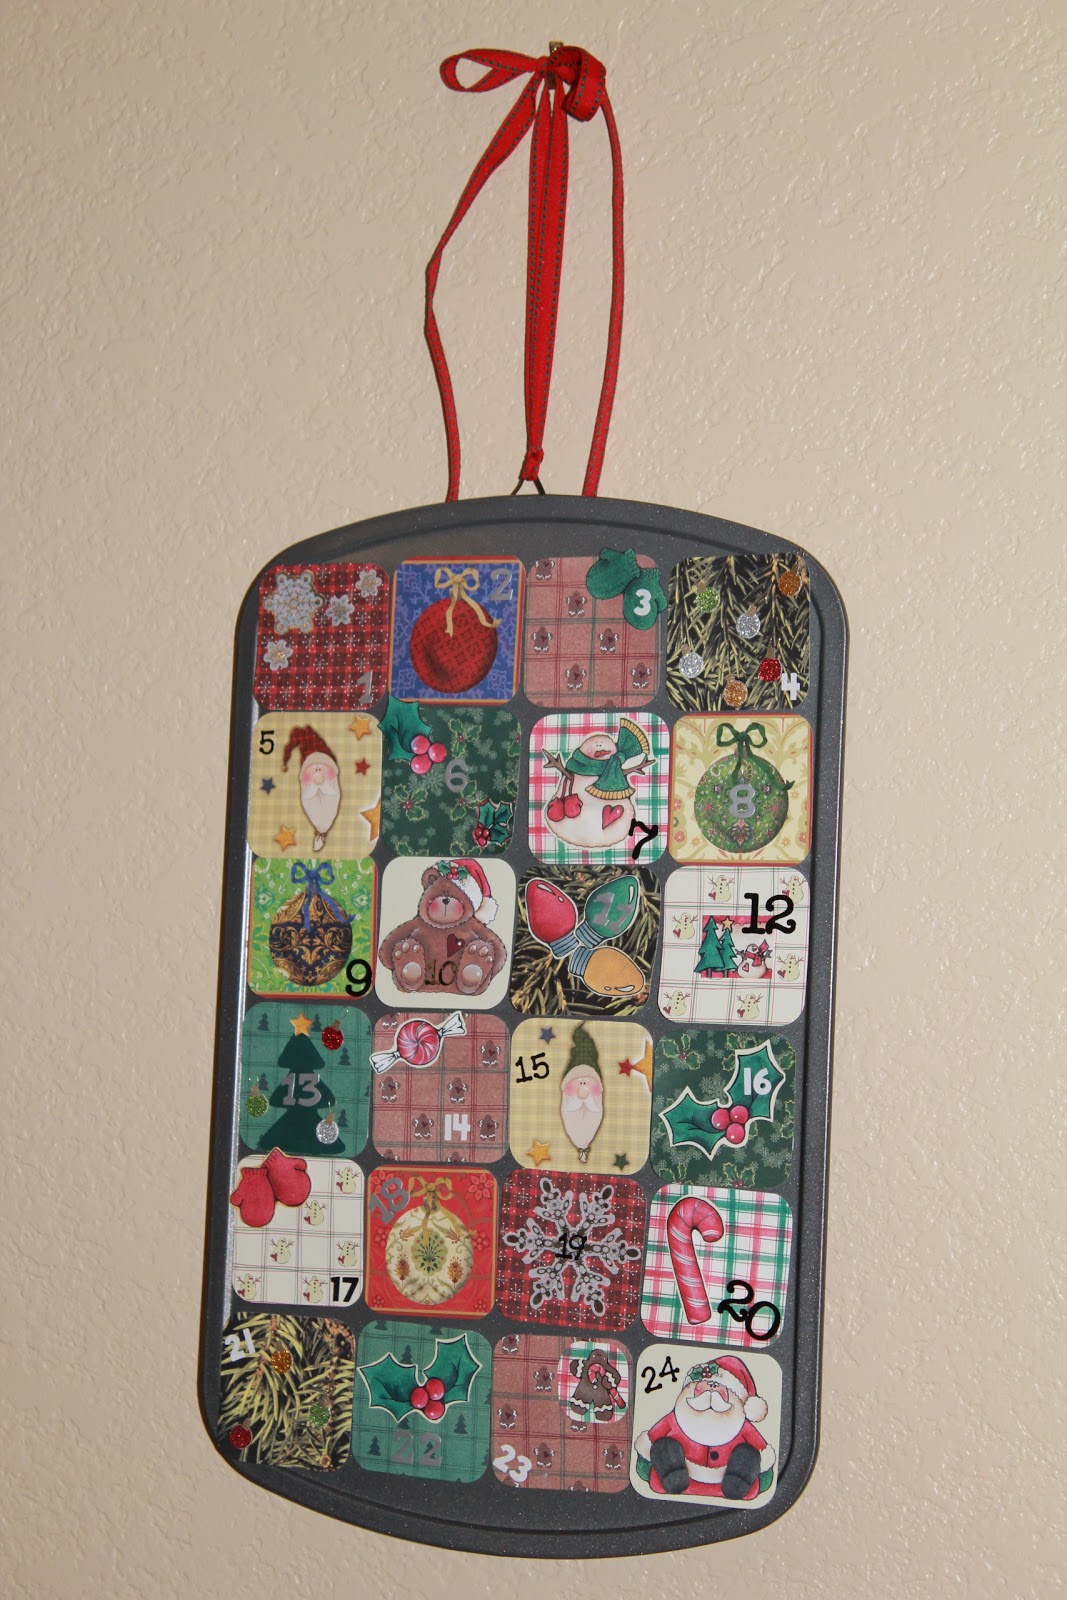

So, on some of the dates we already know we have Christmas activities planned (like our snow day this Saturday, lights on the 12th, etc) those will be on the paper. Other days, we will have things like, “hang ornaments on the tree”, “decorate Christmas cookies”, “hot chocolate & a Christmas movie”, etc. Really the possibilities are endless with the whole thing–the beauty of DIY. You can make the whole thing be whatever you want–and you can design the look too! 🙂
To make your own, here’s what you’ll need:
– 1 24 cup mini muffin tin (I found mine at Walmart for less than $4)
– 24 magnets (any kind will do, just make sure they are rather small)
– Christmas-y paper (however many different designs you want)
– embellishments (if you so choose)
– glue/adhesive for embellishments (and magnets depending on what type you get)
– numbers (hand write them, use stickers, or cut them out with a Cricut/Silhouette)
– wire/ribbon or plate stand
Directions:
– Cut paper into squares (or circles) to cover the muffin cups–mine were approx. 2 1/4 inches. (I also used my corner rounder on the squares)

– Place magnets in an upper corner of the square (you may want to arrange your papers first to decide which side you what your magnet on). I found small adhesive circle magnets for really cheap at Joann’s.

– Embellish each square as you like–stickers, cutouts, ribbon, buttons, you name it! Then, also, place your numbers on each square.

– Display, use, & enjoy! (Note–some muffin tins have holes in the metal from which you can lace ribbon. Mine had a little rim where the metal was folded over on the back through which I laced wire and then tied ribbon over it. Others you might not be able to do any of that and would just have to stand in on a plate stand or something).
Do you use an Advent Calendar? If so, what is it like? Feel free to share/link up in the comments! Happy December!


15 Responses
That's a really awesome idea, thanks fr sharing!
This is really cute- muffin pans are awesome! Thanks so much for sharing at Holiday Hookup!
Very cute! Thanks so much for stopping by my blog! 🙂
Thanks for linking this up! I just love that and one of these days I will make one 🙂
Too cute! I love this Advent calendar. IT looks so easy to do, too. 🙂
Thanks for sharing!
Sherry
This is just the cutest, most clever idea! What an inexpensive and fun craft to help count down the days to Christmas. 🙂
How cute! Our advent calendar has slips of paper with activities on it too. It's a great way to put the emphasis on family time. 🙂 Thanks for linking up to my Christmas Party!
You're very welcome! Always wanna help a fellow blogger out. If you have any other ideas for muffin pans please send them my way. I'm always interested in trying new recipes.
Clever, and sweet. We have done an activities advent calendar this year too – but not in such an impressive container! My 4 year old is really loving it. We've made cards together, had a picnic dinner (it's summer where I live!), picked up grandparents from the airport, been for a walk after dinner, collected pinecones, etc.
what a lovely and adorable idea…thx for sharing
Cute idea! So clever!
Very cute, Sara!! I may have to try this with my little guy next year. I think he will finally be ready for a Christmas countdown then! Thank you for linking up to Homemade Christmas!! 🙂
this is darling!! love it! i'm collecting ideas for children over at my christmas linky party! please come join in the fun!
http://busyasabeeinparis.blogspot.com/2010/11/christmas-ideas-for-children-des-idees.html
xo,
maria
Thank you so much for linking this up! I hope you've had a chance to visit some of the other links! By the way I love the look of your blog, very sleek yet fun design!
I hope your holiday season is merry and bright! xo, Maria