Love those cute magnetic bookmarks? I’m excited to share this easy step-by-step tutorial to make your own magnetic bookmarks with you today as part of a sponsored campaign with Cricut. 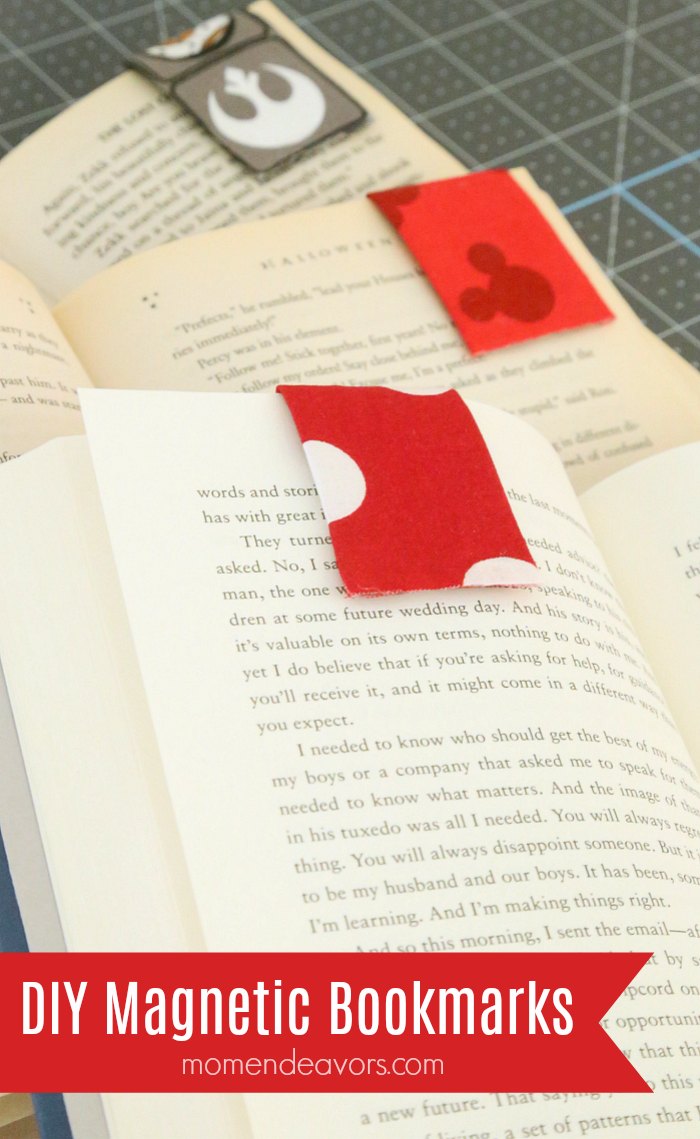 My boys and I just recently discovered magnetic bookmarks (late to the party, I know)…and it’s safe to say we’re obsessed with them! They’re SO handy and just seem a lot more functional than regular bookmarks. And they are also SO easy to make yourself – a great little craft project!
 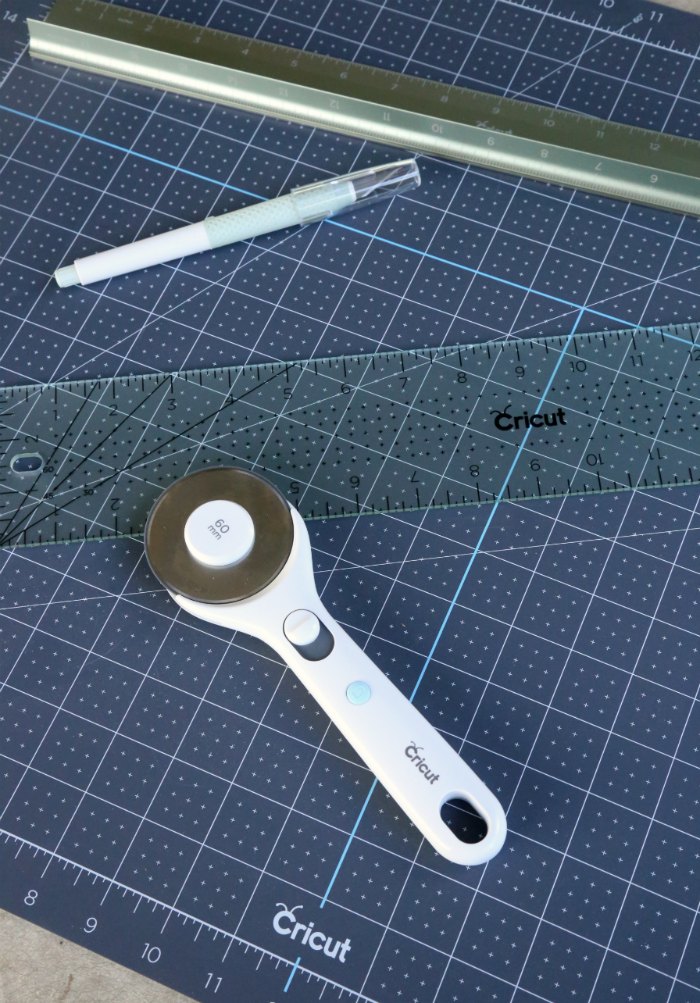 I recently shared my favorite Cricut hand tools for various craft projects, and I used them to make our little fabric scrap bookmarks as well! The Cricut TrueControl Knife, Cricut Cutting Ruler, Cricut Rotary Cutter, Cricut Acrylic Ruler, and Cricut Self-Healing Cutting Mat are all great to have on hand and perfect for using for this project!
In addition to your tools, you’ll also need fabric scraps, a piece of cardstock, thin magnetic strips, and a hot glue gun! Easy peasy! 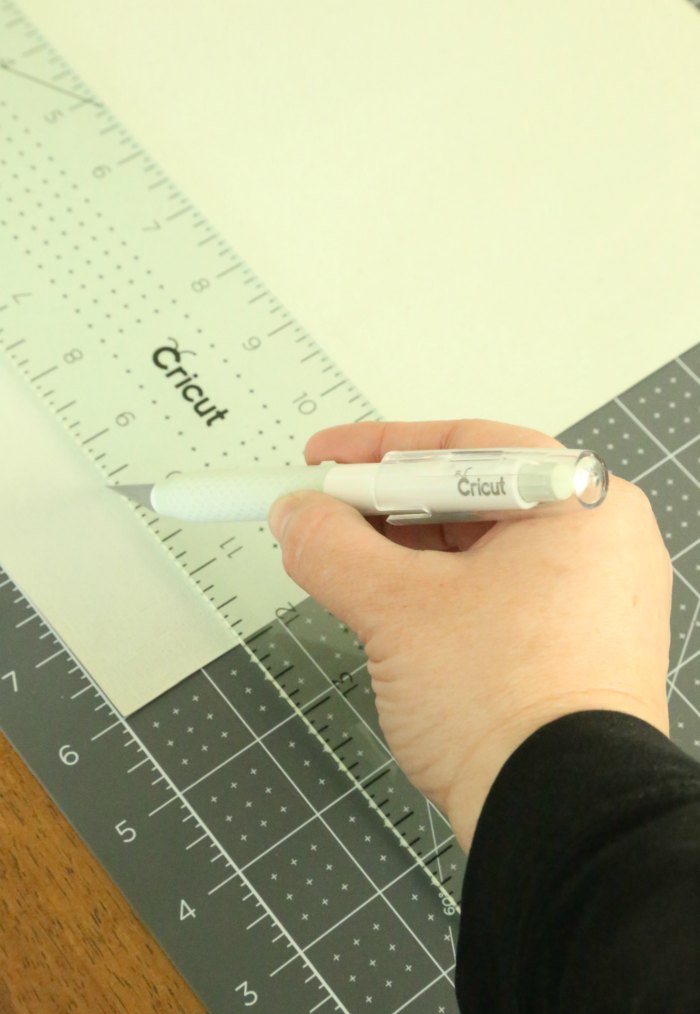 You’ll start by using your TrueControl Knife and favorite Cricut ruler to cut strips out of the cardstock. I opted for 1.5″ wide strips just so the bookmarks weren’t too small. The TrueControl Knife cuts SO nicely that you can cut multiple strips in seconds! You’ll be able to get about 2 bookmarks from each strip, so just cut however many strips you need for the number of bookmarks you’d like to make. And of course, you’ll want to do that on the Cricut Self-Healing Cutting Mat. I LOVE this mat – so great for DIY projects and crafting! The markings on the mat make it SO much easier to get even/straight cuts.
 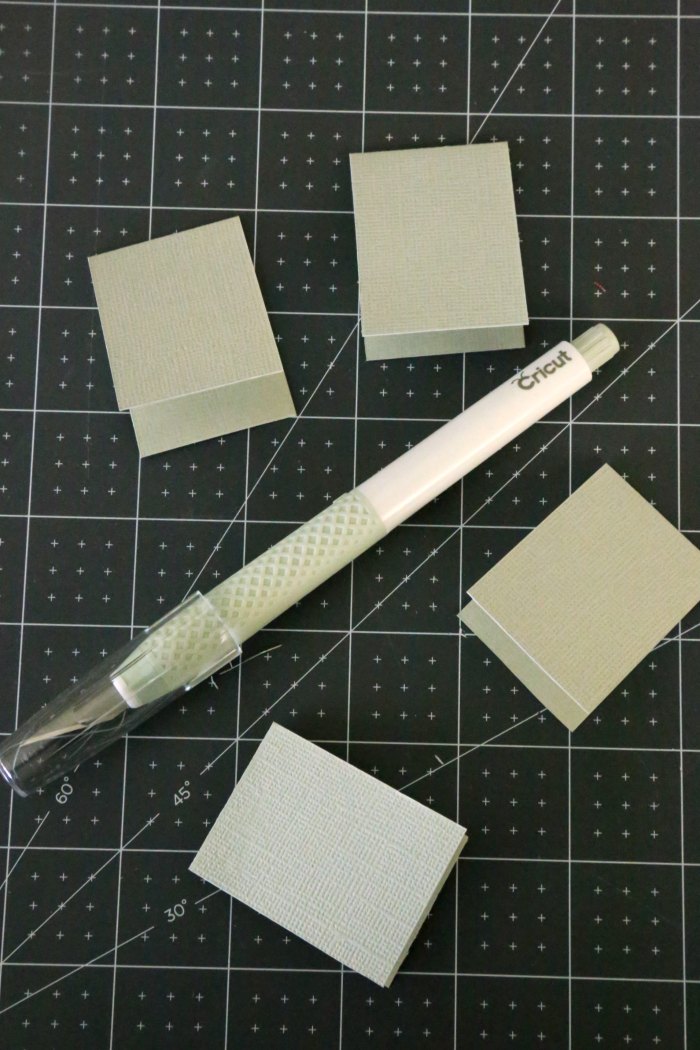 Once your cardstock strips are cut lengthwise, you’ll need to cut them down to be 4 inches tall. So, I could get two bookmarks from each vertical strip cut. You just use your TrueControl Knife for that as well! Then, you’ll fold each 1.5″ x 4″ piece of cardstock in half to create the shape of your magnetic bookmark.
Now, if you had some cute patterned cardstock OR if you just like things super easy and simple, you could move to adding the magnets here. But, I thought it would be fun to make these bookmarks a little more sturdy (and cuter) by using fabric scraps over the paper. And, by using fabric scraps, your bookmarks can really make a statement – favorite colors, favorite characters, themed to match the book, etc. For the fabric portion, you’re definitely going to want to use Cricut Rotary Cutter and the Cricut Cutting Ruler. The rotary cutter cuts the fabric like butter – it’s SO great. And the non-slip cutting ruler is super fantastic because it keeps your fingers away from sharp blades! For the fabric cuts, I cut 3″ wide strips so that the fabric would fold over fairly evenly on the inside of the bookmark.
 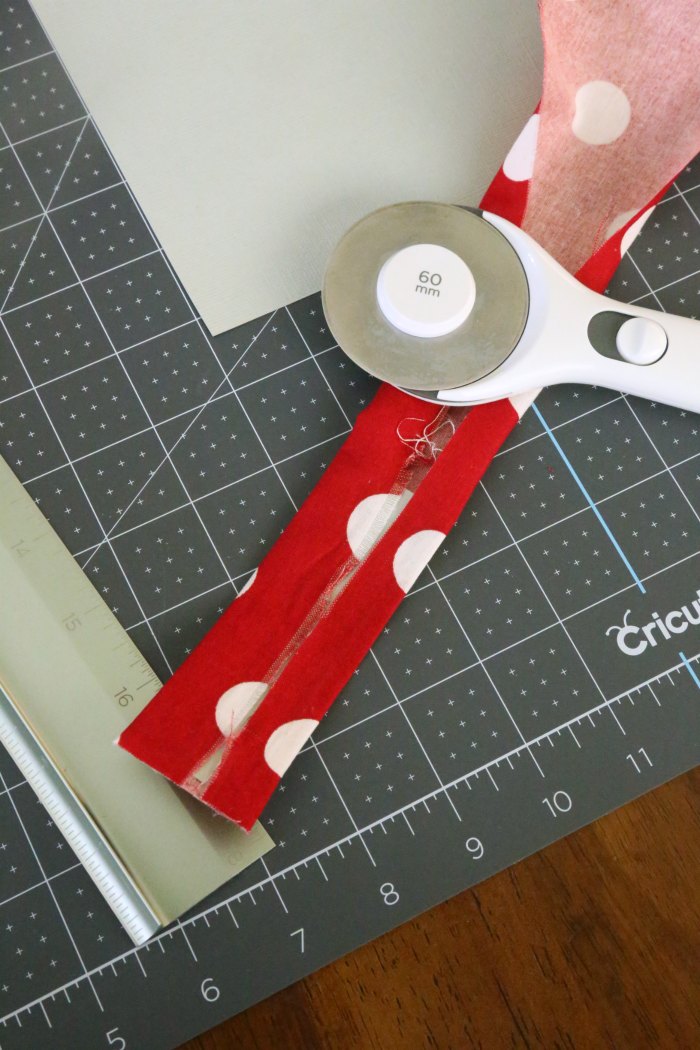 Once your fabric strips are cut, you’ll place them on the cardstock pieces. I folded the fabric over and attached with thin amounts of hot glue. You’ll want to pull the fabric as taut as possible without warping the cardstock. For the ends, you could choose to fold the excess fabric over (or you could get fancy and sew them on). But I just opted to use my Cricut Rotary Cutter to get a nice straight cut and I sealed the edges with hot glue. The hot glue also keeps the fabric from fraying.
 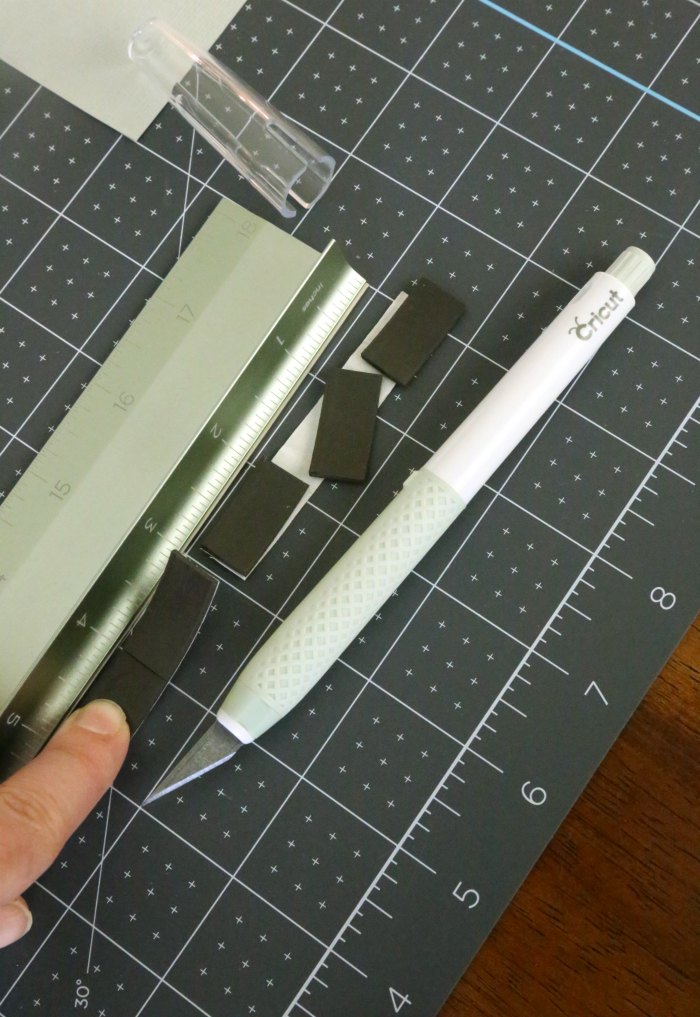 Once the fabric is adhered to the cardstock, the last step is attaching the magnets. You’ll just use your TrueControl Knife to cut 1″ wide pieces of magnet strips. Then, you’ll attach those to the inside of the fabric-covered cardstock with hot glue, so that the magnets meet to create the magnetic bookmark.
 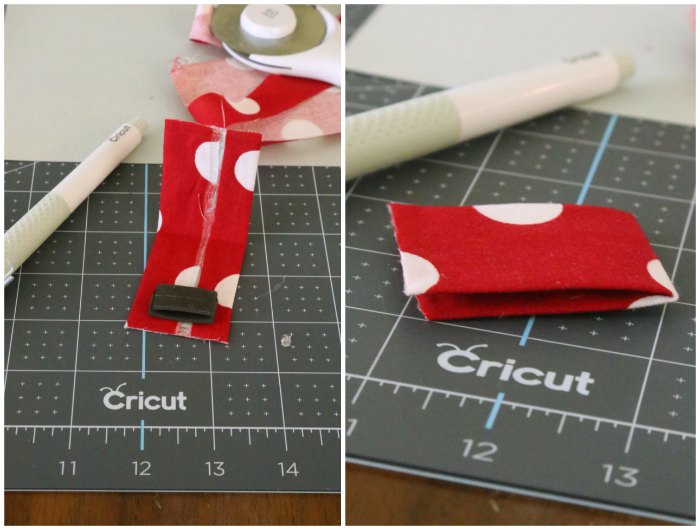 You’ll repeat that process for every bookmark you’d like to make! And that’s it – a few simple steps and you have your very own cute, custom, magnetic bookmarks. We love these!
 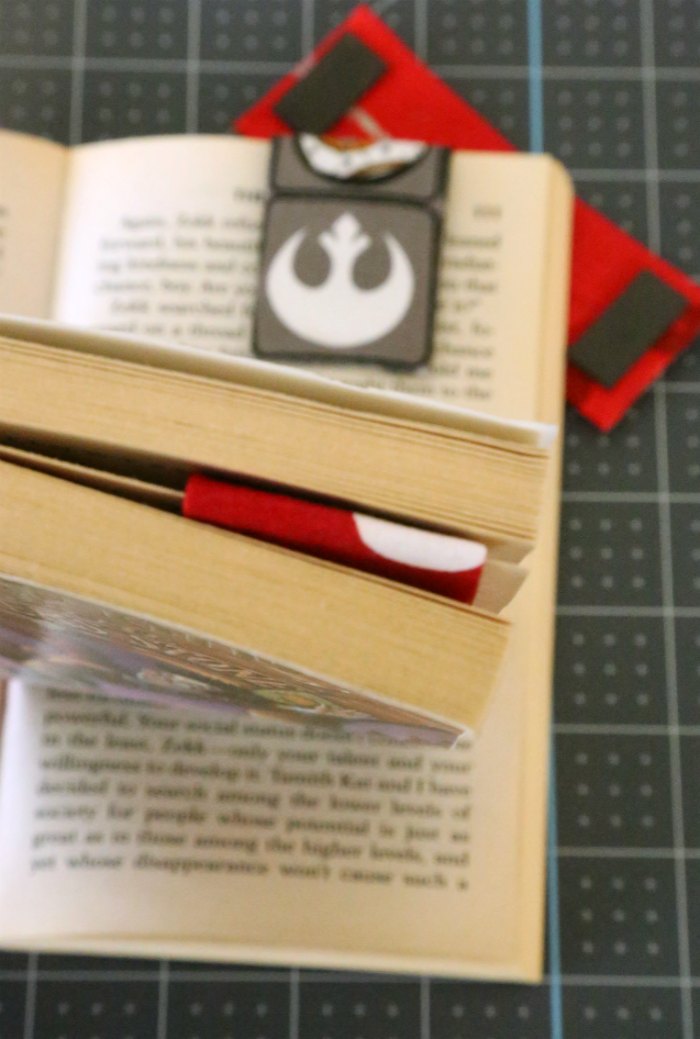 These little bookmarks would make great gift ideas, party favors, stocking stuffers, classroom gifts, and more!
Happy crafting and happy reading!
This is a sponsored conversation written by me on behalf of Cricut. The opinions and text are all mine.