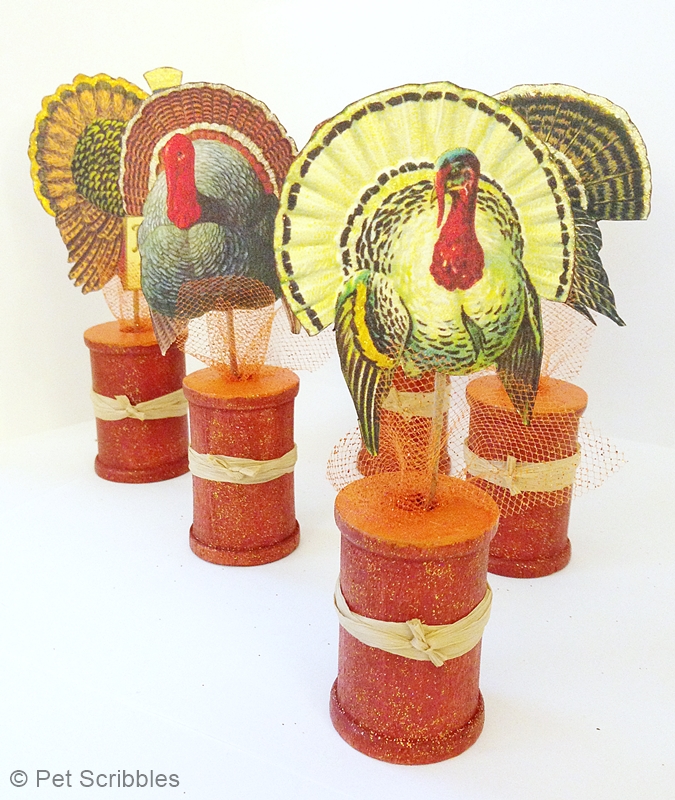
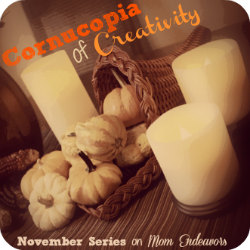
 Hi everyone! I’m Laura from Pet Scribbles, and I’m so excited to be here at Mom Endeavors today as part of the Cornucopia of Creativity series! Have you been enjoying this year’s series as much as I have? Today I’m sharing an easy craft that will make some great Thanksgiving decor, which you can also adapt as favors or placecards (which I’ll discuss later in this post). Make a bunch of these for your guests as a sweet way for them to remember this year’s Thanksgiving gathering!
There’s two components to these Thanksgiving favors: the vintage turkeys and the decorated spools. So, let’s make the turkeys first, and then we can work on the spools!
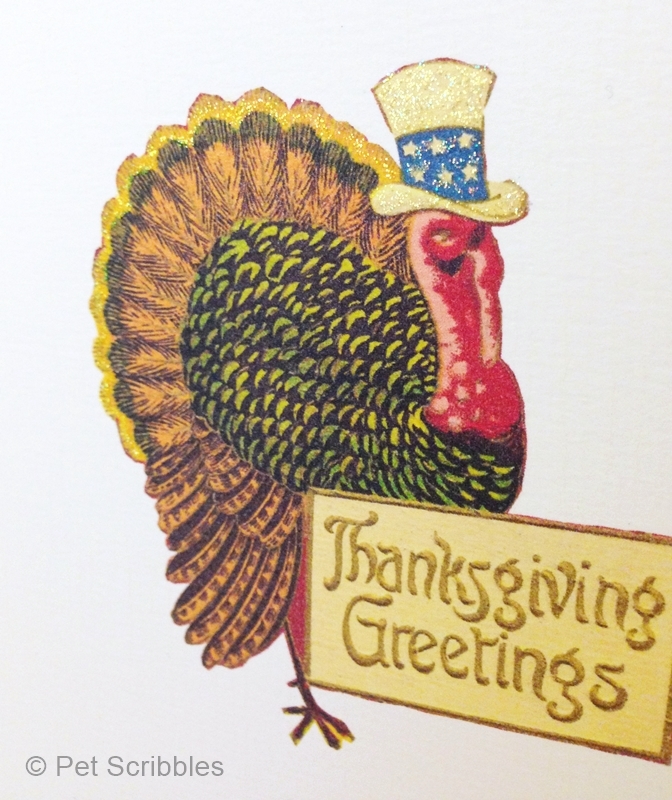
Vintage turkeys – free printable:
I love Victorian images, often using them in my projects, so I put together this free printable of vintage turkey images just for this Thanksgiving craft! Aren’t these turkeys adorable? 
Supplies for Turkeys:
Cardstock (one sheet, 80 lb cardstock in white or ivory)
Stickles glitter glue in Diamond
Brown marker
Acrylic sealer (spray)
Small scissors (like decoupage scissors or detail scissors)
Stickles glitter glue in Diamond
Brown marker
Acrylic sealer (spray)
Small scissors (like decoupage scissors or detail scissors)
Turkey Details:
1. Click on the vintage turkeys printable above to enlarge, then download to your computer.
2. Print out using a color printer and let dry for a few minutes.
3. Use glitter glue on certain areas of the turkeys to play up their features. Let dry.
4. Spray with an acrylic sealer. Let dry.
5. Using small detail scissors, cut out each turkey image.
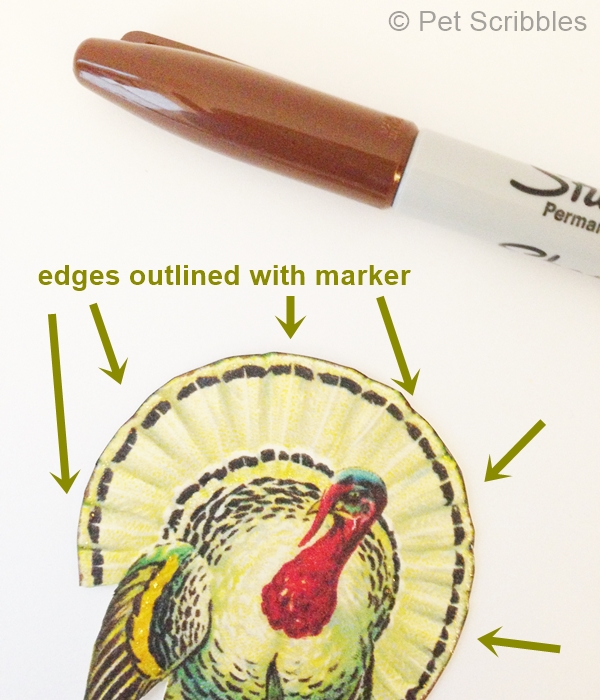
6. Outline the edges of each turkey image with a brown marker for definition.
Set the turkeys aside and gather up your materials for the spools.
Supplies for Spools:
Unfinished Spools (5) (at craft stores in the unfinished wood section)
Red gel stain (Minwax)
Orange acrylic craft paint
Glitter paints in orange, and in red that has some gold in it
Raffia ribbon
Red gel stain (Minwax)
Orange acrylic craft paint
Glitter paints in orange, and in red that has some gold in it
Raffia ribbon
Spool Details:
1. Choose which end will be the top of your spools. Paint the tops with one coat of orange acrylic paint. Let dry.
2. Apply two coats of orange glitter paint onto the tops of each spool. Let dry in between each coat. 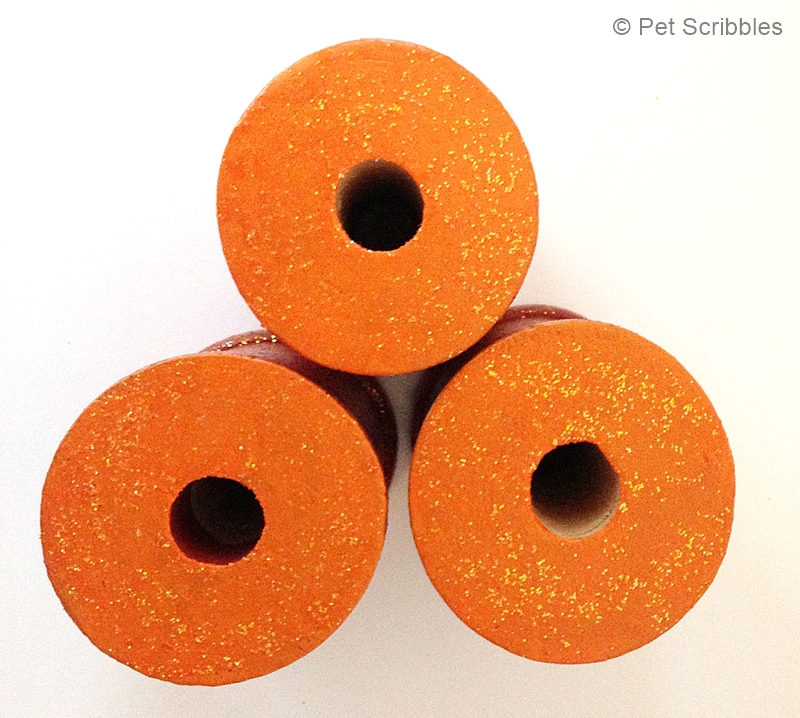 3. Stain the spools (except the tops) using MinWax Gel Stain in red. Let dry. (The gel stain gives the spools a nice weathered look, but you can substitute burgundy-colored acrylic craft paint instead if that’s easier.)
3. Stain the spools (except the tops) using MinWax Gel Stain in red. Let dry. (The gel stain gives the spools a nice weathered look, but you can substitute burgundy-colored acrylic craft paint instead if that’s easier.)4. Apply two coats of red-and-gold glitter paint over the stain, again letting the first coat dry before applying the second. Let dry. 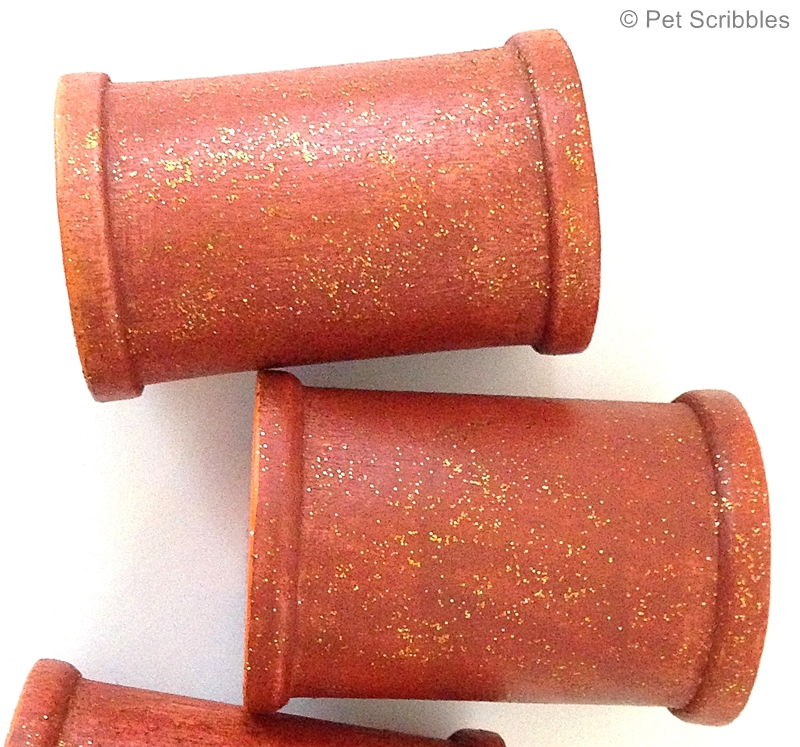 5. Wrap a length of raffia ribbon around the middle of each spool a few times, then tie in a knot.
5. Wrap a length of raffia ribbon around the middle of each spool a few times, then tie in a knot.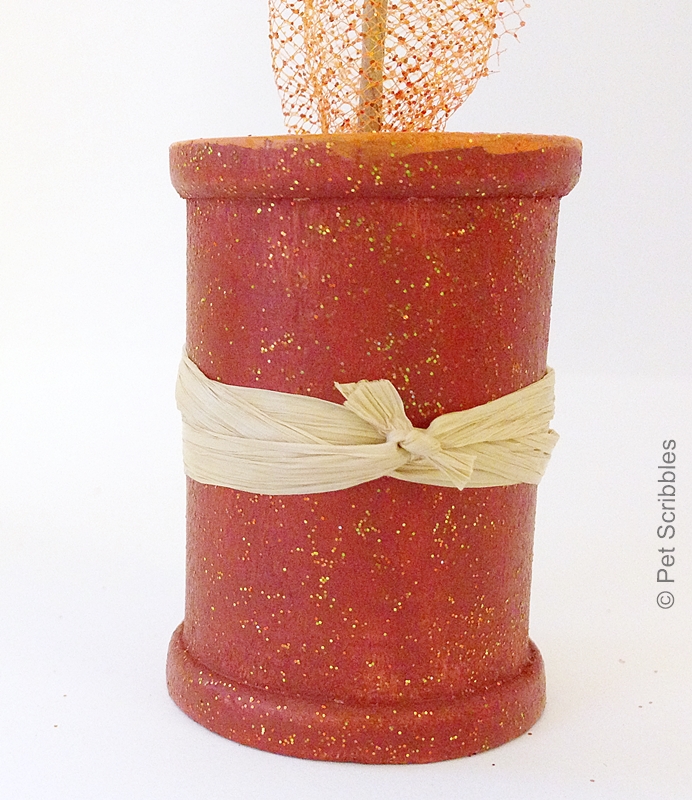 Now you’re ready to put everything together!
Vintage Turkey Spool Supplies:
Twigs or sticks cut to size
(You want something that will fit into the spools and stick out about 4 or 5 inches.)
Orange tulle
Adhesive masking tape
Scissors
(You want something that will fit into the spools and stick out about 4 or 5 inches.)
Orange tulle
Adhesive masking tape
Scissors
Vintage Turkey Spool Details:
1. Cut out five small rectangles of orange tulle.
2. Place one rectangle over the top of a spool.
3. Take one stick and gently push it into the center of the spool. The tulle will start to go into the opening as well, and will leave you with a pretty section sticking out from the center.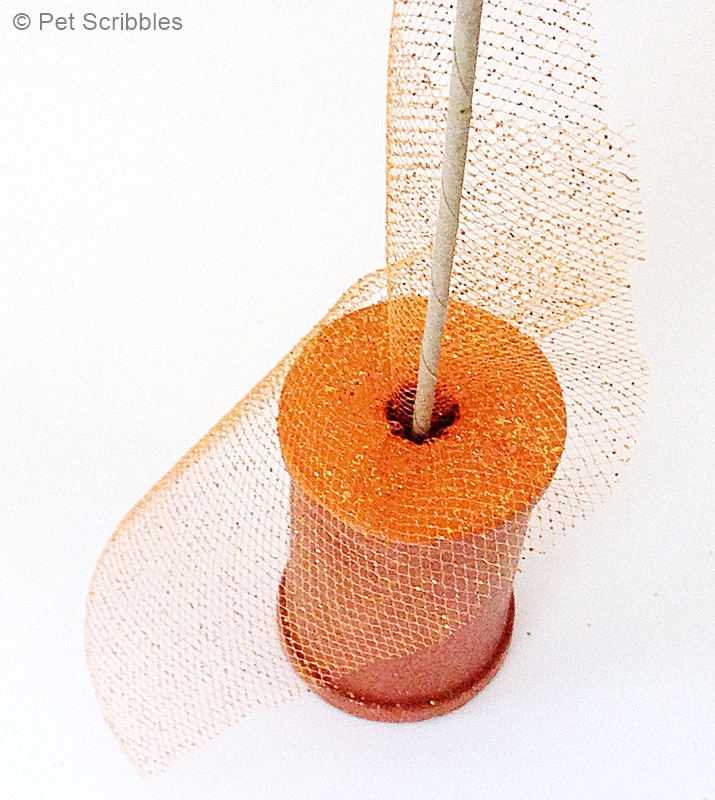
4. Repeat steps 2 and 3 for the other spools.
5. Attach each vintage turkey to one of the sticks using a piece of masking tape. Make sure each turkey is a similar height to the others.
And that’s it! 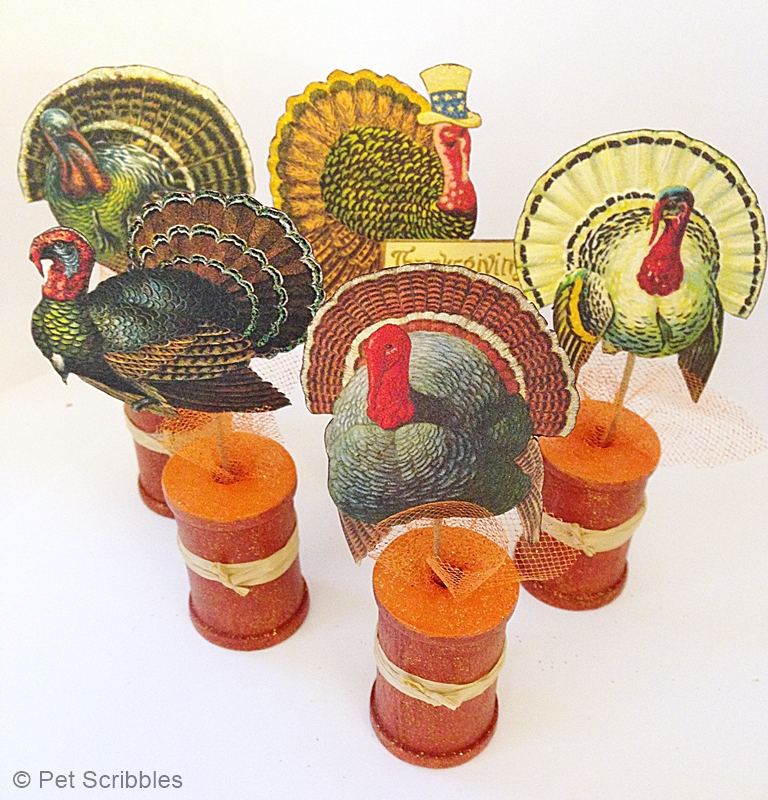 These spools make great Thanksgiving decorations grouped together. You can also use them as favors at each place setting.
These spools make great Thanksgiving decorations grouped together. You can also use them as favors at each place setting.To use as placecards: Make small handwritten nametags and attach to each spool with a small piece of masking tape.
I hope everyone has a wonderful and peaceful Thanksgiving, especially those of you hosting large gatherings! For more easy craft tutorials, many with a vintage vibe, stop over to my blog. You can also connect with me on Instagram, Pinterest, Facebook and Twitter. I’m working on crafts for the holidays, and sometimes wish I had some elves to help out… or that I could teach my cats to craft with me!
For more Thanksgiving ideas as part of our Cornucopia of Creativity Series on Mom Endeavors, click the button below:
Happy Thanksgiving!


One Response
So glad to be guest posting here today, Sara! Hope everyone enjoys the turkeys! 🙂