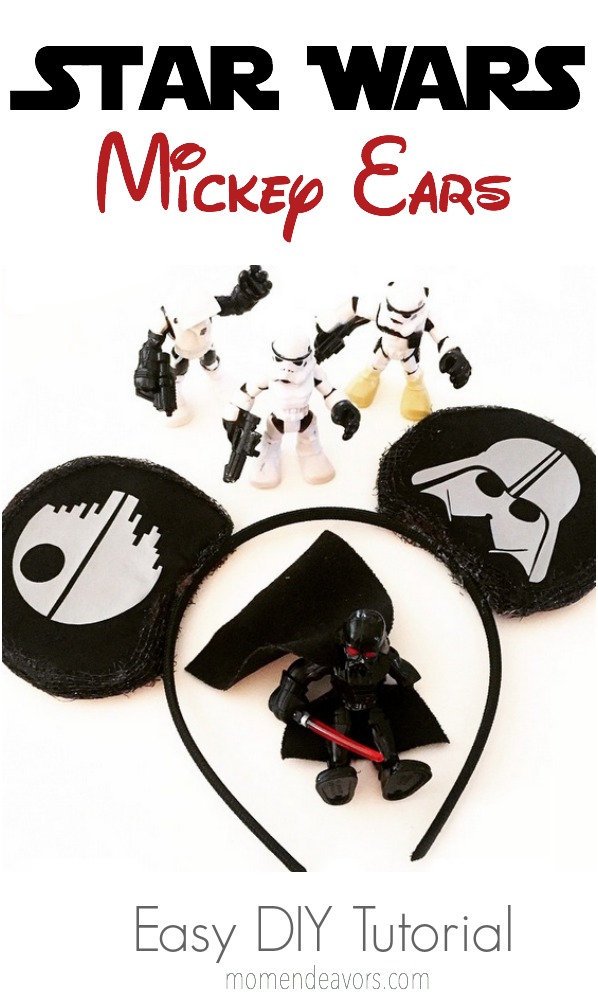
I’m so excited to share some Star Wars and general Disney fun with you today – two of our favorite things around here!! I’ve teamed up with a whole group of Disney-loving creative bloggers to participate in the R&R Workshop Month of Disney series! For my contribution, I decided to share how to make your own Mickey ears – this time, with a Star Wars theme! I made them to add to my simple Darth Vader DIY running costume for the Disney Social Media Moms fun run! But you could use these Star Wars ears for your next trip to Disney or maybe for the midnight showing of Star Wars: The Force Awakens (<—you can get a Star Wars movie countdown printable here) !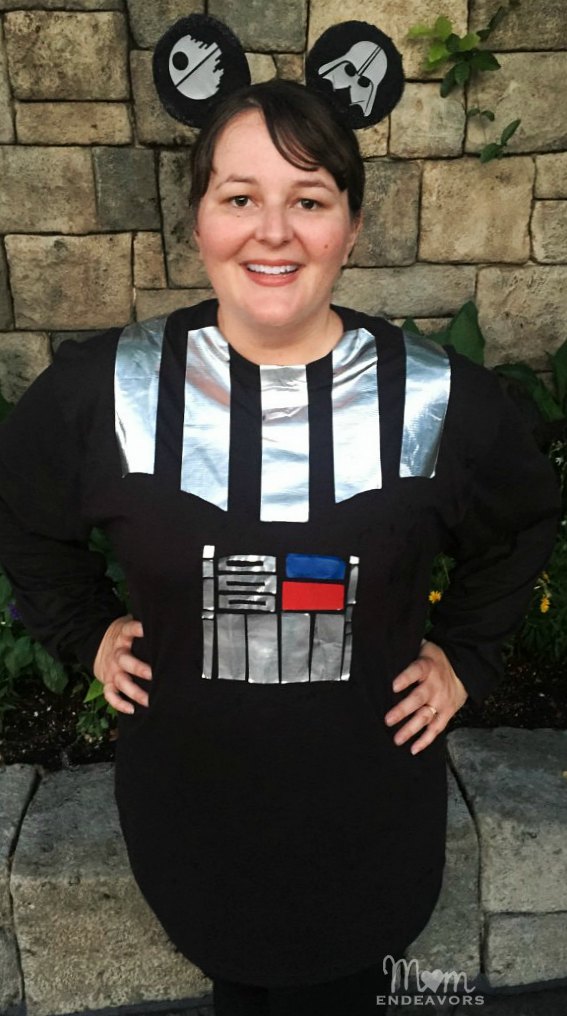 I got the inspiration for making these from my friend Vanessa’s Little Mermaid Ears! The process of making the ears was really easy! You can do so in under 30 minutes! Here’s the simple tutorial:
MATERIALS
- Black Headband
- Foam Board
- Hot Glue Gun
- X-acto Knife
- Scissors
- Mickey Ears Template
- *Black fabric & ribbon
- *Cutting Machine (Cricut Explore or Silhouette) & heat transfer vinyl
*Note: If you don’t have a cutting machine or access to one, you could always replace the black fabric with Star Wars fabric & go that route instead.
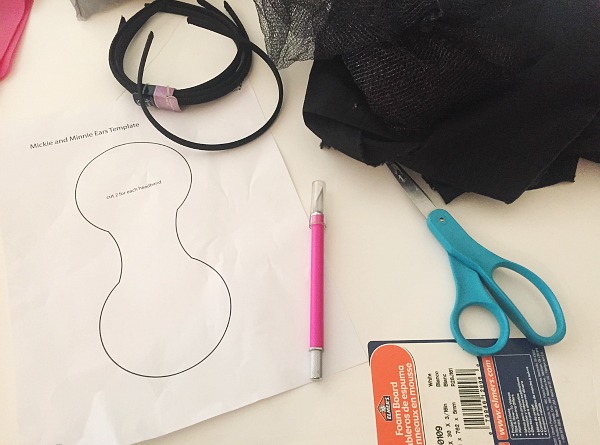 Step 1: You’ll need to print out print out the Mickey Ear Template from Disney Family. Then cut the ears out of the template. You won’t use the connecting part on the template, so just cut that off. Use your headband then to help determine the shape of the curve for the bottom part of the ears .
Step 2: Once your paper template is cut so the curve will hug the headband correctly, trace the template onto the foam board and cut out your two foam ears using an X-acto knife.
Step 3: Trace the template onto the fabric four times and cut just slightly larger than your trace line (to overlap the edge of the foam board a bit). 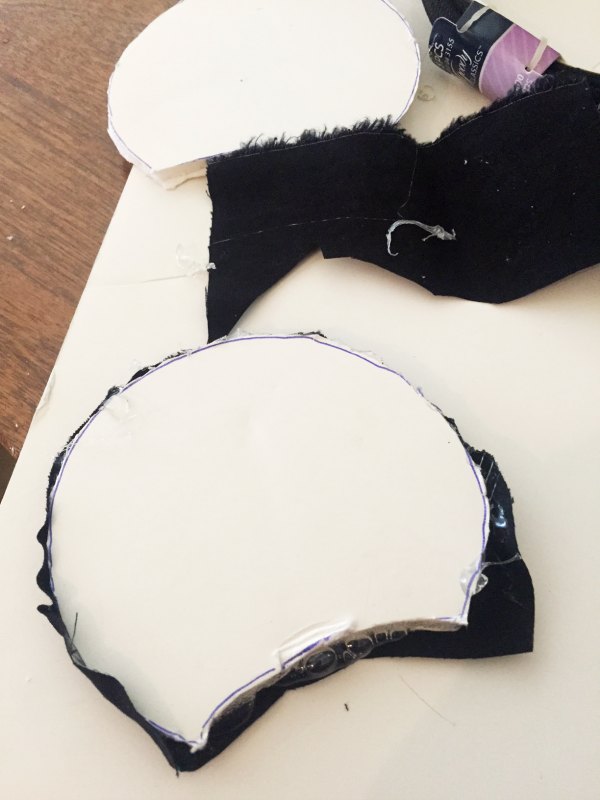 Step 4: Wrap each fabric piece around one side of each ear and hot glue along the foam edges. Repeat until each ear is completely covered. Then, to cover up the glue seams, hot glue black ribbon or other embellishment of your choice around the outside edge of each year (I used some cut black tulle-like ribbon).
(Optional) Step 5: Embellish the ears! If you want ears that look like mine – dark side and all, then you’ll need to use a cutting machine that allows you to import images (like the Cricut Explore or Silhouette). I used my Cricut Explore and uploaded two basic Star Wars images I found online (Darth Vader’s mask & the Death Star). 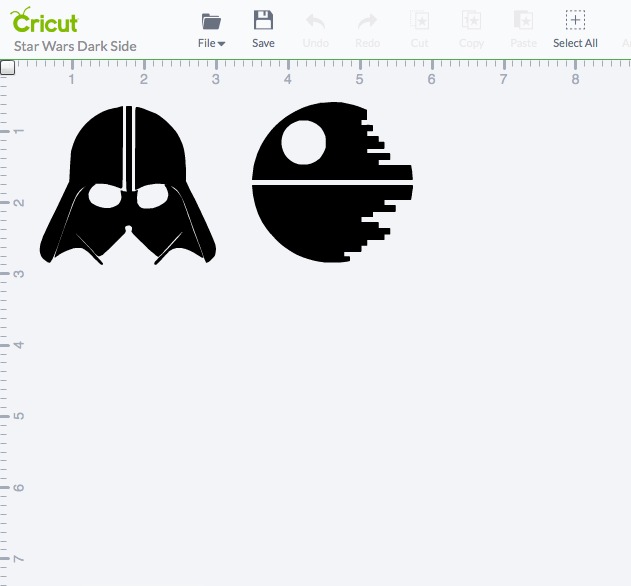 Step 6: Cut the designs out on gray or silver heat transfer vinyl and iron them right on to the ears! That’s it!
 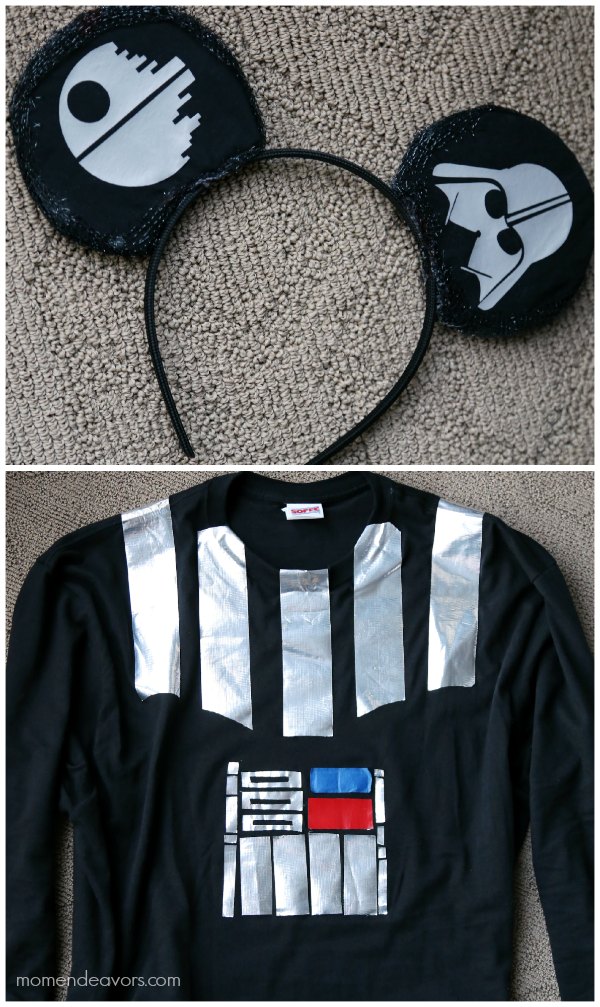 For even more Disney fun, you can check out our whole Disney category on the blog or join our Disney Crafts Pinterest Board!