If only the smell of these oatmeal stuffed baked apples could come through the computer screen! While they were baking, the smell of fall wafting through the house was absolutely divine. If you’re looking for the perfect recipe for this time of year, this is it! These oatmeal stuffed baked apples have all the flavors of an apple crisp, but are healthier (and easier to make)! They’re great for dessert or even a fall breakfast! 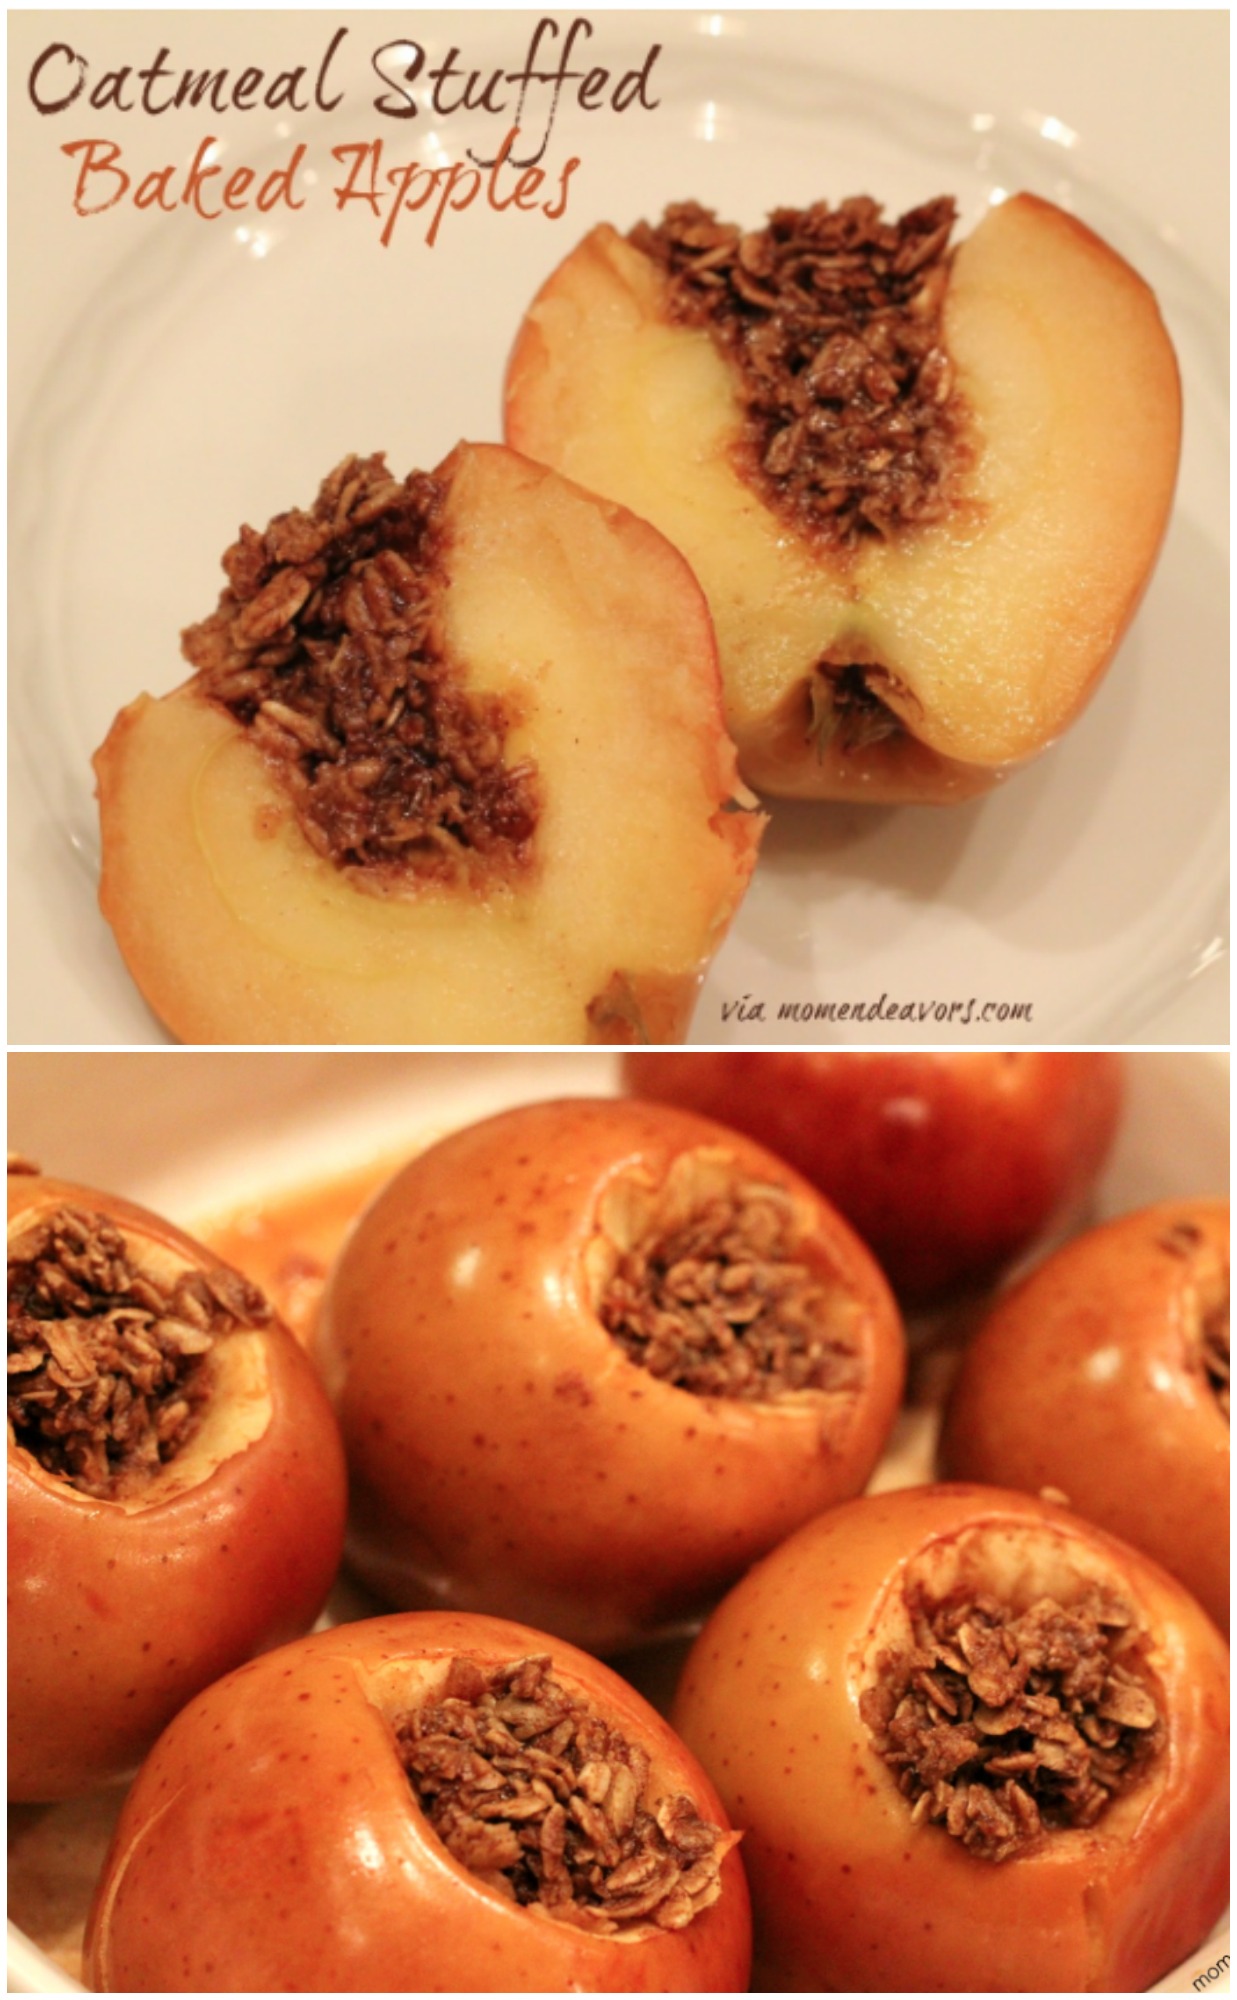
Oatmeal Stuffed Baked Apples
Ingredients:
- 6 apples
- 1/2 C rolled oats (quick-cooking would probably be fine. But, we have old-fashioned rolled.)
- 1/4 C brown sugar
- 1 t vanilla
- 1/2 t lemon juice
- 4 t maple syrup (divided into separate 2t & 2t)
- 1 t cinnamon
- 2T butter (divide into two separate 1T servings)
- 1/4 C water
Directions:
1. Preheat the oven to 375.
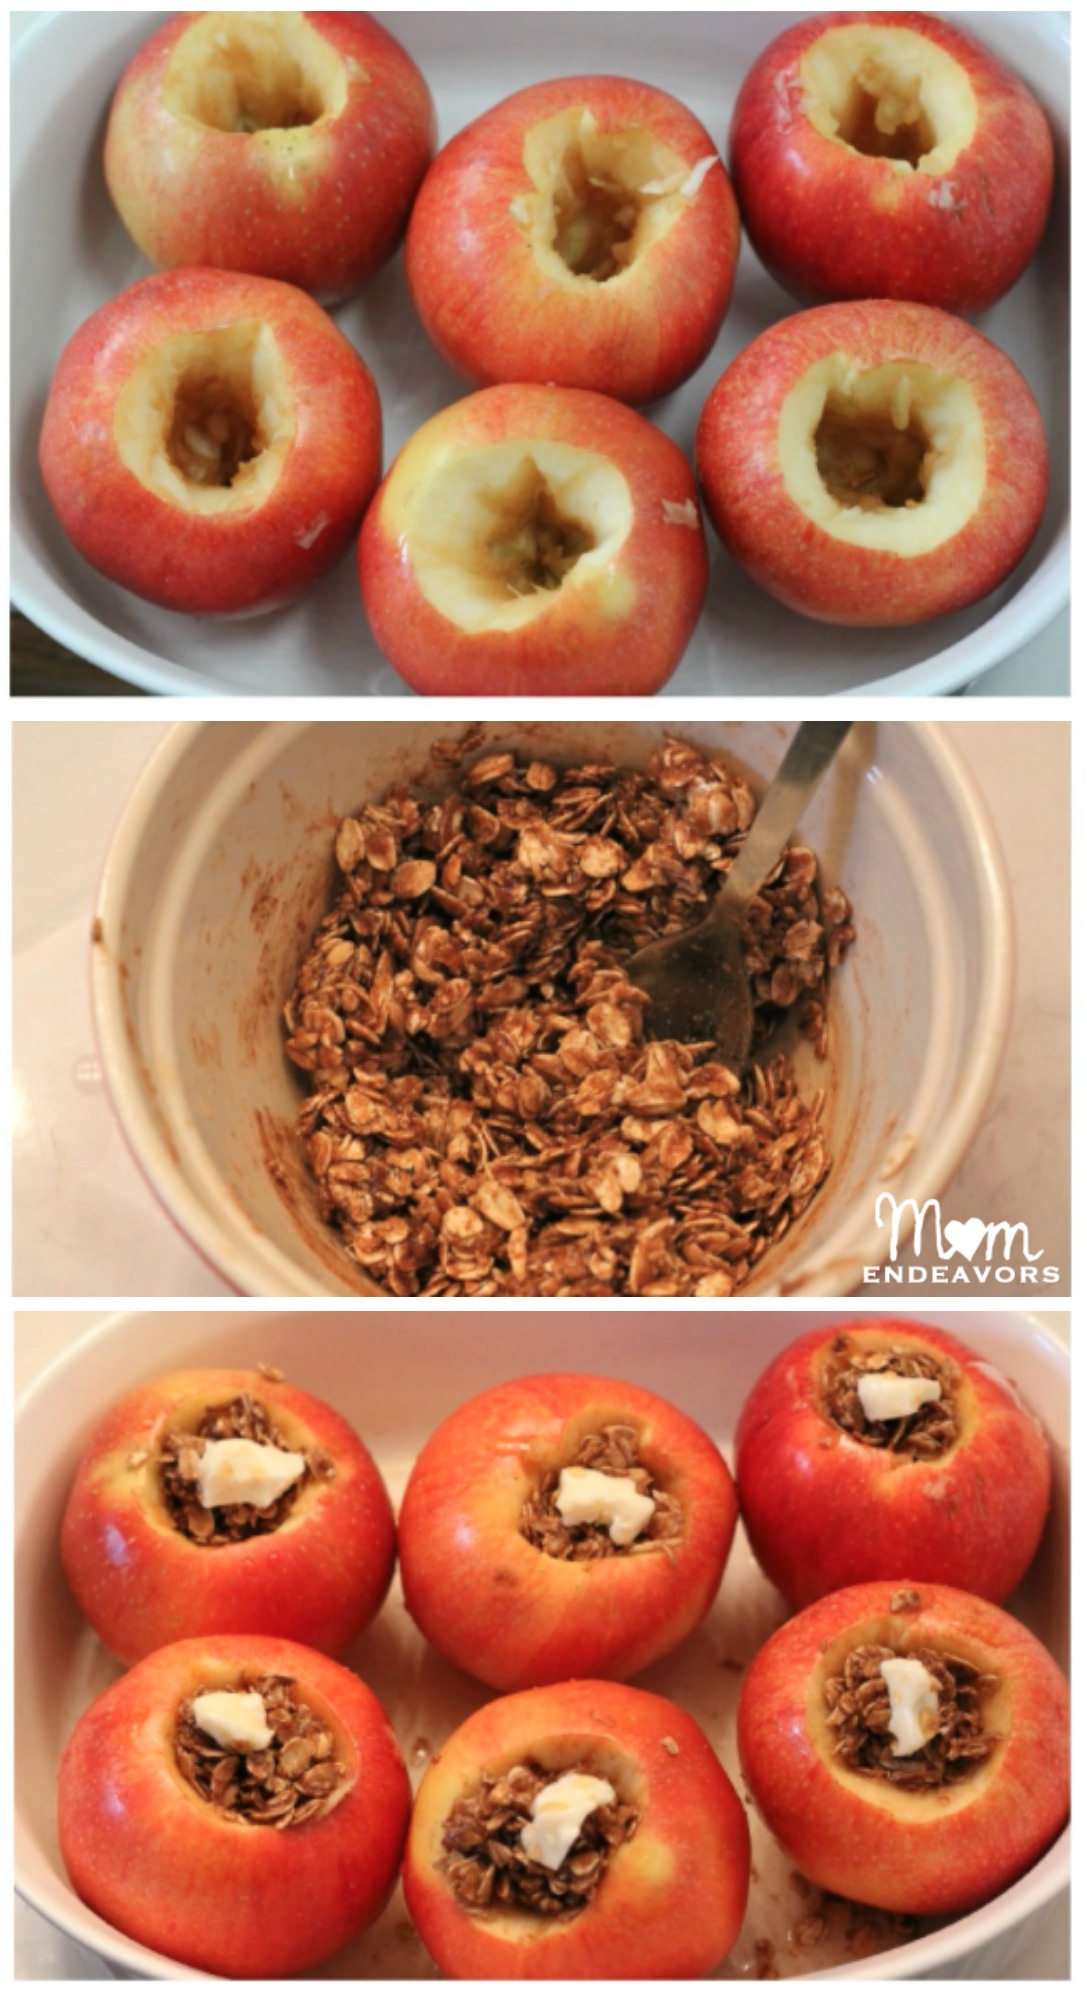
2. Core the apples, scooping out the seeds and making a hole for the oatmeal stuffing. Just be careful to NOT core all the way through the bottom! You just want to get the stem & the seeds. Then, place apples in an oven safe baking dish.
2. In a small bowl, combine the oats, brown sugar, and cinnamon. Then add in 1T of butter (not melted) and work it all together with your fingers. Once the butter is mixed in, add the vanilla, lemon juice, and 2t of maple syrup. Stir to combine.
3. Fill each apple with the oat mixture. Really stuff each apple as much as you can and use up all of the oat mixture! Cut the remaining 1T of butter into small squares, placing one square on the top of the oatmeal mixture on each apple. Then, drizzle the tops of the apples with the remaining 2t of maple syrup.
4. Pour the water in the bottom of the baking dish (NOT over the apples). Bake (uncovered) for about 30 minutes or until the apples are soft & tender.
 Enjoy the heavenly smells while they bake. Then, remove from the oven and let cool for about 5 minutes or so before serving. They certainly would be super delish with some ice cream or even a bit of whipped cream on top. But, we just had ours plain and they were great! Our leftovers kept in the fridge well for a few days too.
ENJOY!
Linked to: *TidyMom, *Tatertots & Jello


17 Responses
Yum-O these do sound good. I was thinking they would be a great breakfast treat, too!
This looks delicious! My husband would absolutely love these!
WOW! Those look delish!
Kas
These look delicious!!
yum! i love oatmeal & apples, this looks delish!
Yum! These look excellent. I love the technique – I bet it creates a great flavor and fall scent to fill the kitchen!
Holy Cow! My kids would die if I made these! I’m pinning this now.
These look so good and much easier than I would have thought. I pinned it so I can remember to make it this fall.
ooo I think I would LOVE this!!! I’m hosting a Thanksgiving party all month long (until Thanksgiving) and would love for you to come over and link it up! This is in addition to my normal Tasteful Tuesday party that runs every Tuesday. Thank you for taking the time to celebrate Thanksgiving and be THANKFUL for all our blessings. http://www.nap-timecreations.com/2012/10/pull-apart-pumpkin-maple-bread-and.html
Made these tonight for my daughter and I and they were wonderful!
Awesome! Thanks for stopping by to let me know! 🙂
This recipe looks amazing! I included it in a round up of 25 gluten free desserts. Thanks for sharing. 🙂 http://www.creativegreenliving.com/2013/03/25-delicious-gluten-free-desserts-that.html
I cooked it according to your recipe. It’s so yummy. Thank you!