If you celebrate Easter and have young kids, then you probably have plastic eggs around. And, if you let the kids play with said plastic eggs, then you might end up with a lot of eggs that are now all kinds of mismatched!A s Easter eggs go, mismatched plastic eggs are definitely not the most aesthetically pleasing. So, instead of throwing the mismatches out (or leaving them as is), why not pretty them up?! We decided to give it a shot by making easy “paper mache” Easter eggs! 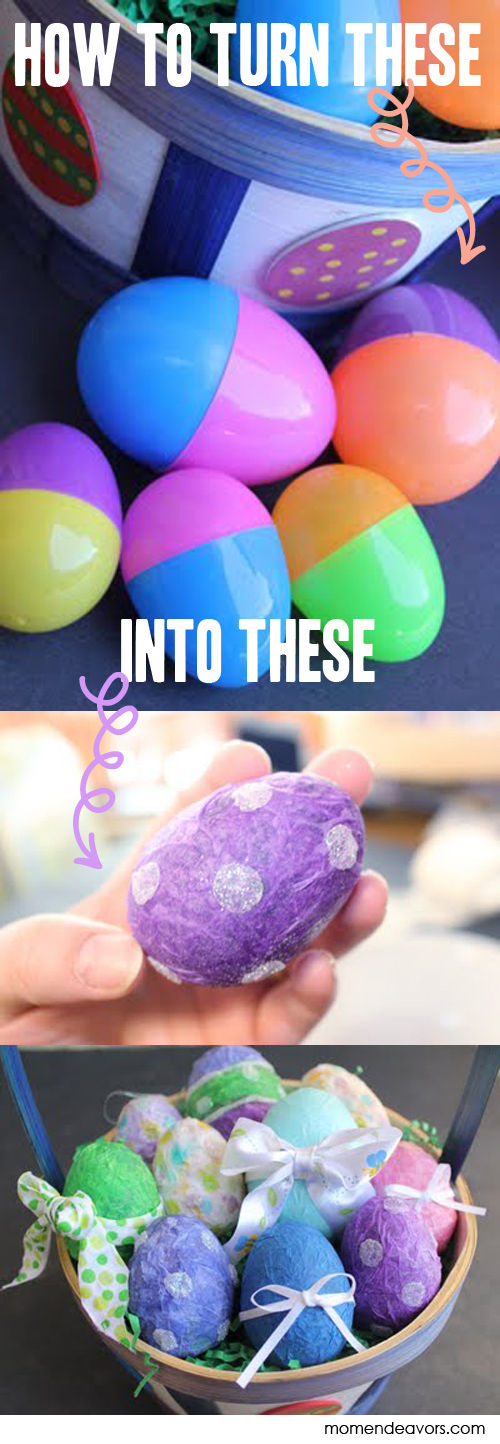 So much better, right?!?! The process is really easy! Big Brother & I enjoyed making these paper mache eggs together! Here’s how to make your own:
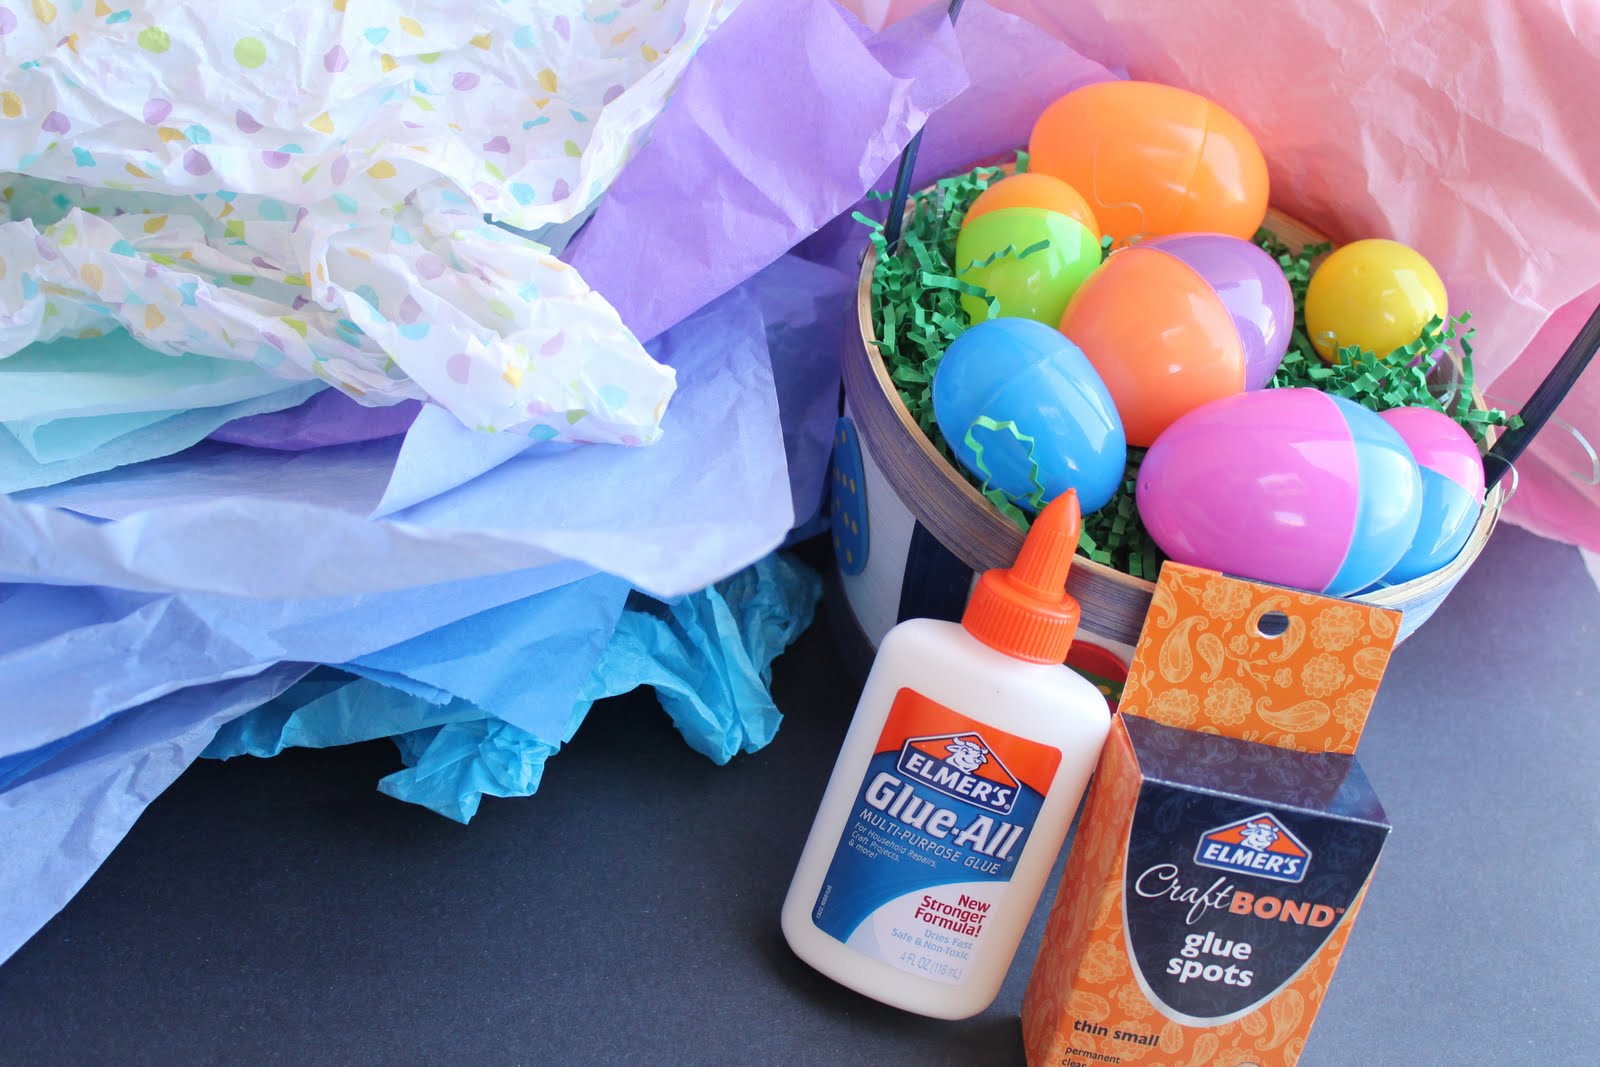
Assorted colors of tissue paper (or any paper you’d like really), plastic eggs, Elmer’s white glue (I used “Glue-All” which had a MUCH faster drying time), Elmer’s glue spots (for decorating), and any embellishments you’d like (glitter, ribbon, stickers, etc.)
Step 1: Gather supplies (you can read about my shopping trip here) and cut paper strips…

Step 2: Prepare your glue mixture (about 2 parts glue to 1 water–you want it runny/glaze-like) and set up your space

Step 3: Mache (is that a verb?!) those eggs. NOTE: This is messy! Big brother wasn’t too keen on dipping the strips & his fingers in the sticky mess, so opted for a painting method instead. Either way works fine. We used anywhere from 10-30 strips (depending on the color of the tissue paper, and size & color of the egg).
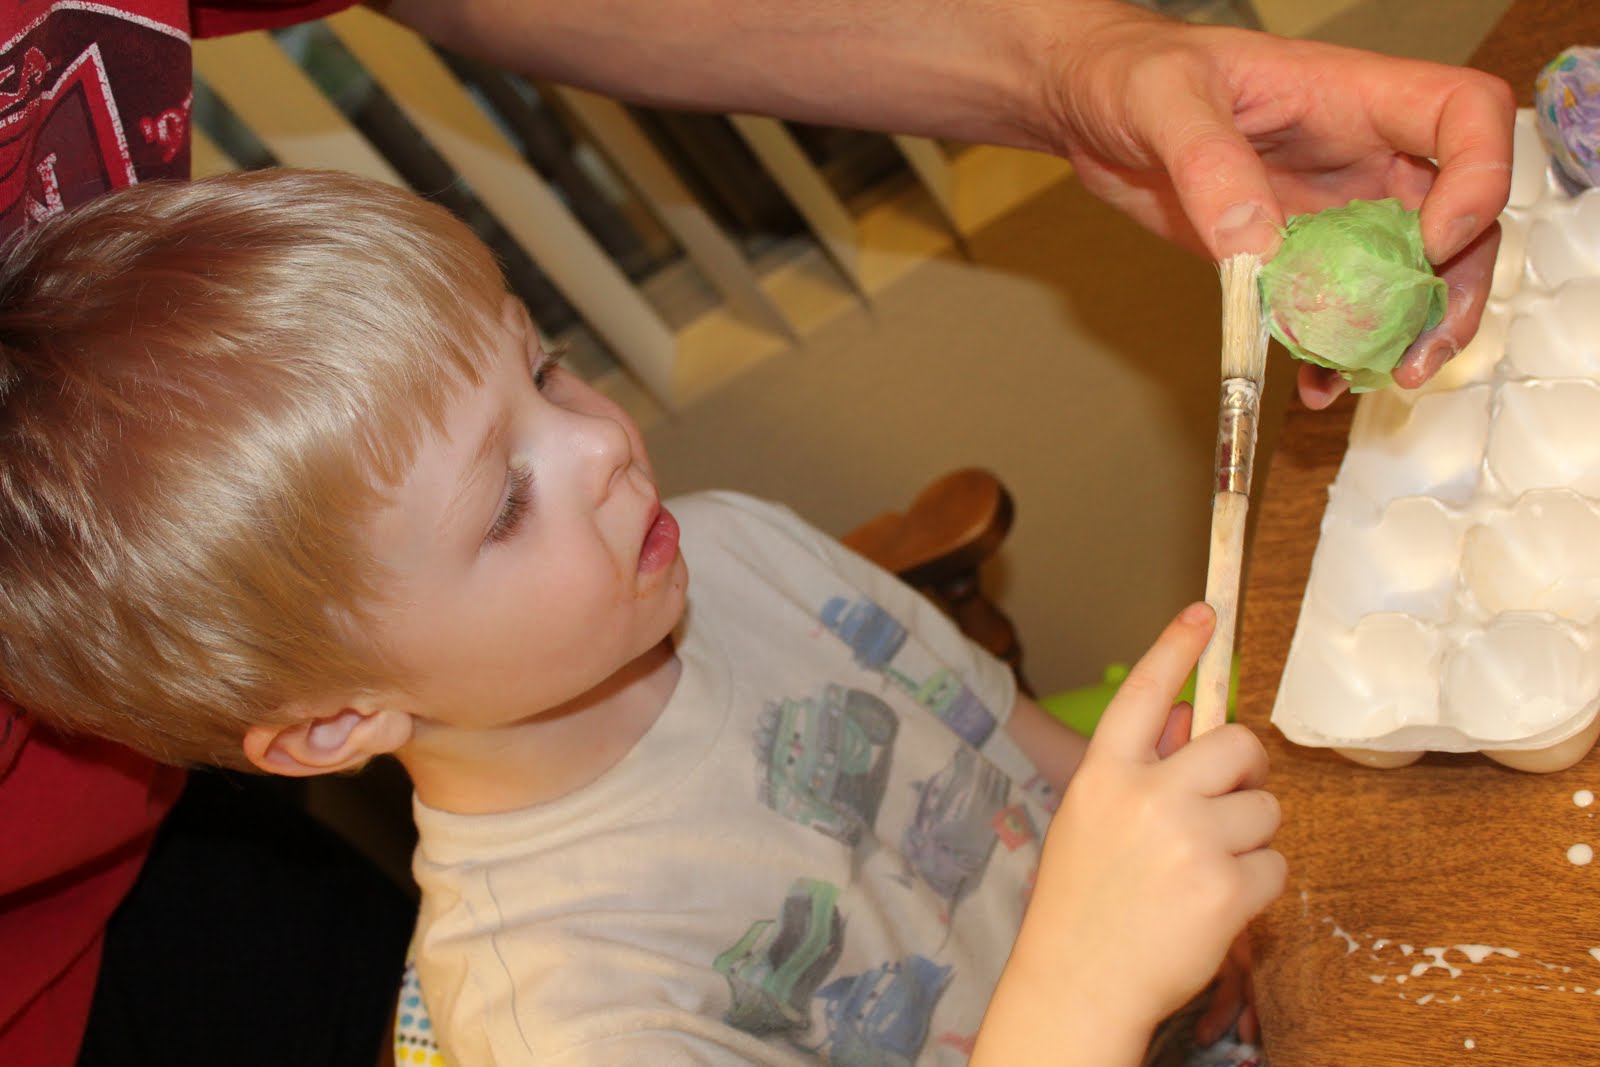
Step 4: Set wet eggs on top of an egg carton to dry (don’t set all the way in). Complete dry time will take quite a few hours. We let ours dry overnight.

Step 5: Decorate the eggs! We used our Elmer’s glue spots to add glitter polka dots and to attach ribbons. The glue spots have a super strong stick and are easy to use. For polka dots, carefully remove the glue spots one by one trying to keep the circular shape:

Place them wherever you’d like on the egg:

Roll the egg through glitter:

Shake off the excess glitter and voila–perfect glitter polka dots!!

You can use the Elmer’s glue spots to attach other embellishments too. I decide to do ribbon. They were SO much easier to use than any other adhesive option I had. Instead of leaving the glue spots round, I spread them out to create bands and wrapped the ribbon around it! Super handy!
Step 6: Enjoy a super cute basket full of paper mache Easter eggs!!

What fun ways do YOU like to decorate eggs?
Disclosure: This project has been compensated as part of a social shopper insights study for #collectivebias” #glueNglitter. All opinions and experiences are my own. For more information, read my disclosure policy.


16 Responses
These are such a great project, and I won't get glitter all over my house! Thanks!
Cute as can be!
You did a super job with these, we have had some around for a few years now. We are visiting family, think we'll do these as a busy project for all the little hands 🙂
Fun project! Thanks for auditioning for American Crafter- good luck:)
they lovely, great idea!
Those turned out really nice! Pinning to my pinterest page 🙂
Plastic Easter eggs are heinous, I loveeee this project! My toddler is verrrryy nosy so I've been keeping Easter crafts pretty low key this year. I feel like the egg dying kits have come a long way since we were kids, we had a lot of fun "splurging" on the fancy $3 kits and decorating hard-boiled eggs this year.
Even though this project looks messy, haha, I bet you and your boy had fun decorating them. 🙂 Thanks for sharing this week.
glue dots for the glitter – genius idea! I very, very rarely get out the glitter… but if I do, I'll have to remember this tip!
I love your eggs! Great job!
They look great!We’ll make some ,too!
These are so adorable! We are TOTALLY making these!
after they dry are you able to open them? Like is it easy to cut them so you can still use them? Super cute I’m going to have to try this! LOve!
Hi Jessica! I actually didn’t try that. My goal was just to make the plastic eggs look pretty for a display, not to use. But, I would guess if you used an X-Acto knife around them, it should probably work! If you try it, come back and let us know! 🙂