This fun Halloween mason jar candy dish craft tutorial is part of a shop that has been has been compensated by Collective Bias, Inc. and its advertiser. All opinions are mine alone. #HandsOnCrafty #CollectiveBias
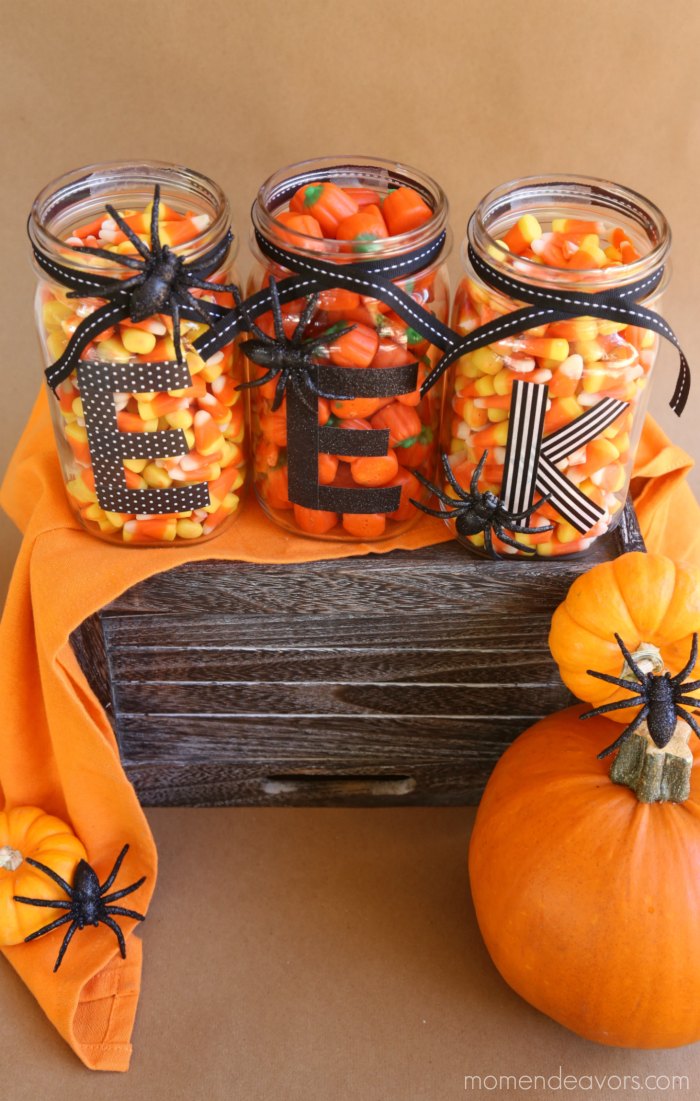
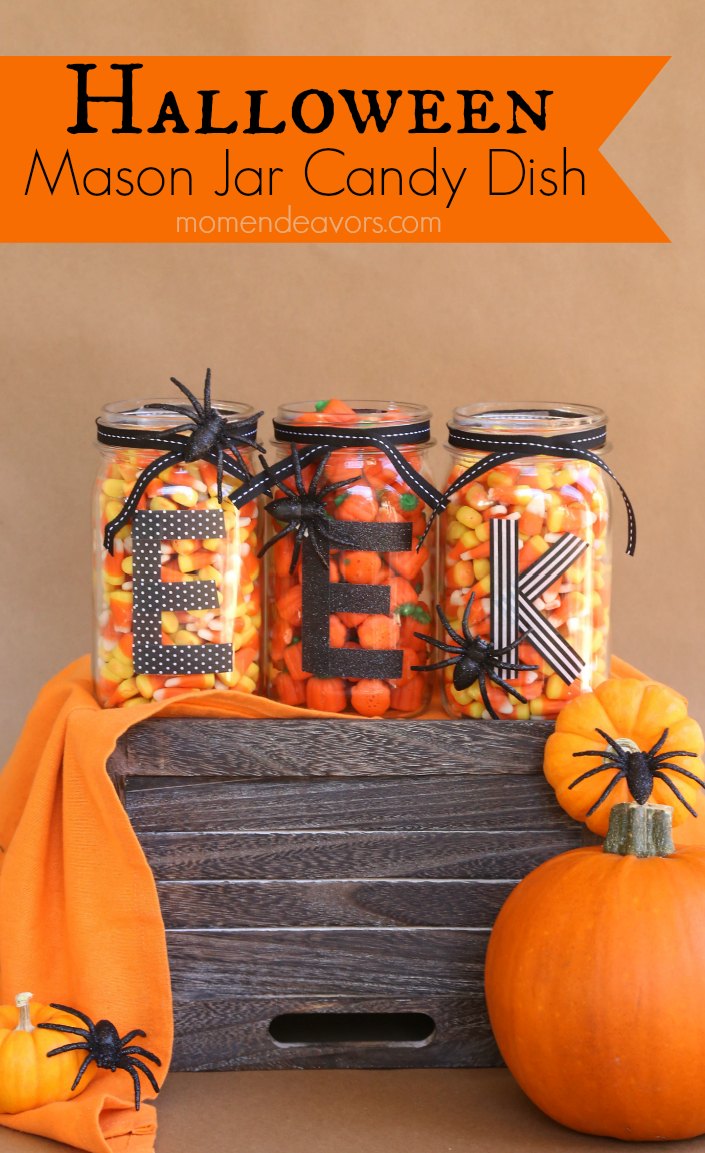 Need a cute way to share your favorite Halloween treats? How about some adorable, decorative mason jars? I love it! It’s cute, simple, and doubles as a great holiday center piece (or mantel piece)! I personally really love the simplicity of just the black & white on the jars! The candy really pops that way then too!
 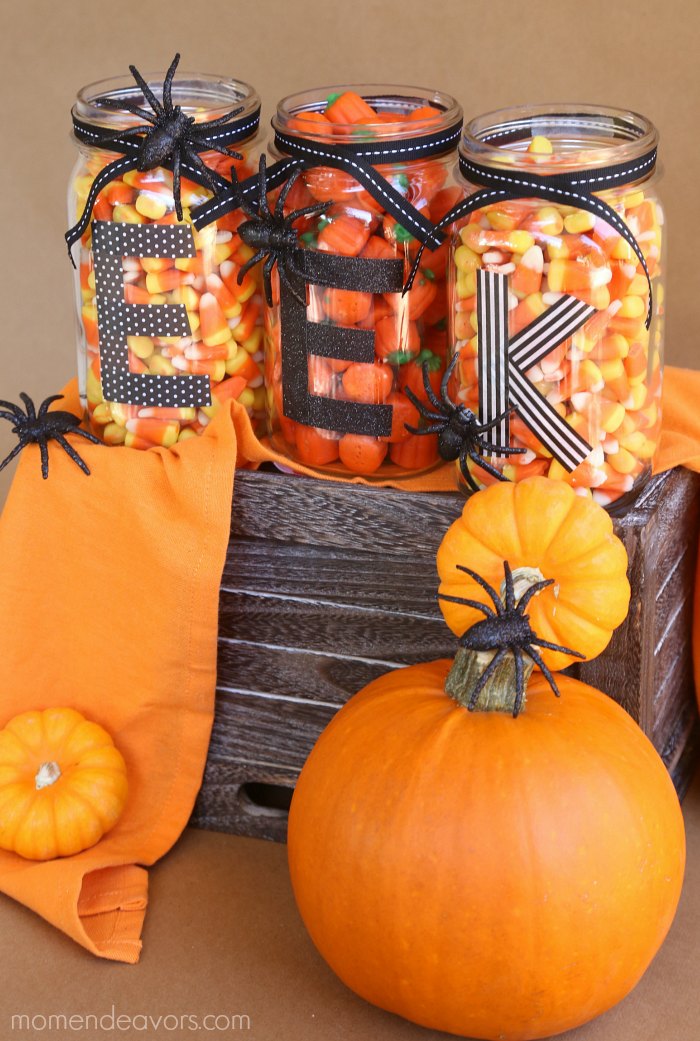 Decorative jars like this are so easy to make – especially with the right supplies! To keep things simple and easy, we used some of the Scotch® Expressions Tapes and Scotch® Create Adhesives. The products are a great combination of versatility, function & fun. I love the patterned washi tapes and the fun glitter tapes! They worked SO well to make the “EEK” lettering on this project. The variety of the Scotch™ Brand Adhesives are great when crafting, as they have all of the best sticky tools you need to be hands-on. So, here’s a look at what supplies we used for this project:
Supplies:
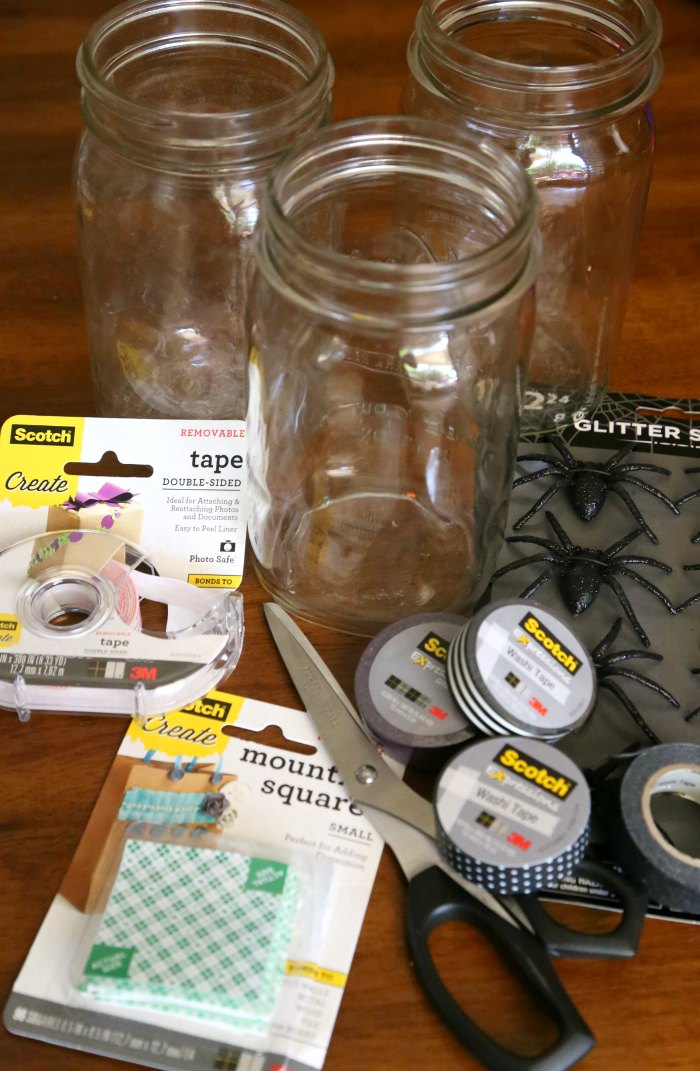
- 3 glass mason jars (ideally with at least one open, smooth side)
- Scotch® Create Double-sided Tape
- Scotch® Create Mounting Squares
- Scotch® Expressions Washi Black Stripe
- Scotch® Expressions Glitter Tape
- Scotch® Expressions Dot Washi Tape
- scissors
- black ribbon
- large plastic spiders
- candy of your choice
Halloween mason jar directions: 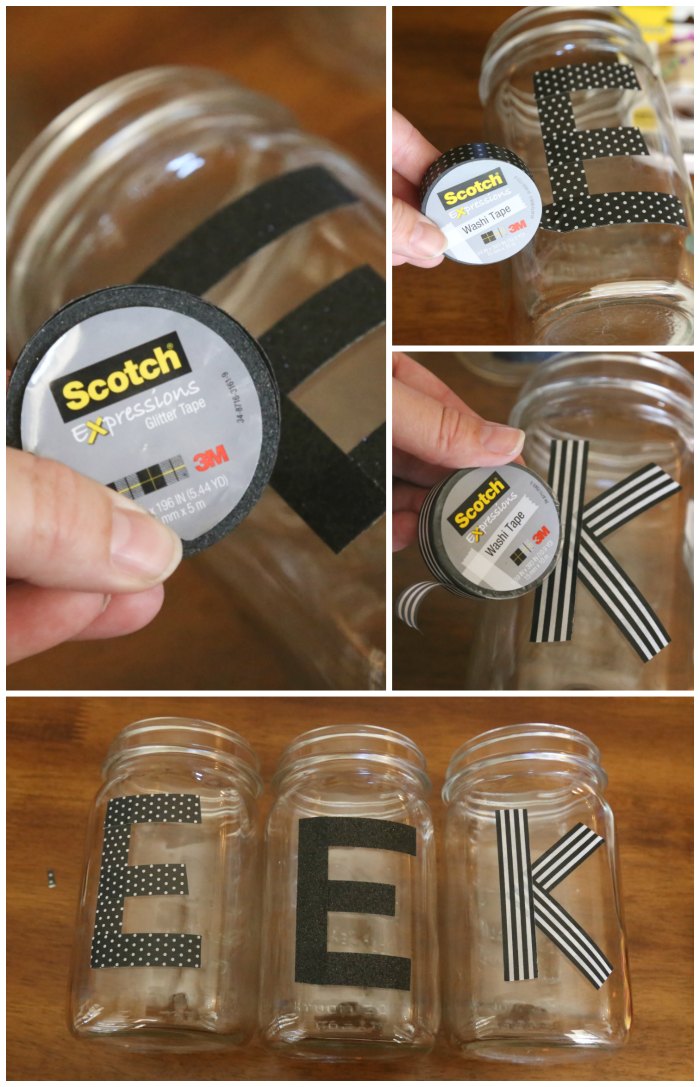 1. Start by making the letters on the glass with the washi tape and glitter tape. Just cut strips of the tapes and stick them on the glass to form the letters.
  2. Use the Scotch® Create Double-sided Tape to place a small piece of the back side of the jar rim (to give the ribbon something to adhere to). Then cut a strip of ribbon to wrap around the jar rim. Use another piece of double-sided tape or a cut piece of the Scotch® Create Mounting Squares to have the ribbon stick in the middle of the front.
3. Then use Scotch® Create Mounting Squares to adhere the spiders to the mason jars where you’d like them. It doesn’t get much easier than that! The mounting squares are just SO easy to use!
4. Fill with candy and enjoy! EEK! 😉
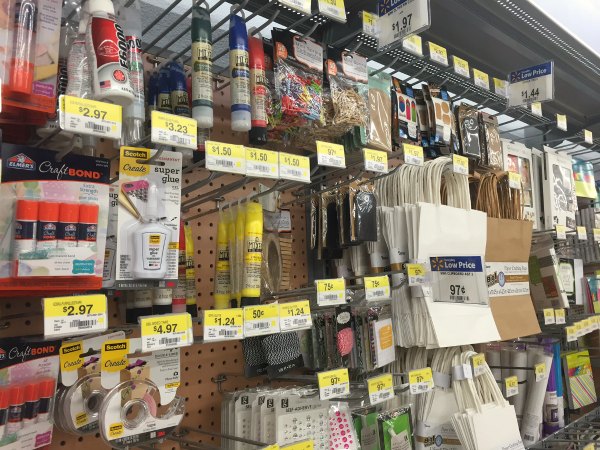
 Isn’t it fun?! I love the way it turned out! An easy craft project is my favorite. You can pick up all your supplies to make your own Halloween jars at Walmart! We found a variety of the Scotch® products in the craft aisle at Walmart! So, I could pick up my craft supplies at the same time as my grocery shopping! Perfect!
For more hands-on, creative project ideas to make with Scotch® products, click over to the #HandsOnCrafty site here! Let us know in the comments below what Halloween project idea you’d like to try!
Like it? Pin it! 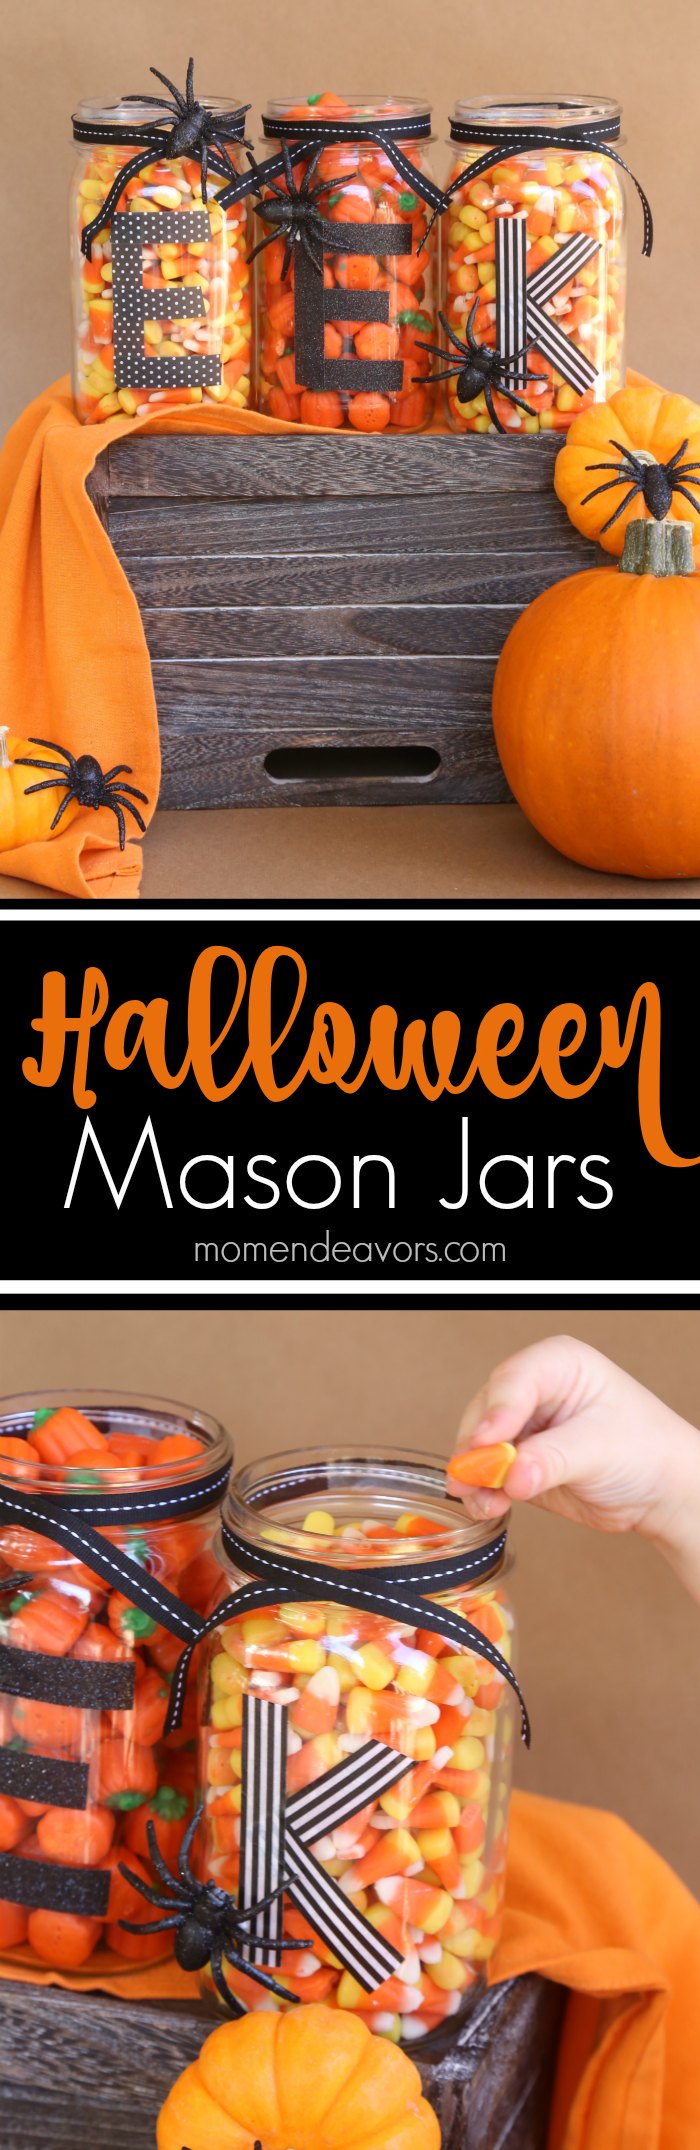


One Response
I LOVE these jars. Super easy and just plan darling.