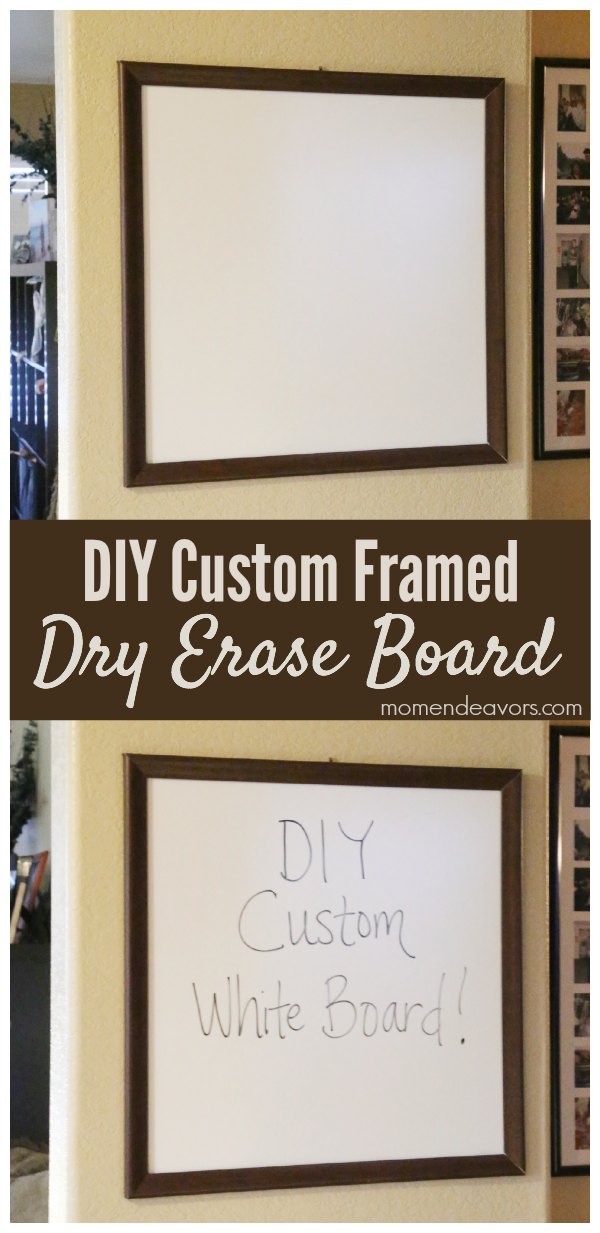
 Does anyone else feel an extra urge to organize or change things up a bit in January? I do. Every year! So, for January’s Lowe’s Creative Ideas blogger project, we knew we wanted to do something useful that would help us with some of our organizational goals. We actually have a few different tasks and areas we’re working on! But, we started with this DIY custom-framed dry erase board.
 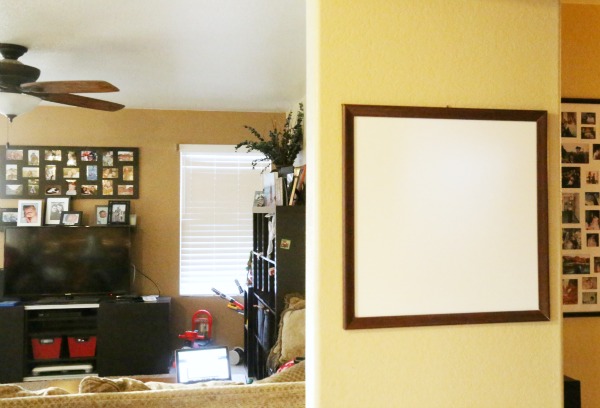 Our kitchen and family-room area (all connected) are by far the most lived-in places in our house. The only problem with them is that there isn’t very much wall space useful for organizational/home management types of things. So, we’ve gotten creative with small spaces by building the cube shelves kitchen organizer, organizing the pantry, making a pantry door kitchen command center, and creating another small space command center in the little nook behind the couch and on the other side of the wall pictured above. Those have ALL helped with the clutter in the kitchen and family room immensely. But, I’ve really been feeling like a need a more viewable space to write important reminders, work on menu plans, etc. But, the problem is the only open wall space is the small “entry way” walls leading from the hallway/stairway and living room into the kitchen. As you can see in the photo above, the wall is NOT wide so standard large white boards were just too big for the space! So, enter a custom-sized project!
  You can buy a large sheet of white board/dry erase board at Lowe’s for right about $10 (awesome for teachers and kid projects too). If you want this project to be very easy, just measure your space before you go & decide on what size white board you want. Then, have the folks at Lowe’s cut your white board for you and leave it at that! 😉 Doesn’t get any easier or cheaper! I of course couldn’t just leave it at that – I wanted our board framed so it would look more finished & nice! That made this project significantly more time consuming (& about $10 more expensive)! It’s not super hard- just requires more steps and time. But, I do like the finished look!
For the frame, we picked up two pieces of molding that had a groove perfect for sitting the board in. I liked the wood color on it too, so that’s what we chose! 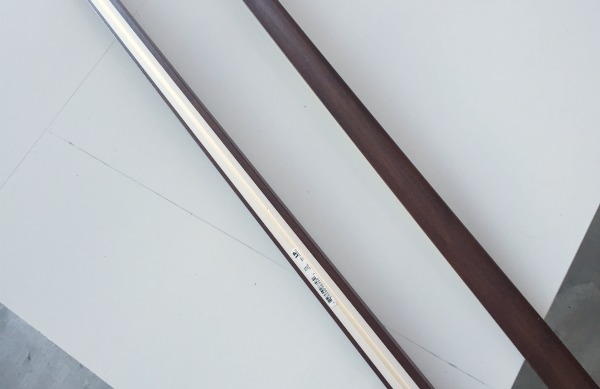 So, we left Lowe’s with the large sheet of white board, two pieces of molding, large picture hangers, and some strong glue! I would also recommend some clamps to clamp the molding to the board (once you’ve glued – we didn’t have any and I think it would have helped the glue stick). Once home, we measured and then cut our pieces. The white board is just slightly large than 2′ x 2′ and then we used a miter box & saw to cut the molding pieces to frame the board.
 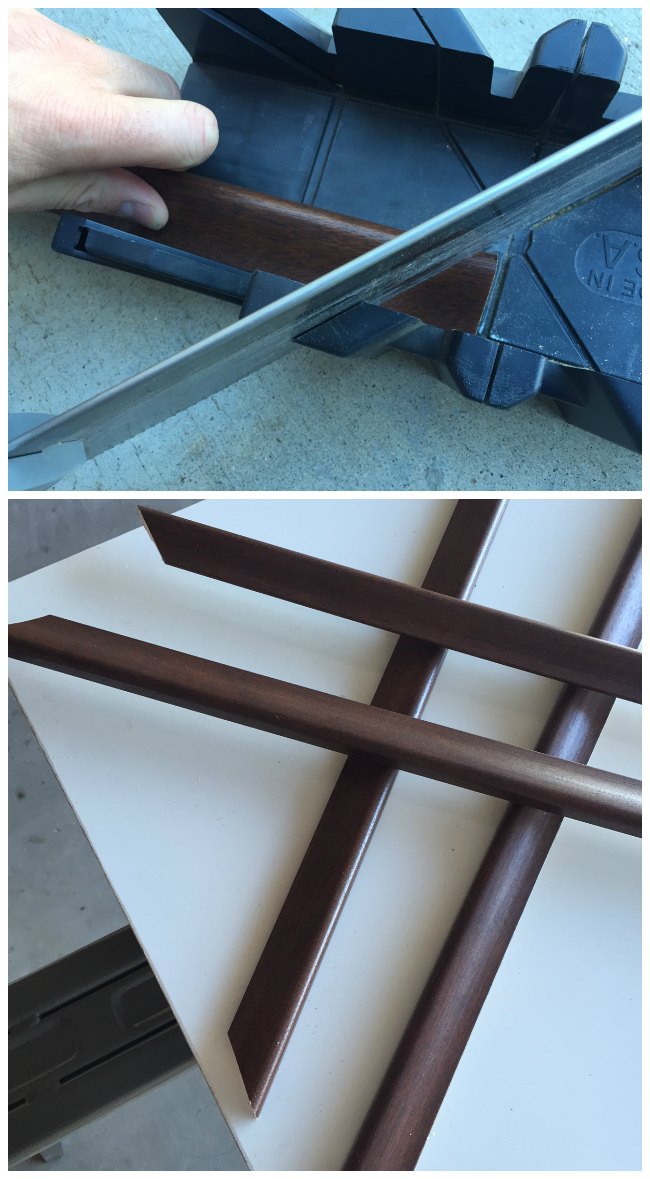 Next up, we made sure the molding pieces fit together like a frame. If you want it to really come together nicely, I would glue & staple (on the back) the corners together (using clamps to hold everything together).
  But, that does take more time if you all 24 hours for the wood glue to set up. So, we skipped this. We just made sure everything lined up decently, then fit the white board into the grooves on the molding and glued it all together (and let it dry over night)!
 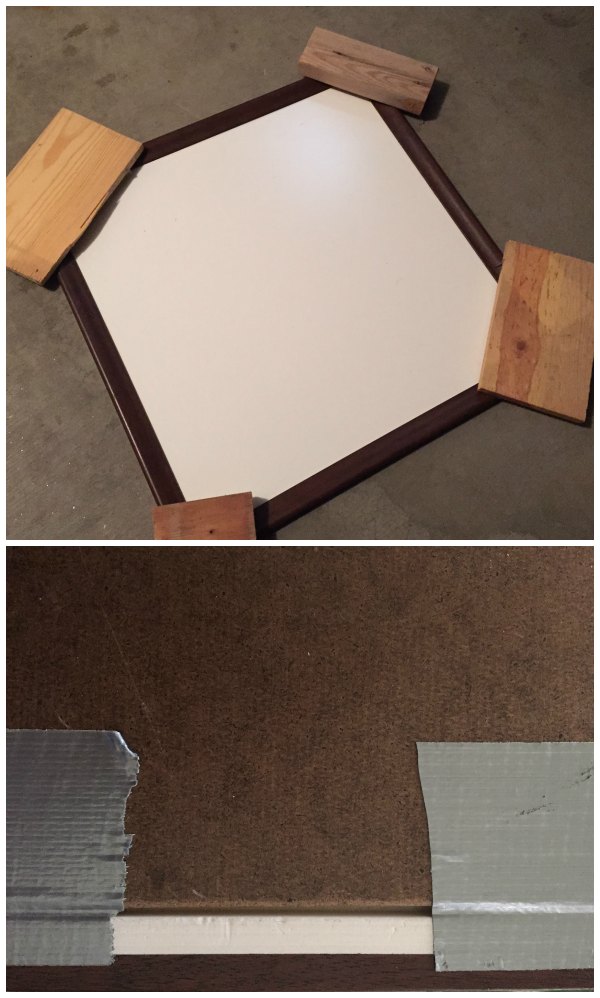 Because we didn’t have the proper equipment (like clamps), in a few spots the glue didn’t set up as well. So, we added some stability by adding strips of duct tape to the back of the board and the molding (no one is going to see the back, so who cares?!). The last step was just hammering in a large picture hanger to the back.
  Right now, we’re using it as a menu & message board and it’s working out SO nicely. I don’t know why waited so long to build something for that awkward space!
What organizational projects are you hoping to tackle this month?
For more ideas, visit Lowes Creative Ideas and follow along with Lowe’s on Pinterest or on Instagram! You can sign up to receive their free Creative Ideas Magazine, which is full of all kinds of ideas & inspiration! There’s also a magazine app so you can have inspiration on the go! And, this spring you can get weekly projects, tips & special values with the new “Improve with Lowe’s” app. ![]() Disclosure: This is a sponsored post as part of the Lowe’s Creator’s & Influencers Network. All ideas, opinions, and photos are entirely my own.
Disclosure: This is a sponsored post as part of the Lowe’s Creator’s & Influencers Network. All ideas, opinions, and photos are entirely my own.


One Response
What a great idea! I didn’t know you could buy white board at Lowes. Thanks for the great idea.