I’m so excited to share this month’s #LowesCreator post! This DIY kiddie car wash is absolutely perfect for summer outdoor fun, easy to build, and something the kiddos absolutely LOVE!
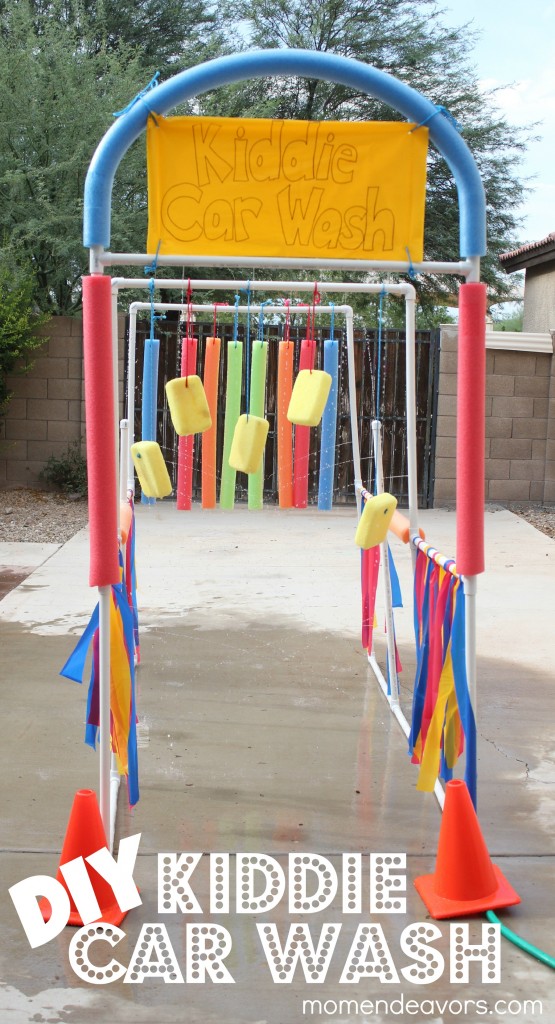 As a Lowe’s Creative Ideas Blogger, the theme of June & July’s posts centered around summer outdoor projects. Last month, we built a fun outdoor game (kid-friendly DIY Ladder Golf). Everyone loved it. So, we knew we wanted to build something else for some outdoor family fun this month. We had some grandiose plans. But, with the birth of Baby Brother sooner than we expected, we needed to make something simple instead. The big boys have been having to entertain themselves for periods of time a lot lately & they so badly want to play outside (but that’s difficult when it’s 100+ degrees). So, inspired by The Idea Room’s (fellow #LowesCreator) PVC sprinkler and the Lowe’s Creative Ideas Kids’ Car Wash Sprinkler, we decided to make one and it’s SO fun!!! 🙂
Supplies:
- 8 10-ft. pieces of 3/4″ PVC pipe
- 11 PVC T-joints
- 7 PVC elbow-joints
- 4 PVC cross joints
- 4 PVC caps
- 1 hose connector
- 7 pool noodles
- 5 sponges
- colored nylon rope
- plastic table cloths (you could also use trash bags)
- drill & 1/16″ drill bit
- scissors
- hacksaw or pvc cutters
- permanent marker
For the decorative portion, you could really use a variety of supplies. We purchased everything from Lowe’s (even the pool noodles), except for the table cloths which I happened to have on hand from past birthday parties. To build the actual sprinkler, the cost is less than $25. Any additional cost comes from what you buy or have on hand to decorate with.
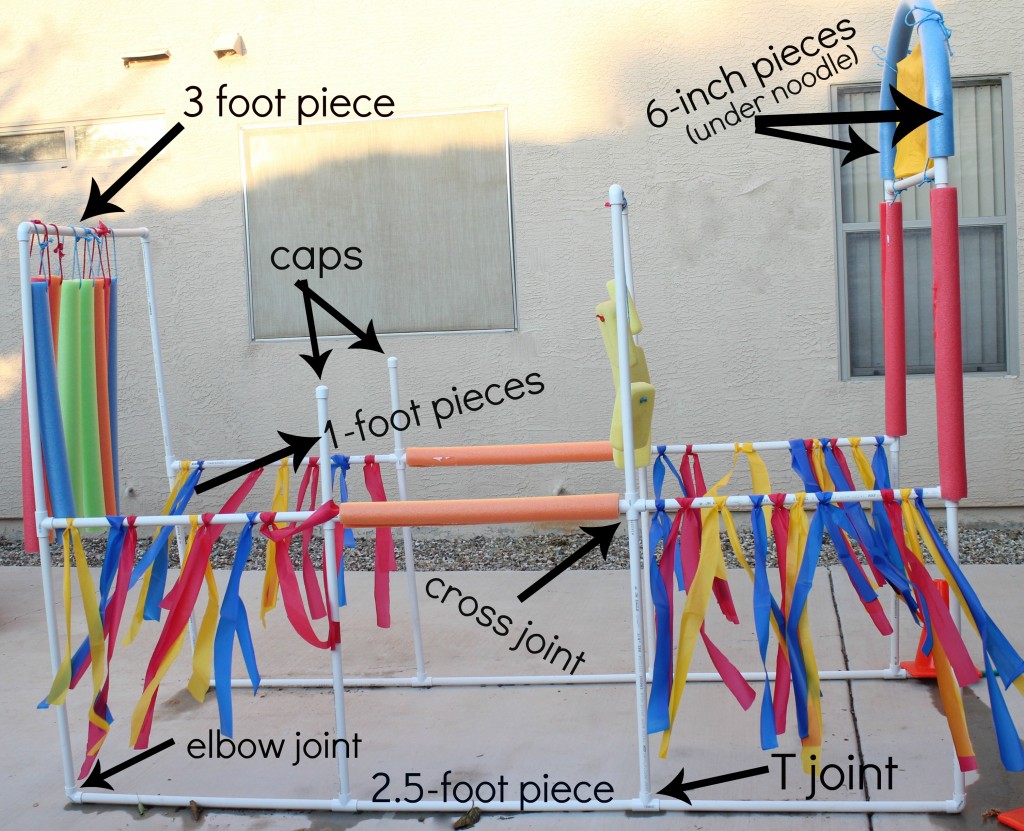
- The first step is to cut the PVC pipes (sometimes they will do this for you at Lowe’s). Cut 3 3-foot pieces, 26 2.5-foot pieces, 2 1-foot pieces, and 3 6-inch pieces.
- Use one of the 6-inch pieces & attach it to the hose connector. For added stability of that connection, we glued it together with PVC glue.
- Assemble the structure.
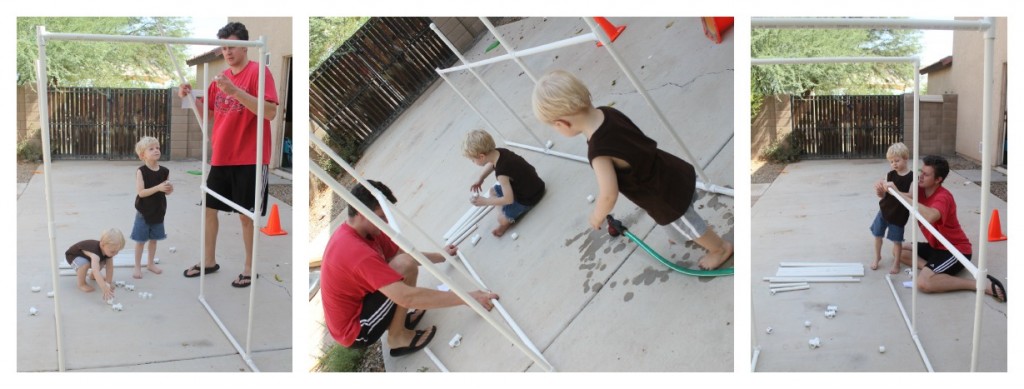 You’ll use the joints to connect all the 2.5-foot pieces together. The 3-foot pieces are the horizontal connectors at the top of the frame. The 1-foot pieces get capped off. The, remaining two 6-inch pieces go at the top of the front, with caps on them and are used to stick the pool noodle on them. Here’s an image to help visualize:
 Once the frame is built, you’ll need to drill holes in your structure. This is a bit of trial and error. We started with fewer holes & added more (after the water pressure was so strong that our structure blew apart!). To drill the holes, we used a 1/16″ drill bit. We ended up with about 4 or 5 across each 3-foot piece, 2 or 3 in the vertical 2.5-foot pieces, and we drilled a hole in the top of the caps on the 1-foot pieces.
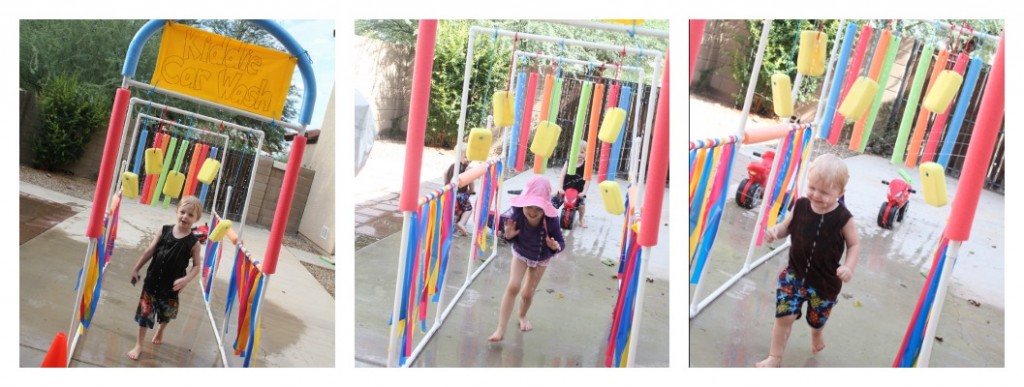
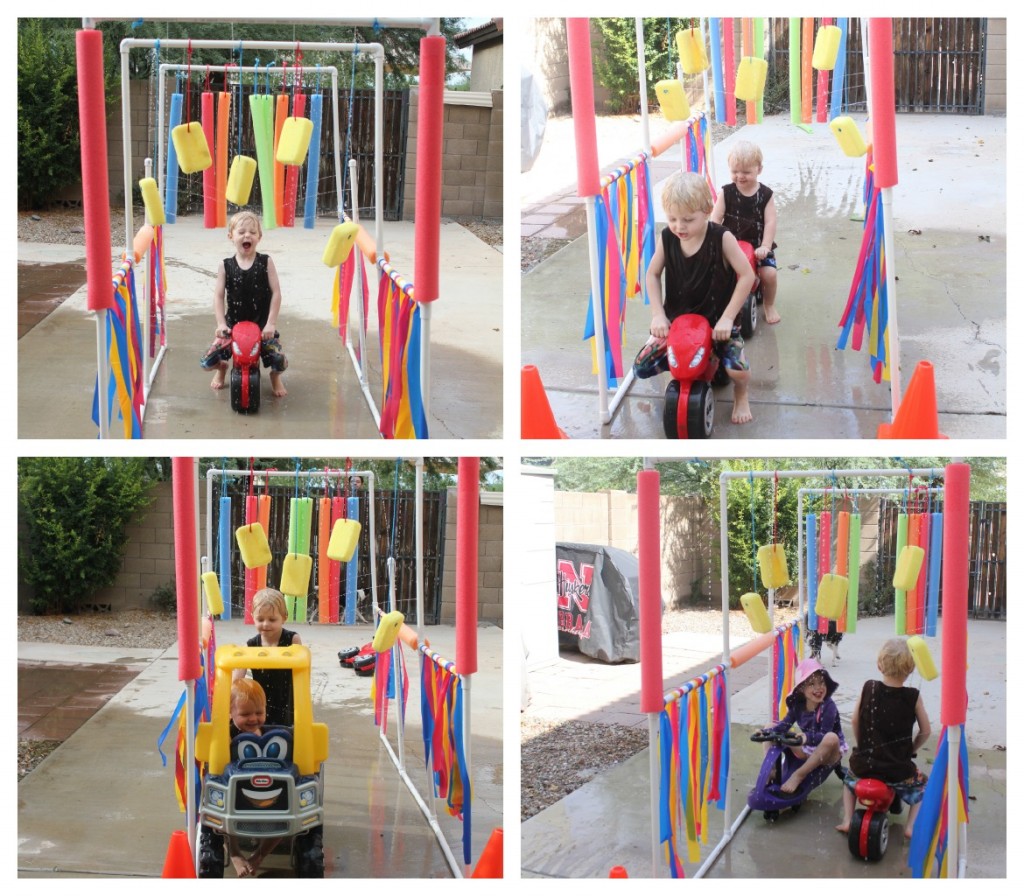
Once you have the holes & water working the way you want, then decorate! Pool noodles (cut in half), nylon cord, a few sponges, and some plastic table cloths. Making some DIY sponge balls to attach would be super fun too! The “Kiddie Car Wash” sign is just a folded plastic table cloth written on with permanent marker. We punched holes in the corners and attached to the frame! This is the spot to have fun & be creative– there are so many different things you can do!
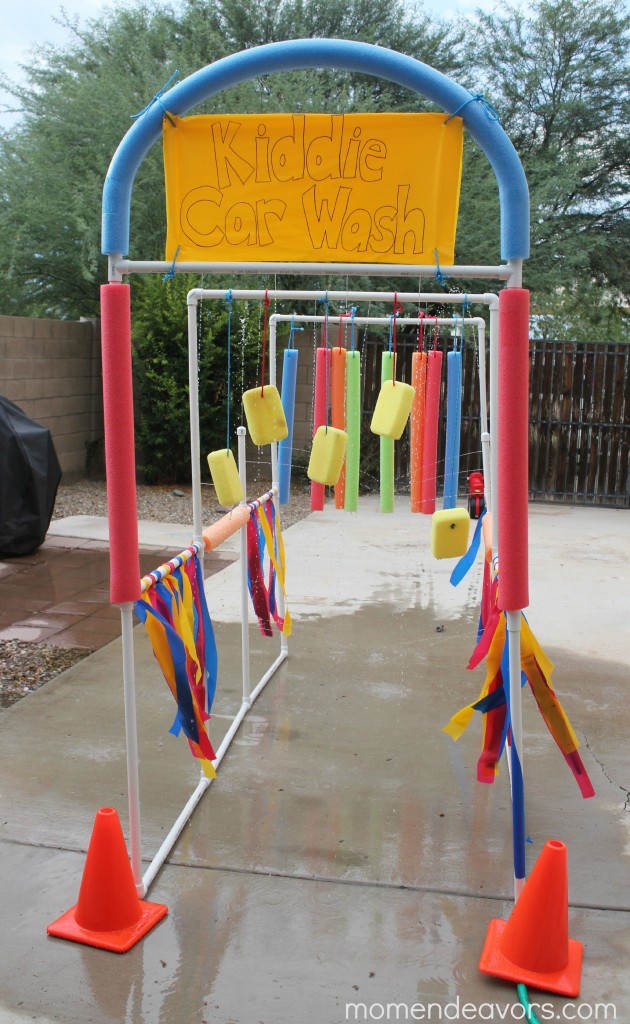 Then, all that’s left is to turn the water on and have fun playing!!! A total blast of outdoor fun that is perfect for summer! The kids loved going through on various “vehicles” and just running through themselves! So, so fun! 🙂
 For more fun outdoor DIY ideas, check out this roundup of #LowesCreator ideas. And, if you need to do some outdoor cleaning, you can enter to win a great prize pack from Lowe’s and P&G through Friday (8/3).
 For more great ideas, check out Lowe’s Creative Ideas on FB and Lowe’s on Pinterest.
Disclosure: I am a member of the Lowe’s Creative Ideas Creators & Influencers Network and receive a Lowe’s gift card to complete my projects. All opinions & experiences are entirely my own.
Linked to: *Today’s Creative Blog, *Tatertots & Jello, *Tidy Mom, *Flamingo Toes, *Sundae Scoop, *Skip to My Lou, *Making Lemonade








59 Responses
I LOVE this. I ca not think of a kid (young or old!) that would not think this was a blast. 🙂
You are so creative!! I love this idea and never in a million years would of thought to make a mini car wash for the kiddos! I bet they are having a blast getting cool in that AZ heat!
Oh this looks like a blast! You are so creative! What a fun way to play outside in the water… and wash off some toy cars too! Pinning this with hopes that I can talk hubby into making this for us! 🙂
That looks so awesome, I love it!
SO creative! Seen these in the store for too much money and thought, hmm, that is probably easy to make. THANK YOU!
This looks like so much fun! It would be great to set up out front, and let the neighborhood kids all “wash” their “cars” in the car wash!
This is just awesome!!! My girls would go nuts over this!
this is such a cute idea! and perfect for these hot summer days!
What an adorable idea!
Oh how fun is this! You are so creative. My kids would love to have something like this. I’ll have to get my husband to work on it!
Looks like so much fun! What a great family project!
That looks like so much fun! My girls have one of those Cozy Coupes, and I know they’d love to play with this. 🙂
SO super cute–love it!!! My kids would go nuts over this 😀
That looks like so much fun!!!
This is SO COOL!! You guys did an awesome job on this!
This is AMAZING!! Great job!
This is AWESOME!!!
This is SO cute and perfect for summer. Thanks for sharing.
If you get a chance I would love for you to come link up this summer tutorial at my Pin Party. http://sarahdawndesigns.blogspot.com/2012/08/pintastic-monday-link-party-3.html
This is magnificent! It reminds me of the Big Wheel Car wash I had when I was a kid…only much more AWESOME! LOVE <3
This is sooo cute!! I especially love the hanging sponges and noodles! What a fun summer activity!
Hi ! I found this post through Pinterest and have been thinking about making one of these for a while for my girls. Thanks for the great tutorial! I have a question though – is this something you could easily take apart for storage at the end of the summer? (And then, rebuild the following year?) I live in the North (Minnesota) and would want to store it over the winter. Thanks!
Hi Nancy! Thanks for stopping by! Yes! You absolutely can take it apart! Ours is apart in a shed right now. Just be sure to save the directions or label each piece with a sharpie or something so re-assembly can go faster! 🙂
This is just amazing! As my son nears the end of the school year and with no plans to put him in camp this summer, I have been searching the internet for some fun and exciting things to do this summer and this is definitely going to be one of them. He would LOVE helping to put this together and the fun with this would be endless. I’ll also have to sign up for the Creative Magazine…I’m sure that’s chocked full of great ideas that I could incorporate too! 🙂 {hopping over from Mom’s Crafty Space’s linky party}
Thank you! 🙂 I’m so glad you found this then! I co-host that link party with Mom’s Crafty Space, so be sure to stop by every Thursday for great summer fun ideas! 🙂
Thank you so much for taking the time to give such precise instructions! My neighborhood had a bike rodeo this weekend and I built this per your instructions and it turned out wonderful! It was a big hit! The kids loved it and went through over and over again. I could not have done this without specific directions and I was actually so proud that I did this without my husband’s help! It is actually pretty easy once you have a plan made for you. We will definitely be breaking this out a lot this summer!
Bernadette, thank you SO much for leaving this comment! As a blogger & sharing posts all the time, getting comments like these absolutely makes my day! I’m SO glad that you found it helpful and created such an awesome thing for your neighborhood event! 🙂
Thanks for posting everything. I have looked at a dozen of these so far and yours is great!
Thanks, Brynne! Glad you like it!
Hi! This looks so fun! I’ve seen a few different versions of these, and this one is the most creative, but also the biggest. I’m just wondering if you had any issues with lack of water pressure since it’s so large? I’m wondering if the spray works a little better with smaller versions? Just curious what you think….
Hi Heather! We didn’t have any issues with it, although I will say it does take a couple of minutes for the water to travel throughout the whole structure initially. But, once the water is actually going, it worked great. That’s the only one I’ve done, so I don’t know if another one would work better. But, the boys love ours! 🙂
Wow! I have never seen anything like that and it looks like awesome fun! I wonder if I could get hubby to whip one up…
I’m hosting a party and would love it if you’d stop by and link up!
Made this on Saturday – i think i had 1 1/2 hours in it without the hubby’s help. My 2 1/2 yr old is in love. This is going to be used for the next several years!!! Thank you!
Awesome, Randi!!! Thanks for taking the time to comment! Glad your 2.5 year old loves it!!
Thank you so much for your post! We built this for my son’s 5th birthday party this weekend. We live in a cul-de-sac and the boys just rode around for an hour with the biggest smiles on their faces. I created a “fix it” station with tools, a toll booth and an air pump station. The boys even colored pages for a book about where my son where ride his bike on an adventure. But without your plans, our awesome party wouldn’t of been possible. Thanks so much!
That is SO fun, Mindy!! Thanks so much for sharing!! 🙂
Hi there. Thanks so much for this gem of a find. But just to let you know.. on the pdf file for printing only said 3-3ft 3-2.5ft… etc. So I went and had that cut to find out it wasnt enough. :/ but no harm no foul. Came home and cut it myself with an old saw in the garage. 😉 wish I could attach a picture of ours completed.
Awesome! So glad you found it! Not sure on the PDF file–that’s not something I offered in the post. It’s 26 2.5 foot pieces. But, I’m glad you got it figured out! If you want to head over to the Mom Endeavors Facebook Page you could share a photo there! I’d love to see it! 🙂
I just came here to say GBR! Stumbled across this post here in Omaha, saw one of these put up in the neighborhood.
I made this last week and it was so easy and fun! The sprinkler cost closer to $50 to make for me. Those connections add up!
I added an extra foot to the height so I get to run through it too! I had a lot of issues at first with it popping apart on me or tipping sideways. Adding some string tied to garden stakes to support it like a tent and tying extra string diagonally to give support between upper and lower sections helped.
Also having all the pool noodles on one bar didn’t work at all for me. There was too much weight. I ended up doing 3 on each bar.
After I added the stakes, it has been super stable and held up great during my kid’s birthday party. I even moved & restaked it and it’s still going strong.
My favorite part- it totally packs away easily so I can store it until next year.
I also just came across this post and created one for my kids! One thing I would add, make sure you use schedule40 PVC (this is thicker and will provide a sturdier wash). I was able to get some of the spray heads that you see in carwashes and used those to provide a spray! Thanks again for the inspiration!
Amazing outdoor DIY ideas, I will do it with my kids, I’m sure they will love it!
We put it on our Hill in the back of our house with a tarp and made a massive slip N slide. It was amazing My 5 year old had an amazing time helping me build it and And Loved playing in it.
Love this amazing DIY Kiddie Car Wash, amazing kids craft. Thanks for sharing with us.